Lamp making may be one of the most addictive of all woodworking projects, but it’s unquestionably one of the most useful. There are endless design variations to explore, and making a lamp is an ideal small-shop project. Although lamp making is often associated with woodturning, you don’t need a lathe to make a great-looking lamp, but you do need a band saw for this one.
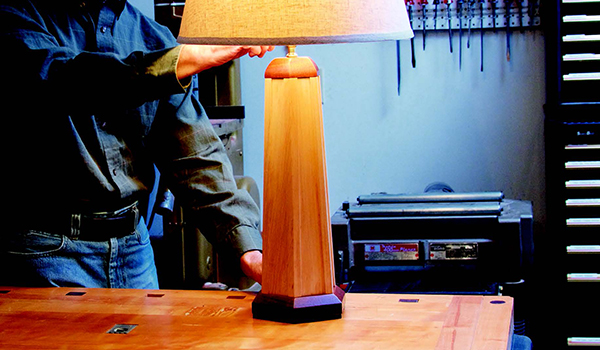
Making this lamp’s tapered hexagonal body is straightforward using a band saw with the aid of a tapering jig (see Drawing). The lamp can be made using almost any wood or combination of woods. (I used hard maple to make the body and mahogany for the top cap and base.) The thick stock gives the lamp some heft so it’s stable and difficult to topple. You’ll also need a lamp wiring kit and a lampshade, which are readily available at hardware stores, home centers and from online retailers.
Prepare the Stock
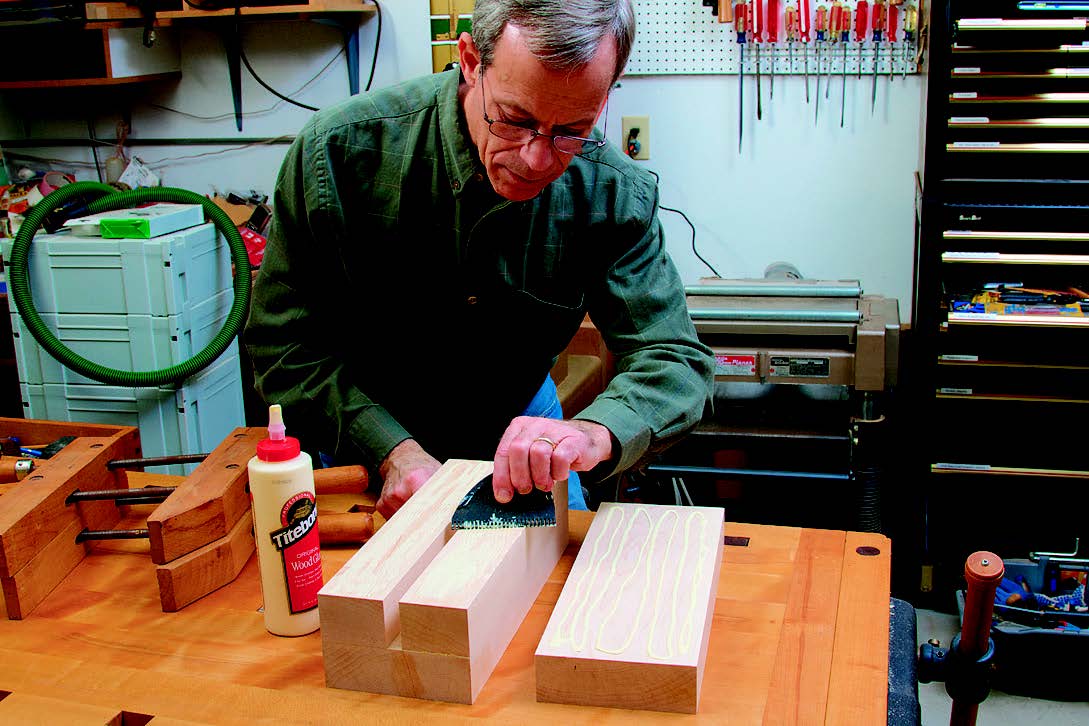
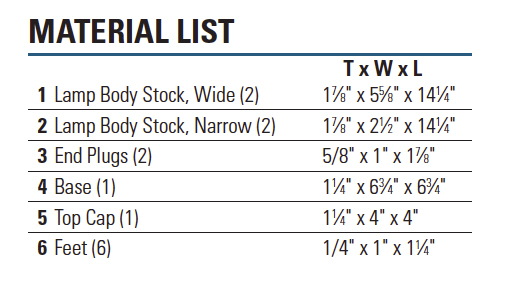
The lamp body is made from four pieces of 8/4 maple, but you could glue together thinner stock to achieve the required thickness. The glued blank has a hollow center channel that provides wiring access (see Drawing). Gluing the stock also makes it more stable and allows you to orient the wood for a pleasing grain pattern.
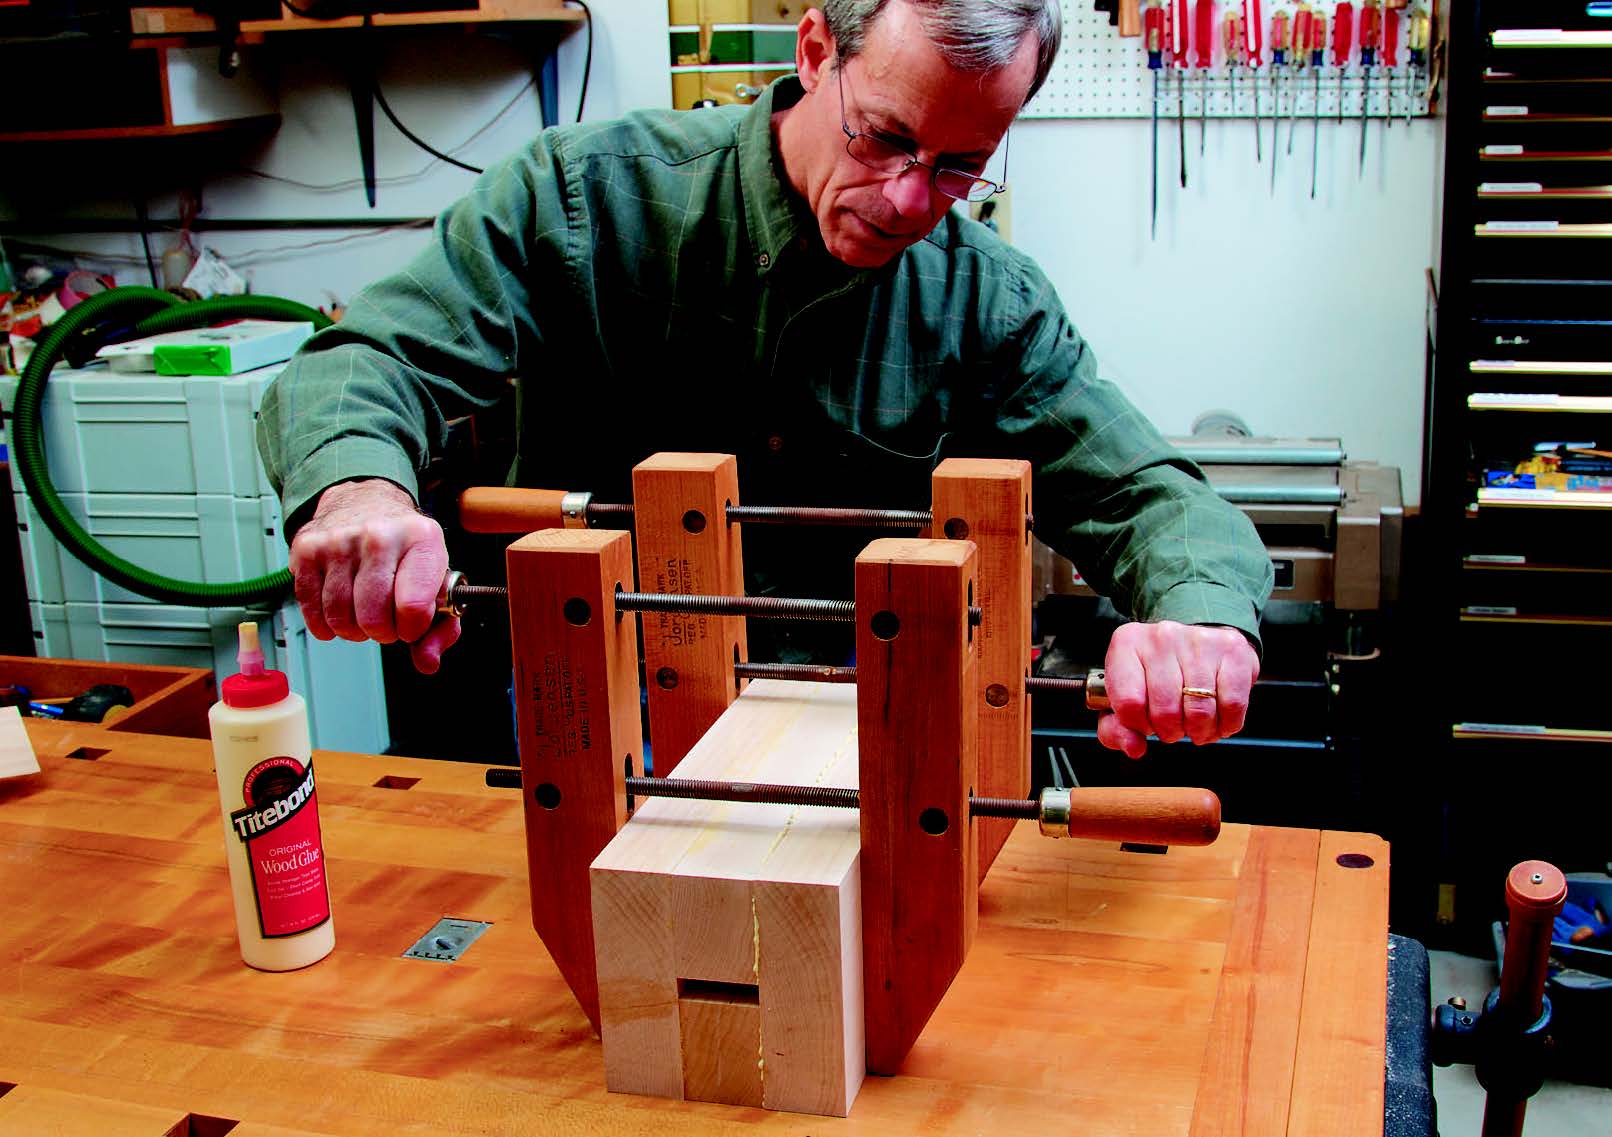
Starting with square pieces helps ensure that the finished lamp is plumb, so jointing and planing the stock is highly recommended. Make your workpieces a little oversize so you can square the glued lamp body blank if needed. (The blank dimension for this project is sized to work with a band saw with a resaw capacity of 6″ or greater.) It’s also important that the center channel actually remains in the center of the stock as you work so the electrical parts wind up in the right place.
When gluing and clamping the stock, try to keep the pieces from slipping so the edges remain flush. I use wood handscrews to clamp because they provide pressure over a large area and can be adjusted to apply more or less pressure in specific areas.
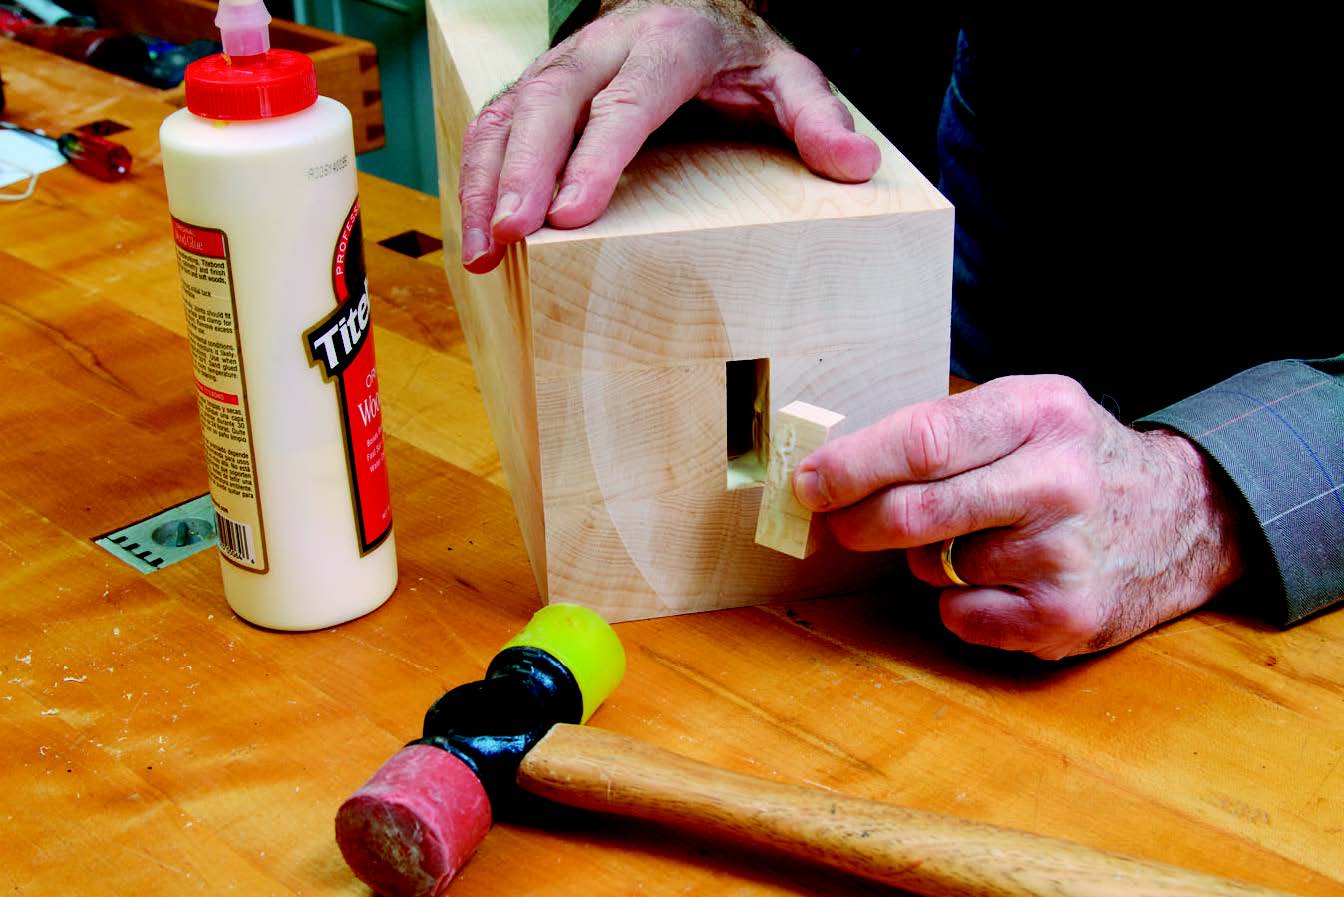
Once you remove the clamps, check that the ends are perpendicular with the sides of the blank. Square the ends if necessary with a band saw or miter saw. Don’t worry if the dimensions aren’t exactly the same as those in the Drawing — it’s unnecessary for a project like this to be that precise.
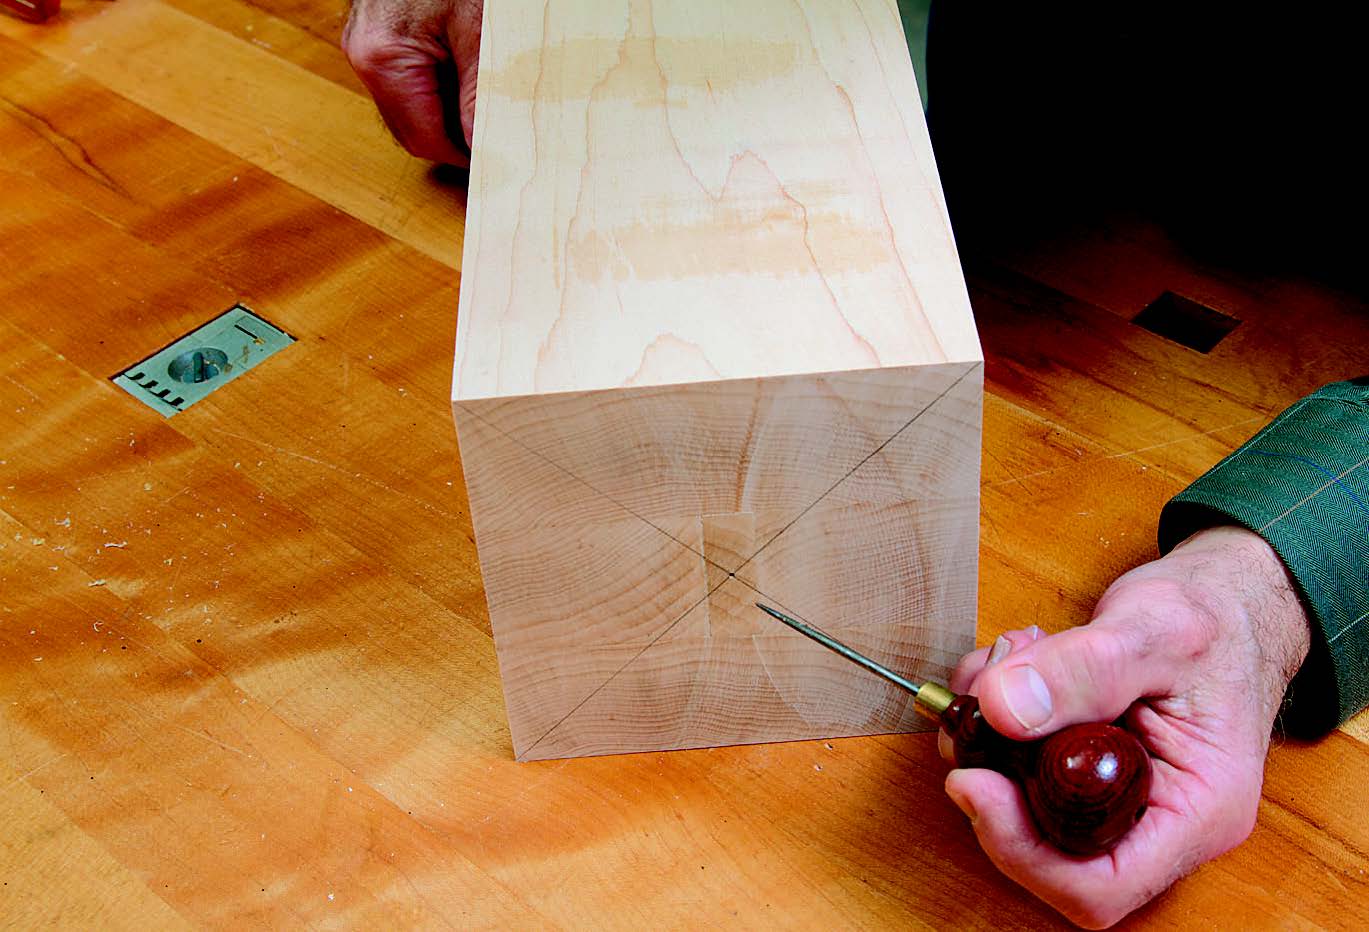
The rectangular end plugs allow the blank to be mounted in the band saw tapering jig, but more on that later. Cut the plugs so they fit snugly in the center channel, then glue them in place and tap them flush with the stock. Now draw diagonal lines on the ends of the stock from corner to corner to locate the center point, which should fall in the middle of the end plugs. Punch a small hole in the centers with an awl.
Lay Out the Hexagon
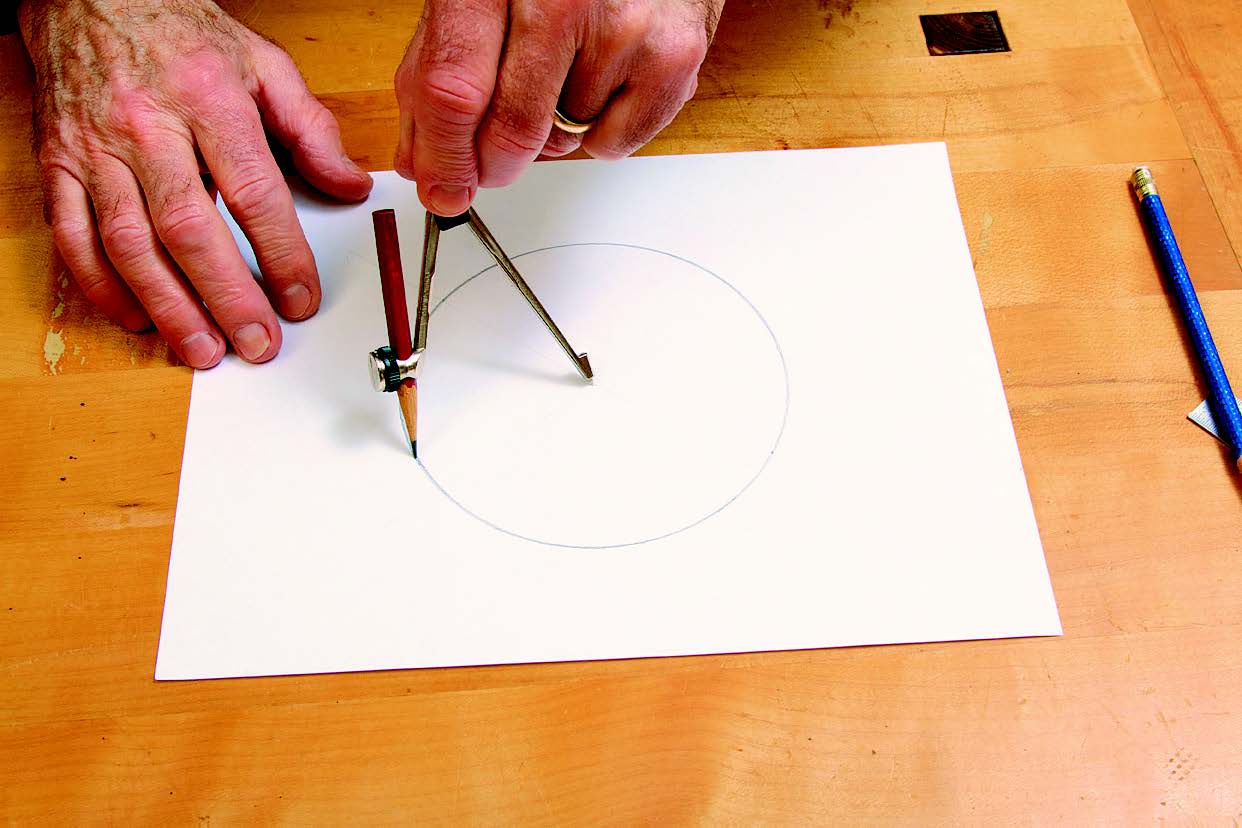
Creating a hexagonal pattern is amazingly simple — check out the photos. Use a wing compass to determine the maximum size of a circle that will fit on the end of your stock.
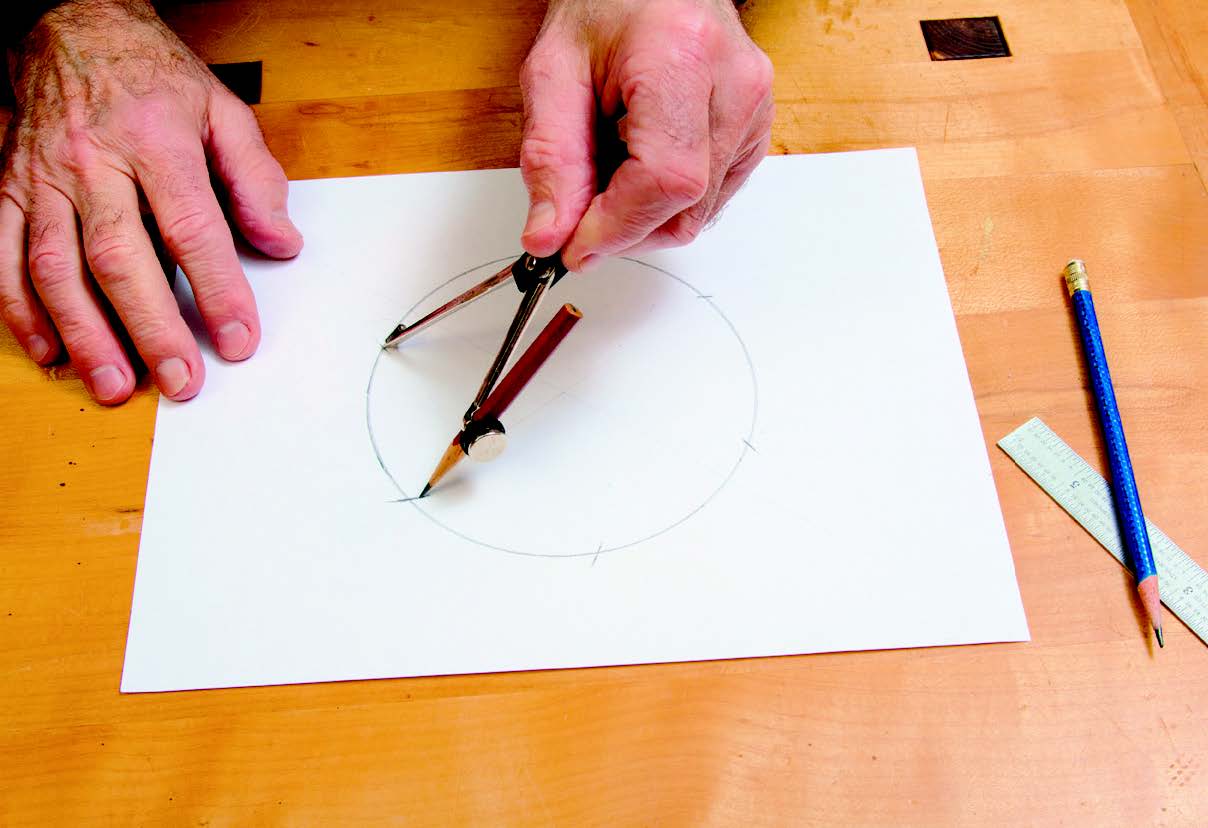
Using the radius measurement, draw a circle on paper or cardboard (or on the stock). Without changing the compass setting, strike off consecutive points around the circle’s circumference — you should get exactly six points.
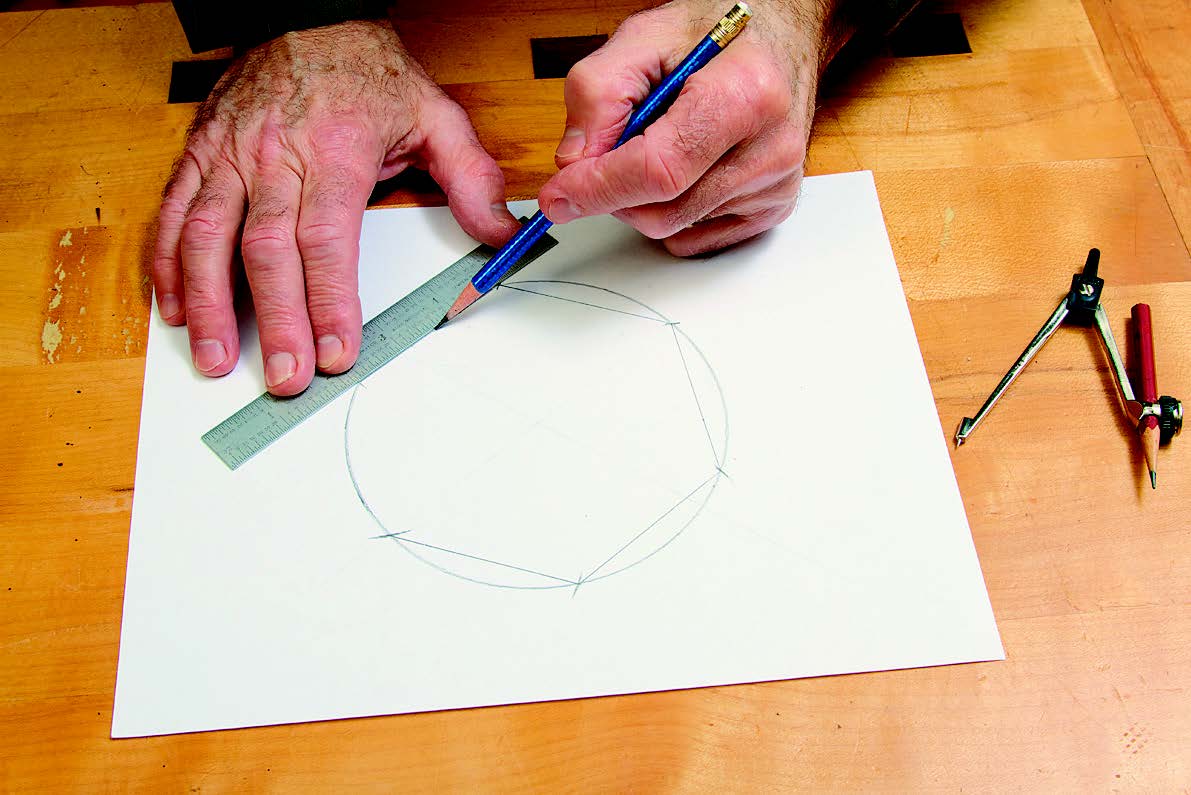
Then draw lines between the points to outline the hexagon, and finally cut out the hexagon pattern. Although you can draw directly on the stock, a pattern provides consistent, repeatable results if you plan to make more than one lamp.
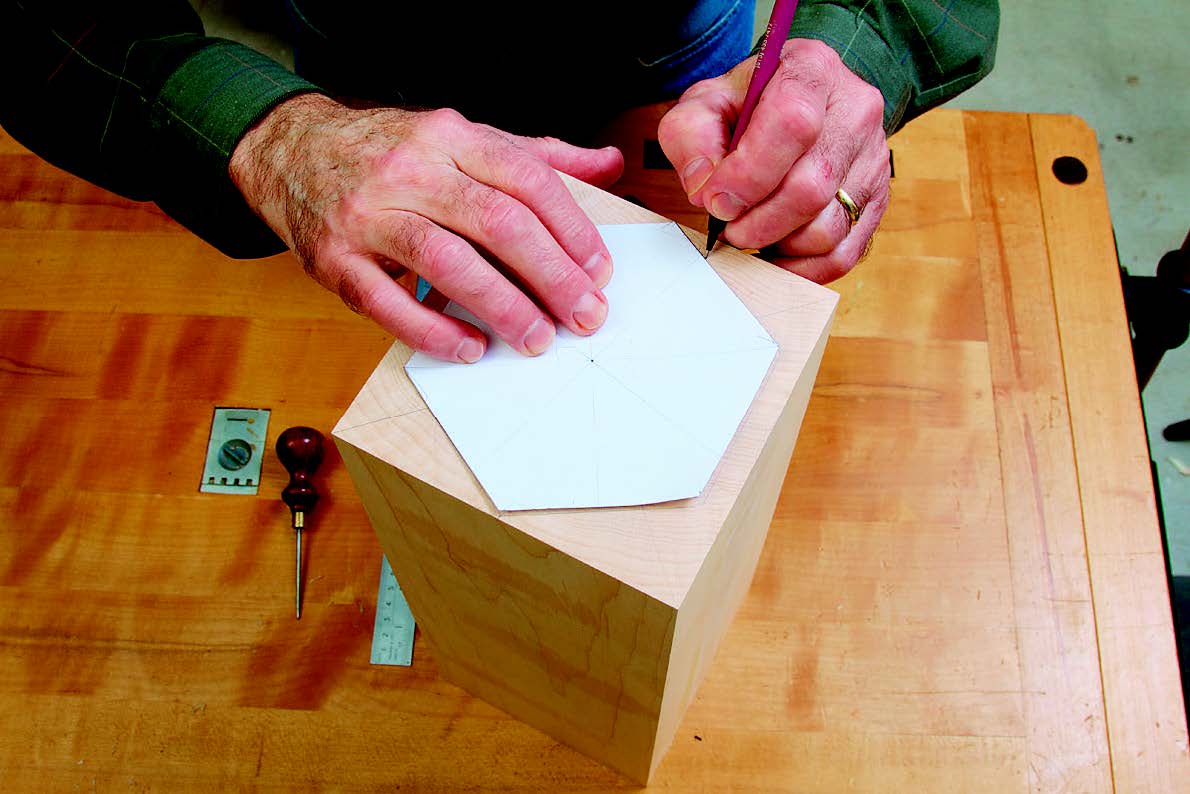
Center the pattern on the stock using the awl mark you made earlier and trace around the pattern in pencil. You can do the same on the other end (the bottom) for visual reference when cutting, but it’s optional. Now draw a smaller inside hexagon by measuring 3/4″ from each line. This delineates the starting point for the taper on the top end.
Make the Tapered Hexagon
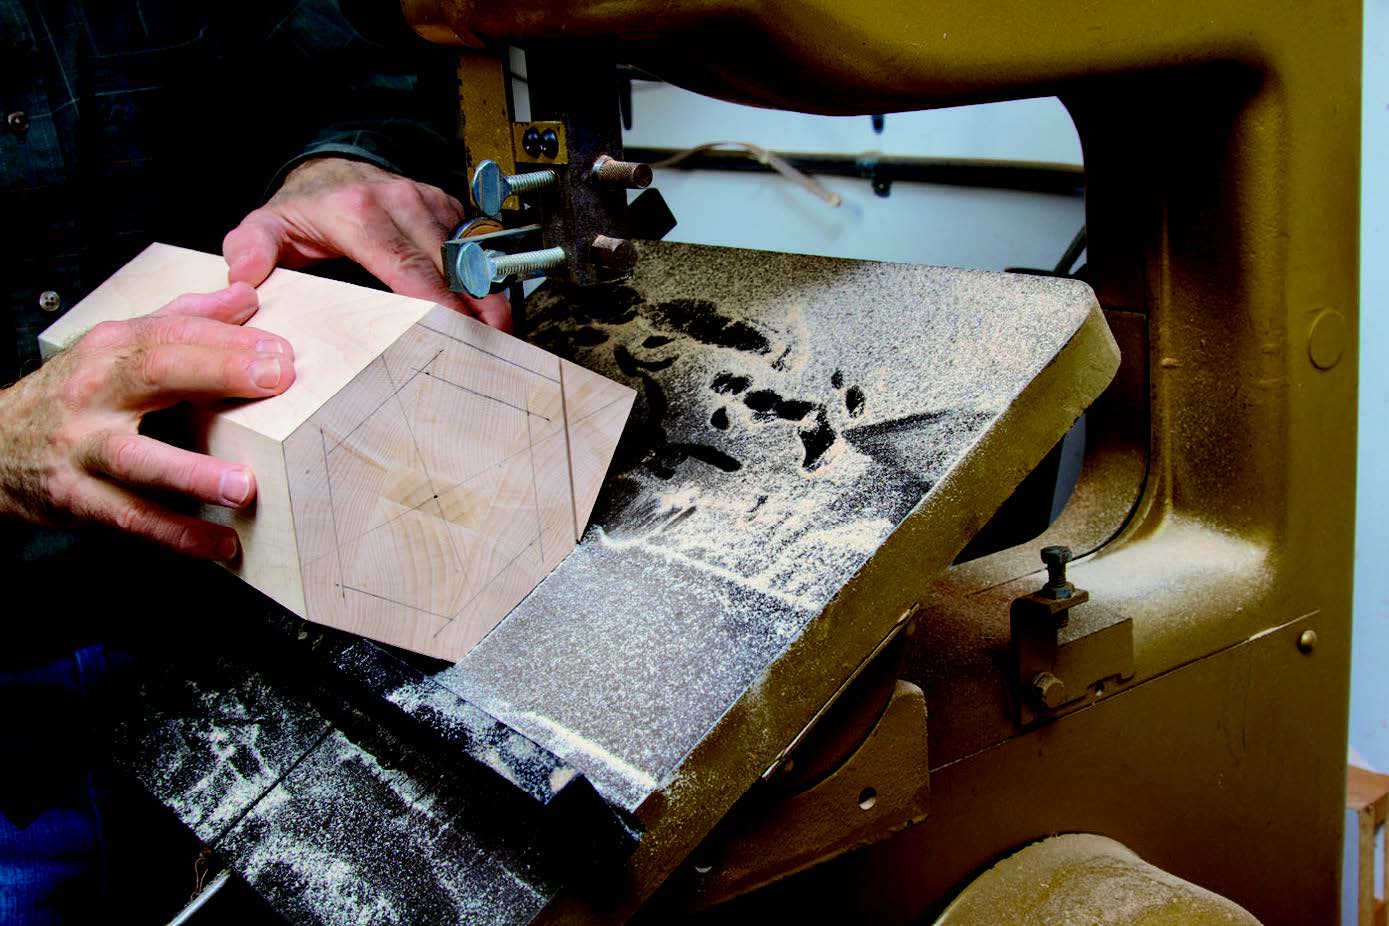
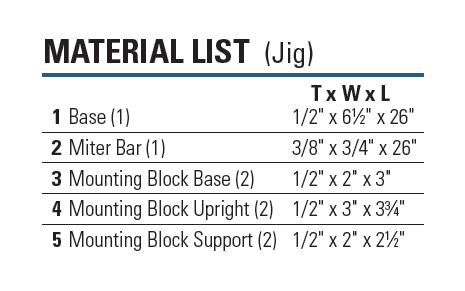
Cutting the tapered hexagon is a two step process that requires a band saw jig (see Drawing) for the second step. (If your band saw has a resaw capacity greater than 6″, it may be possible to do this in one step with the jig.) Understanding the jig’s operation is more important than duplicating its dimensions because band saw table sizes differ. The jig’s purpose is to guide the stock through the blade at an angle.
The jig’s base is 1/2″ plywood with a runner on the bottom that fits into the band saw’s miter gauge slot. The workpiece is held by adjustable mounting blocks on each end that are sized to allow the stock to rotate and just touch the base. It’s important to use only one screw to attach each mounting block to the base because they need to pivot to remain parallel with workpiece ends.
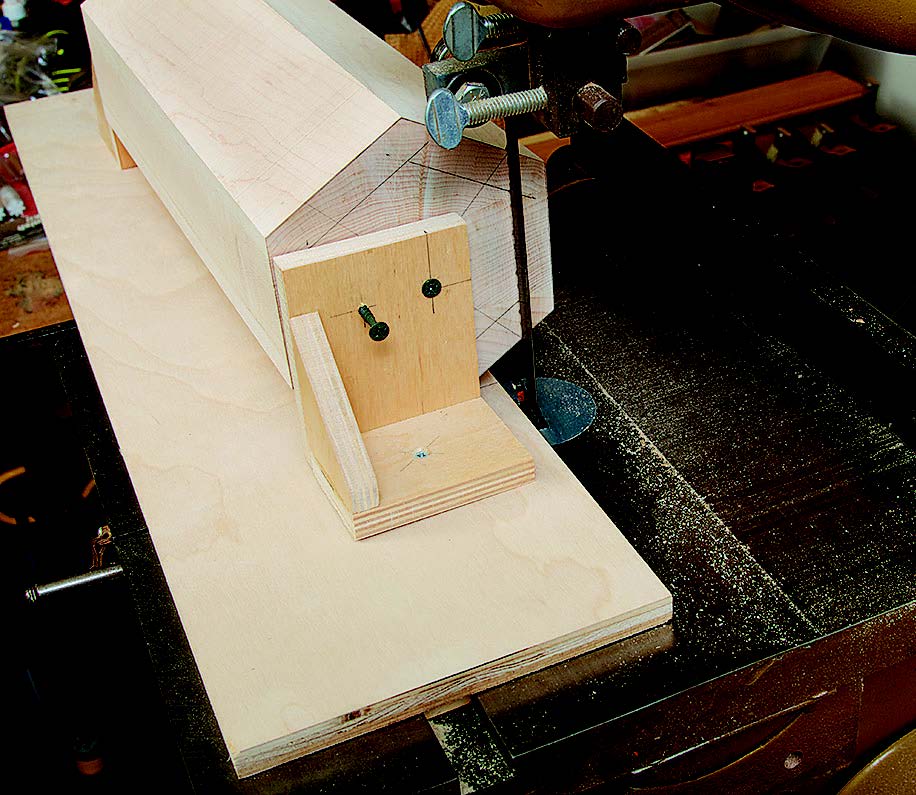
The first set of cuts you’ll make on the band saw produces a straight hexagonal column. Use a 1/2″ or wider blade to minimize blade deflection. Position the saw’s fence to the outside of the blade and tilt the table toward you about 30˚. (You may want to adjust the fence to accommodate blade drift; check your saw’s instruction manual.) Then adjust the fence and blade to align with one edge of the hexagon drawn on the top of the workpiece. Make the first cut; then rotate the workpiece and adjust the fence and table to align the blade for the next cut. Repeat this operation until you’ve cut all six sides. Save at least one of the cutoffs; you’ll need this later for routing the relief cuts in the lamp body.
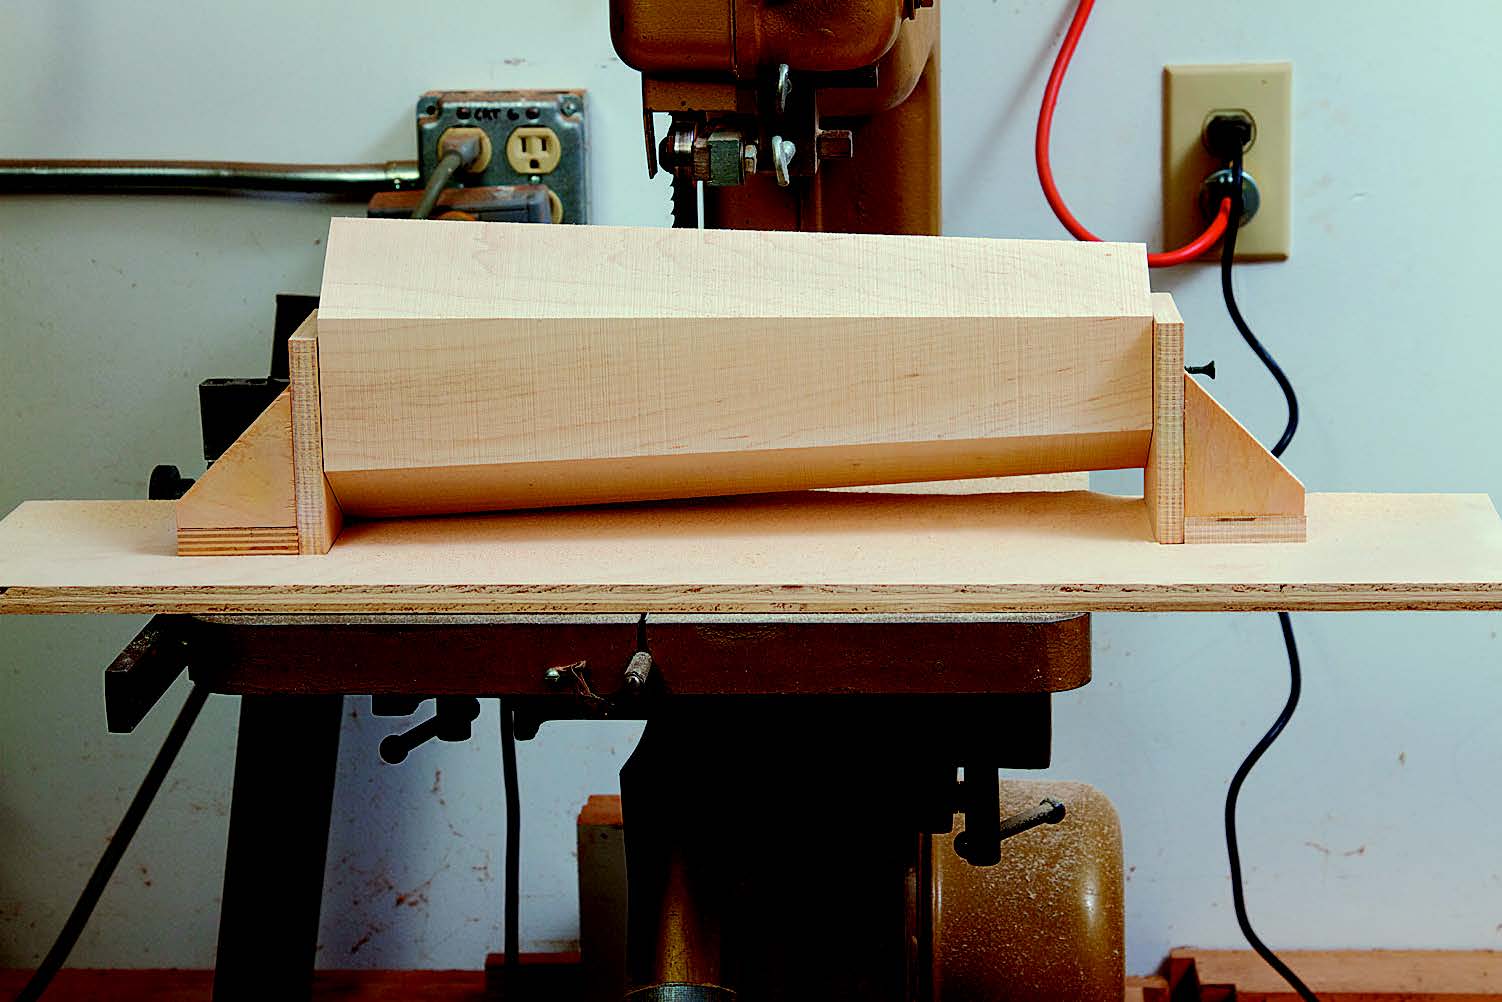
Now you’ll need to mount the workpiece in the tapering jig. Here’s the sequence that worked best for me: First, screw the bottom mounting block to the center of the bottom of the workpiece, but don’t attach the mounting block to the jig’s base yet. Roughly center the workpiece on the jig. Position the jig with its track in the saw’s miter gauge slot and align one of the bottom edges of the hexagon against the blade. Now screw the bottom mounting block to the jig’s base. Next, attach the top mounting block to the top of the workpiece and slide the jig back so the blade just touches the top of the workpiece. Rotate the workpiece from the bottom mounting block so the blade aligns with one of the lines of the smaller inside hexagon drawn on the top. Screw the top mounting block to the base and recheck the blade alignment with the small hexagon. Finally, screw one or both of the mounting block lock screws slightly into the stock to prevent the workpiece from rotating. Now you can cut the tapers by rotating and cutting.
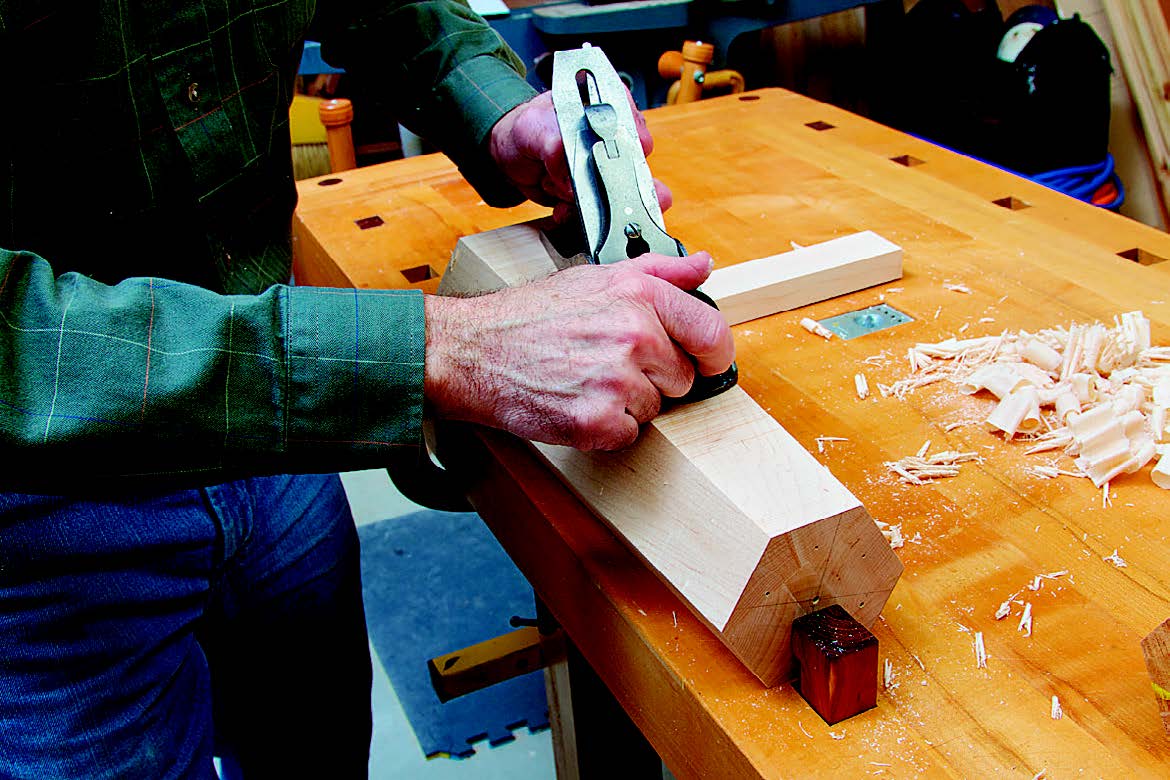
Once you’ve completed the cuts, you’ll need to remove the saw marks from the workpiece. I used a hand plane because it provides a clean, crisp, controlled cut. You could also use a jointer or a sander, but be careful not to remove too much stock. Now’s a good time to bore a 1/2″ hole in each end to open the center channel for wiring.
Rout the Relief Cuts
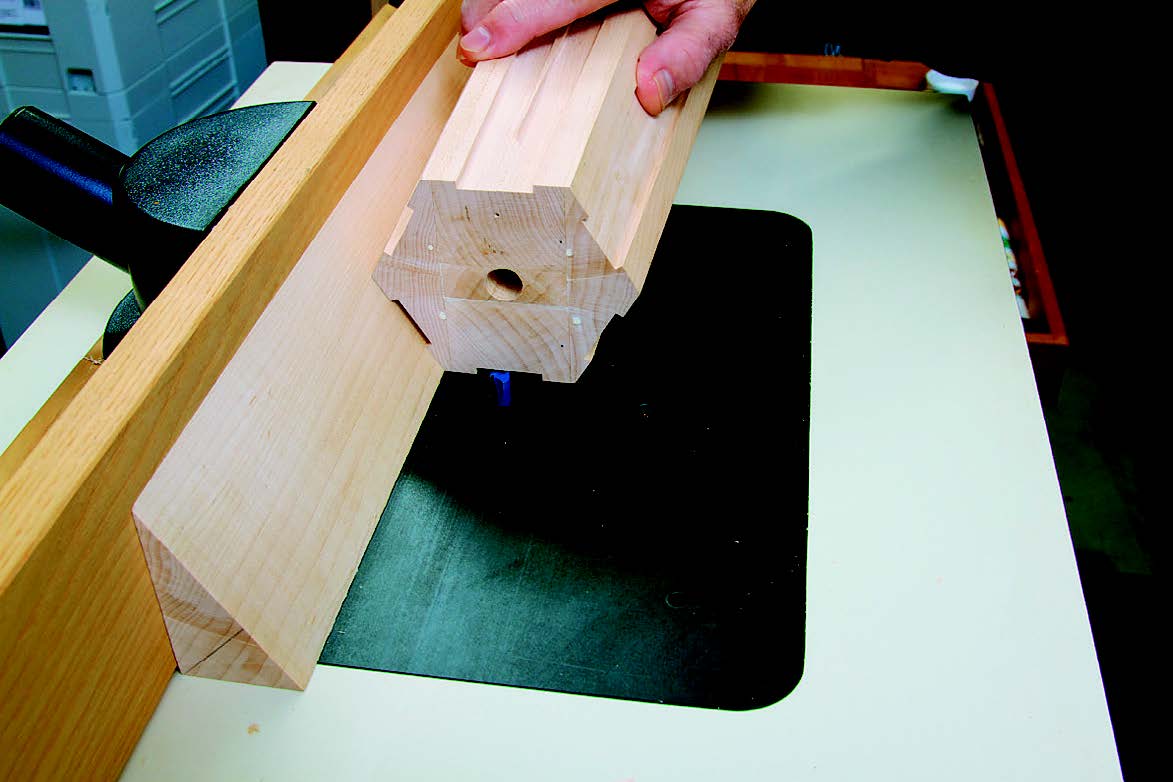
The decorative relief cuts add dimension and visual interest to the lamp body by emphasizing its hexagonal shape. For safety’s sake, it’s best to use a router table for this step because it provides excellent support and control for the workpiece.
Use a 3/8″ or 1/2″ flat-bottom straight bit to rout the 1/8″-deep relief channels. Attach the cutoff (saved earlier) from making the hexagon to the router table’s fence with brads or carpet tape. The cutoff provides stock support and the clearance necessary to keep the router bit parallel with the workpiece edges. Make steady, multiple passes to remove the stock between the raised edges. Turn the workpiece around and adjust the fence so the cut starts on the opposite edge to complete the work.
You’ll need to sand the relief channels, so start with 120-grit paper and work your way up to 220-grit. Then sand the edges, and you’ll be ready to make the remainder of the parts.
Top, Base, Feet
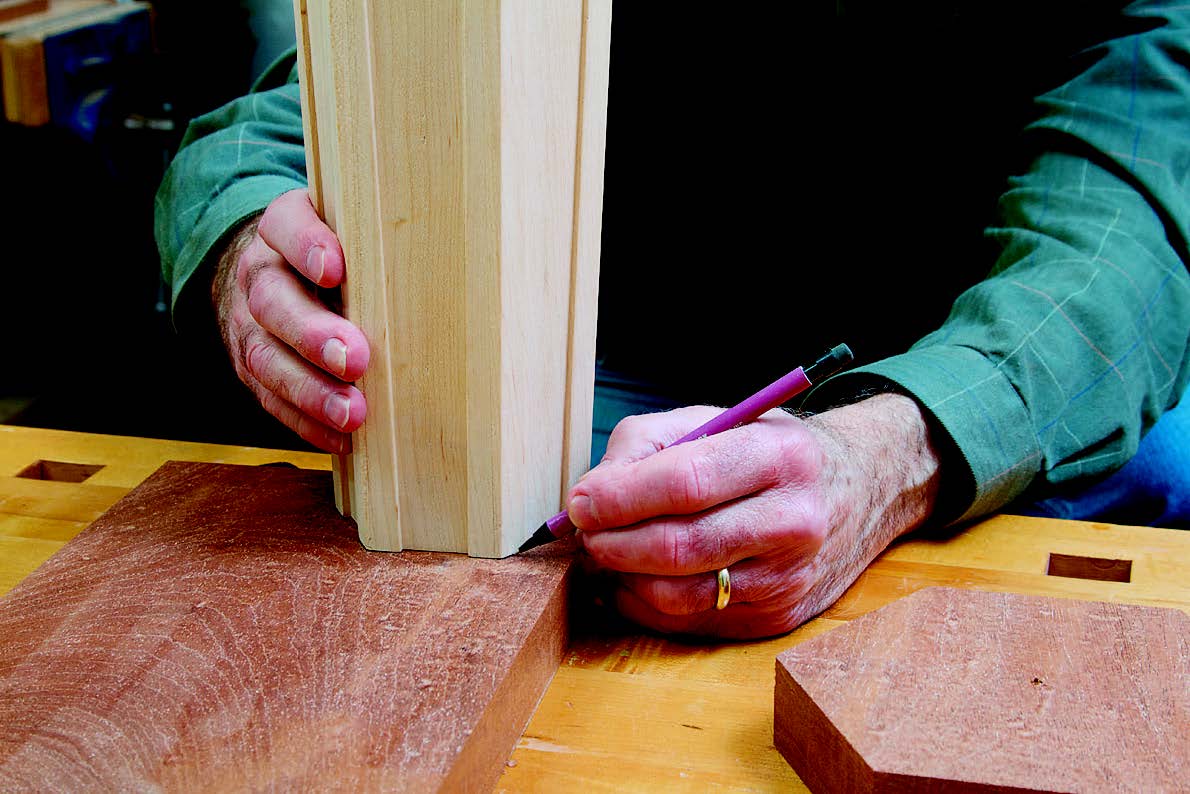
If you prefer, you can use a contrasting wood for the top cap, base and feet. The top cap must fit precisely on the lamp body top. However, it’s unlikely that the lamp body is perfectly symmetrical, so you need to trace the top onto the top-cap stock for a perfect fit. Cut the piece on the band saw, but leave it just slightly large to allow for some fine-tuning. Mark one mating edge on the lamp body and top cap to ensure alignment during assembly.
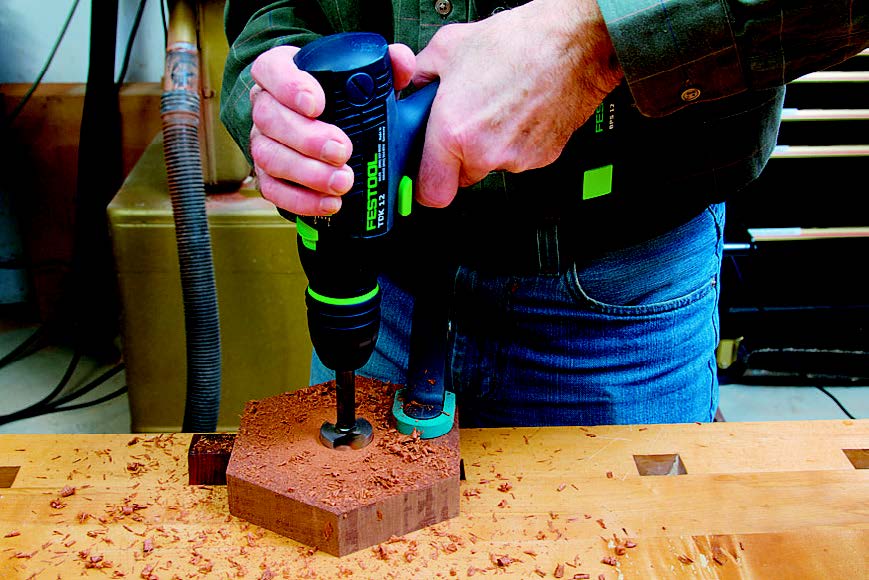
The base’s tolerances don’t need to be quite so exact, so simply lay out a hexagon on the stock, then cut it on the band saw. Once it’s cut, you’ll need to counterbore a 1/2″-deep x 1-1/4″-diameter hole in the bottom of the base to accommodate the end of the threaded lamp pipe and nut. Then bore a 7/16″ hole through the center of the base and the top cap for the lamp pipe.
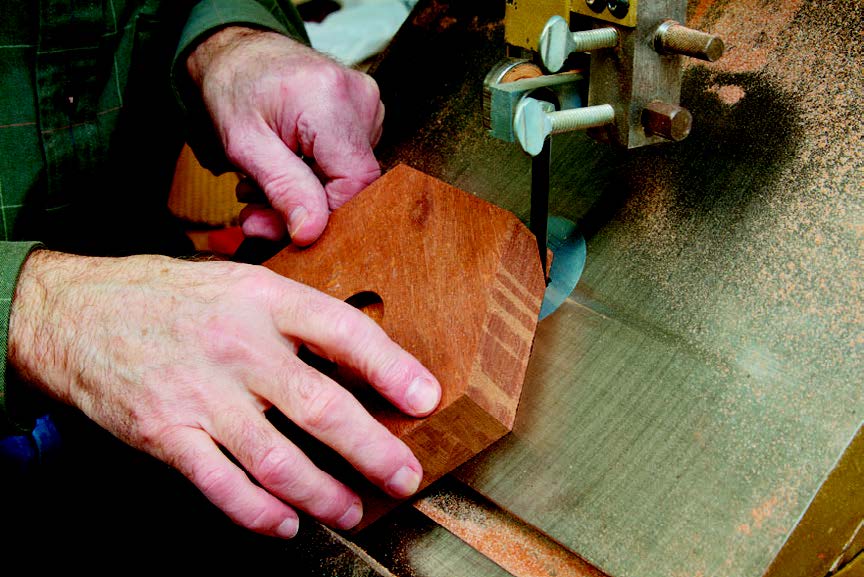
Using the band saw, cut 45˚ chamfers on the top edges of the base and top cap. Aside from sanding the sawn edges, I shaped the top’s upper surfaces, starting at the chamfers, with files and sandpaper to create a more rounded profile where it meets the metal lamp neck. When you’re satisfied with the fit and appearance of the top cap, glue it onto the lamp body with either epoxy or cyanoacrylate.
The feet afford a more finished look to the base and allow space for the electrical cord to exit. Make a strip of 1/4″-thick x 1-1/4″-wide x 10″-long stock and trace the corner onto the strip for six 1″-long pieces. Cut these pieces on the band saw and then sand the edges smooth. Glue the feet at the corners of the base about 1/16″ back from the edge. You might also want to add a few pin nails to secure them.
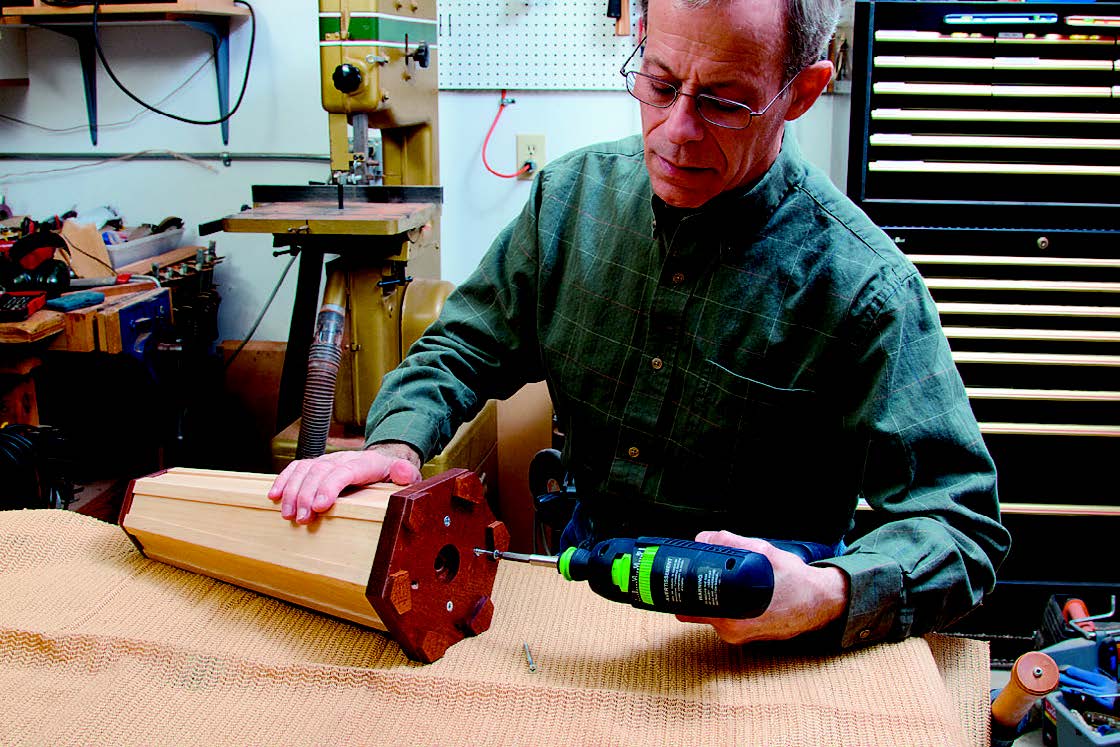
After finishing, you’ll attach the base to the lamp body with four #8 x 2″ wood screws, but drill and countersink the screw holes now. Then place the lamp body on the base and center it. Mark the base screw hole positions on the lamp body and then drill pilot holes.
Assemble and Install Wiring
Everyone has a favorite finish, and because lamps typically don’t experience a lot of wear and tear, don’t hesitate to use what you like. I applied a few coats of clear aerosol lacquer, rubbing between coats with 0000 steel wool and a soft cotton rag. This finish provides enough protection and imparts a soft glow to the wood. Finish the base separately from the lamp body and top cap. When the finish has cured, screw the base to the lamp body, and you’ll be ready to wire.
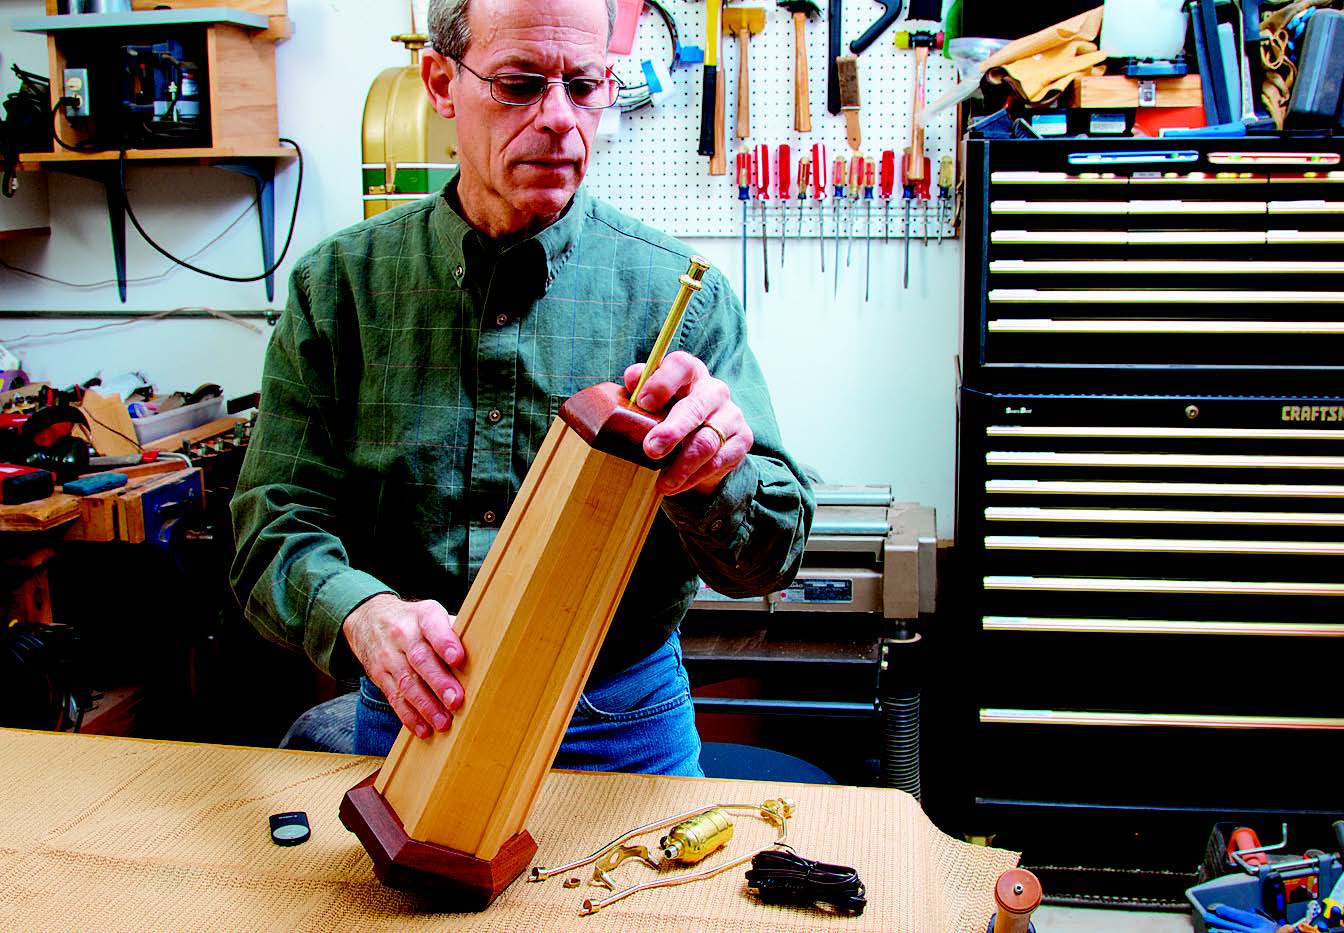
Most lamp kits provide some wiring instruction, but here are a few tips that can ease the process. First, cut the threaded lamp pipe so it extends about 1/4″ at the top and bottom. Use a file to round any sharp edges on the inside and outside of the tube to prevent damaging the wire. Insert the tube through the lamp and install the locknut on the bottom and the neck on top and then tighten. Now install the harp bottom over the lamp nipple (on top of the neck) and screw the socket cap onto the nipple. Thread the wire from the bottom through the lamp pipe and into the socket cap. Pull enough wire to connect to the socket and tie an underwriter’s knot to prevent the wire from being pulled off the terminals. Connect the wires to the terminals, finish assembling the socket, and finally add the harp and lampshade. The final touch is to add some non-slip protective pads on the feet (item #43518 at rockler.com; 800-279-4441).
With this lamp’s construction now under your belt, you’re likely full of ideas how to improve it, make multiples of it and branch off into making your own designs. Just be careful not to have all those new lamps turned on at the same time, or you could experience a big spike in your electric bill.
Click Here to download a PDF of the related drawings.
