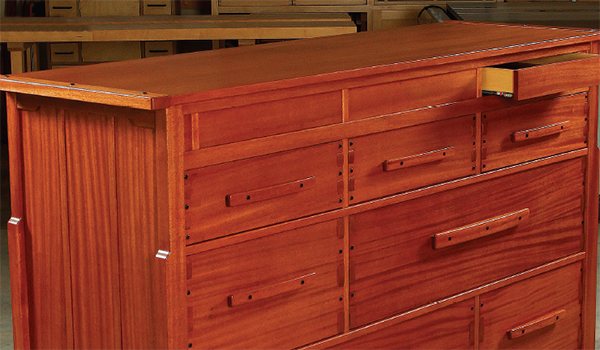
If you built our Greene and Greene Bed and Nightstand (February and August 2015 issues), this Dresser is a beautiful and practical way to complete your bedroom set. Many of the construction methods for the Nightstand, in particular, are the same. This dresser, however, is definitely a complex, challenging project: you’ll find additional details you’ll need in the construction Drawings and text available online as part of our February 2016 “More on the Web” section. Be sure to study all the Drawings carefully and often as you build this project to guide your progress.
Starting with the Legs
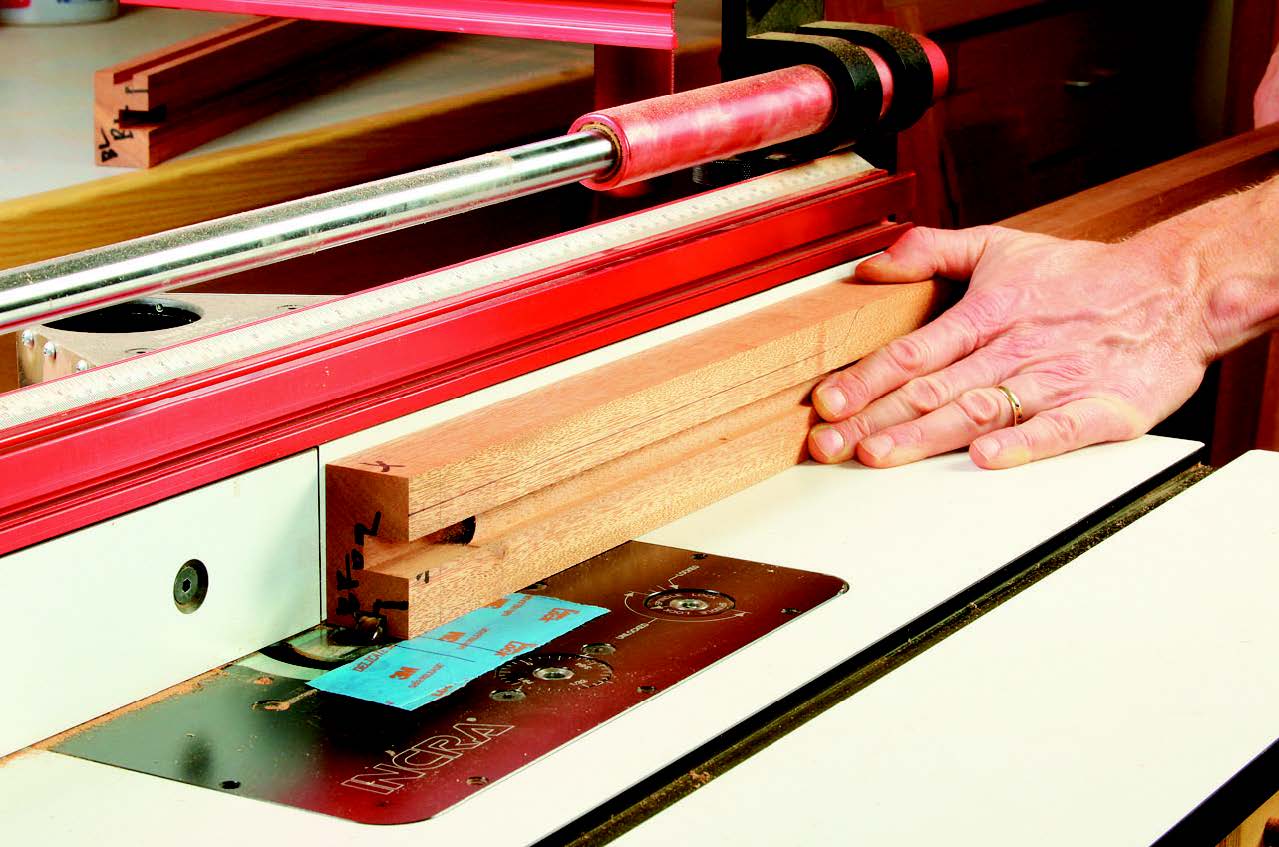
To begin, build two side assemblies from pairs of legs, upper and lower rails, the two narrow side slats and three panels. To that end, prepare your leg blanks and make a scrap template for the cloudlift pattern. Mark the legs as fronts and backs, lefts and rights to help keep their orientation clear, then draw the cloudlift profiles, but don’t cut them.
Next, cut a 1/4″-deep groove into the wider inside faces of the legs, centered on their width, using a 1/2″ straight or spiral bit in your router table. Stop these grooves (which house the side panels) 1-1⁄2″ from the leg bottoms, and square up their ends. The side rails fit into 3/4″-deep mortises in these grooves. The top side rail mortises are 1-1⁄4″ long; the bottom rail mortises are 1-3⁄4″ long.
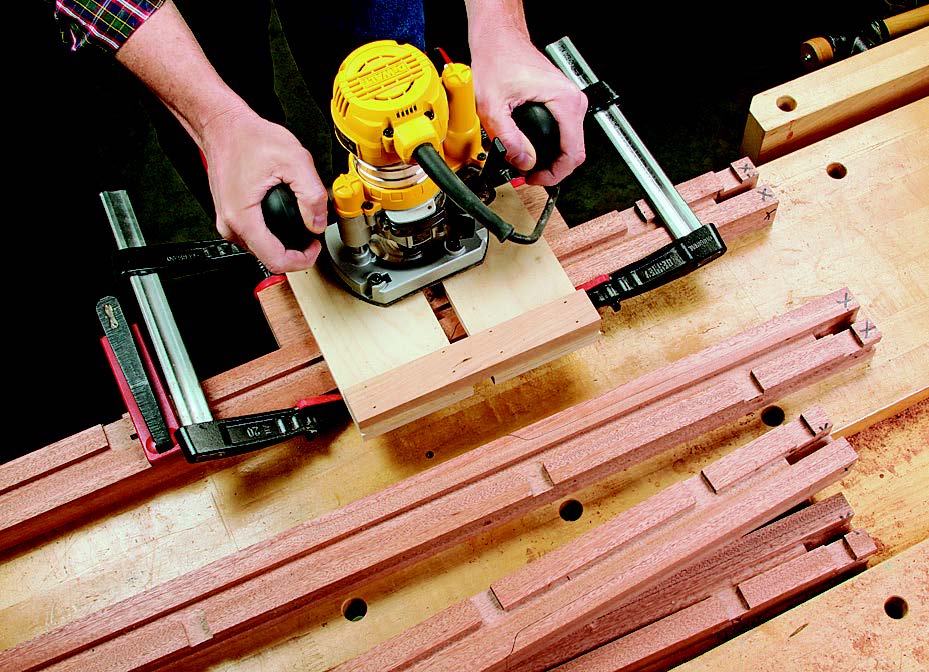
With the same bit, plow a 1/4″-deep groove down the narrow, inside edges of the back legs for the back panel. Position them 1/2″ in from the back faces of the legs, and stop the grooves 1-3⁄4″ up from the leg bottoms.
Now, mark the 1/2″-wide mortises for the top, center and bottom front rail tenons on the inside edges of the front legs. Position these mortises 3/8″ in from the front faces of the legs. Rout the mortises 3/4″ deep, and chisel their ends square.
Notice in the Drawings that five web frames support the drawers and create the dresser’s internal skeleton. Mark their locations on the four legs in order to rout 3/4″-wide, 1/4″-deep dadoes that will seat them in the legs. Stop these short dadoes at the side panel grooves. Once those are milled, rough-cut and then template-rout the cloudlifted edges of the legs. Complete the legs by rounding their bottom corners with 1/4″ radii.
Forming the Side Subassemblies
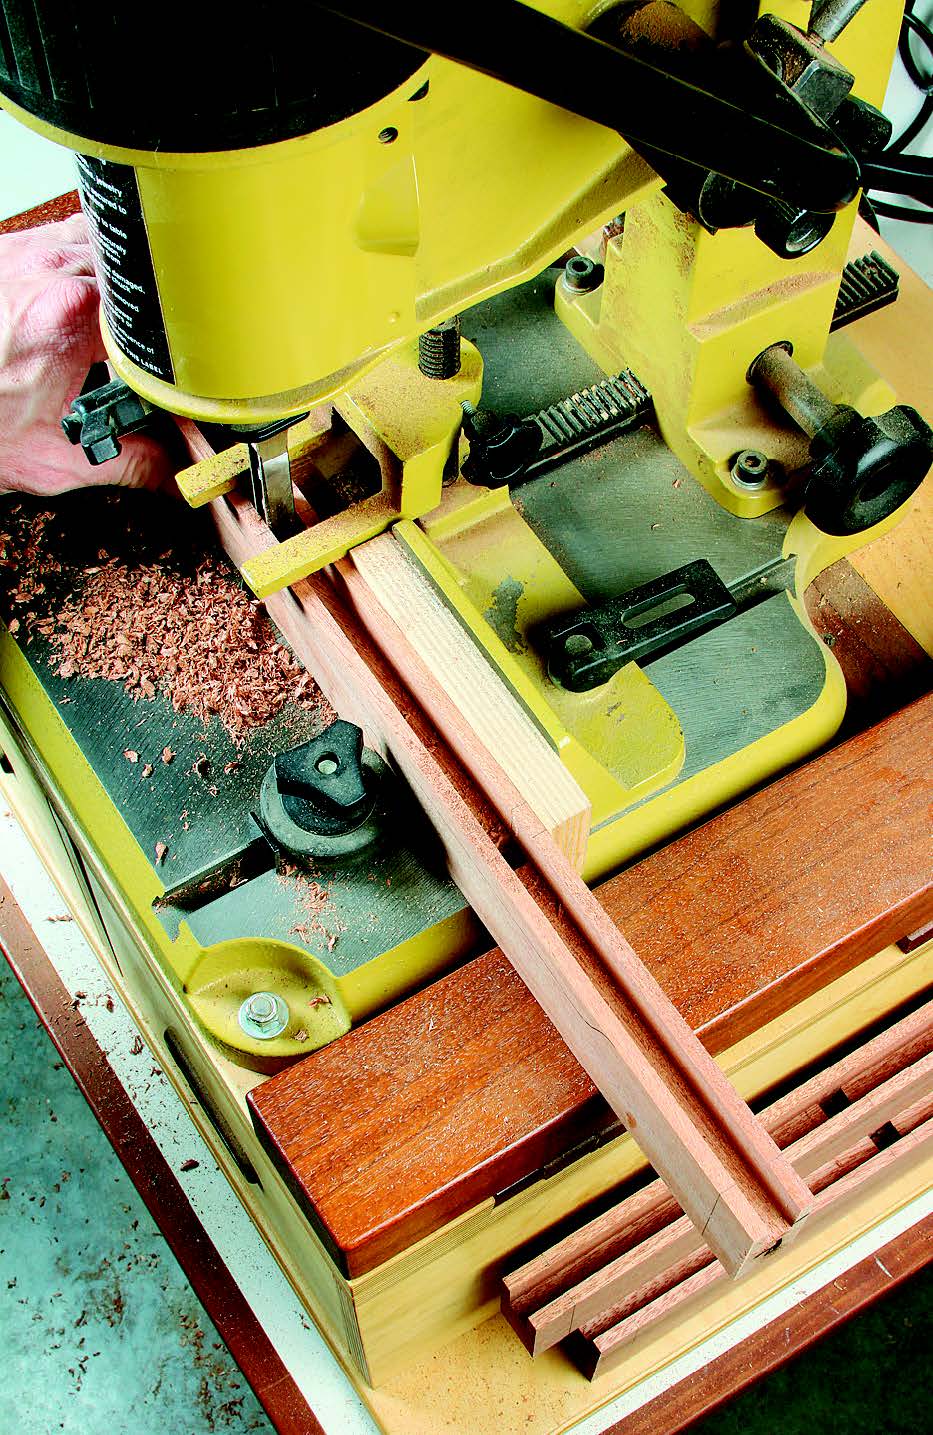
Set the legs aside for a spell and prepare blanks for the top and bottom side rails. You’ll need to make a cloudlift template for tracing the profiles on the bottom edges of all four rails. Draw the shapes to inform you of which edge is “up” on these rails, but don’t cut the cloudlifts out just yet.
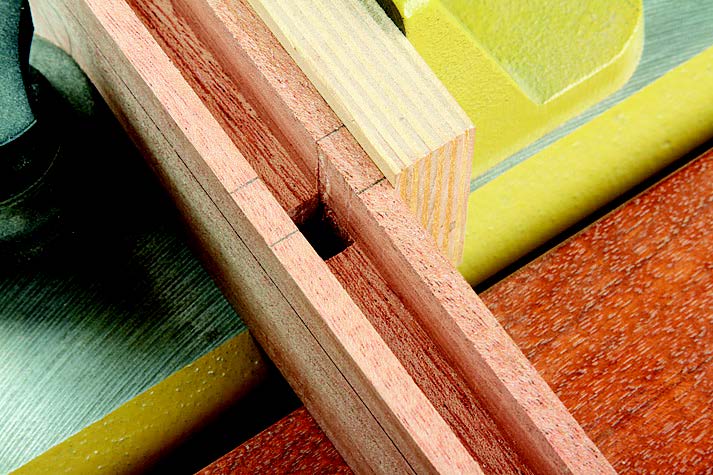
On the thickness of the rails, center a 1/2″ straight bit in the router table to plow grooves for the side panels and side slats: rout a 1/2″-deep groove into the top edge of the bottom rails and a 3/4″-deep groove into the bottom edge of the top rails. The side slats join to the side rails with 1/2″-square tenons, so mark and chop those next. Make them 1/4″ deeper than the grooves.
Now head to your table saw and raise 3/4″-long tenons on the ends of the rails. The top rail tenons are 1-1⁄4″ wide and flush to the top edges of the rails. The bottom rail tenons are 1-3⁄4″ long with a 1/2″ bottom shoulder, so form this shoulder, too.
You need 3/4″-wide, 1/4″-deep rabbets on the top inside edges of the top rails to house the top web frame, so those are your next task. Likewise, the inside top edges of the bottom rails need a rabbet to fit the bottom web frame. Cutting these will remove the inside wall of the side panel grooves, but don’t fret: the support here will be returned when the top and bottom web frames are installed. With the rabbets done, band saw and template-rout the rails’ cloudlifted edges
Mill blanks for the four side slats from straight-grained stock, and rout 1/2″-wide, 1/8″-deep grooves into two opposite edges of each slat for the side panels. The ends of the side slats also need 1/2″ x 1/2″-square tenons to fit into the rail mortises, so raise them now. Note that the top tenons are 1/2″ long, and the bottom tenons are 3/4″ long. Finally, the inside faces of the side slats require 3/4″-wide, 1/8″-deep dadoes to fit the ends of the web frames, similar to the legs.
With the joinery behind you, surface six 1/2″-thick blanks for the side panels, and dry-assemble pairs of front and back legs to upper and lower rails with the panels in place to create two carcass side subassemblies. Be sure there’s about 1/16″ of expansion capability for the panels between the slats to allow for seasonal wood movement.
Disassemble the parts and soften, with 1/8″ roundovers, all the sharp edges that will show from the sides of the dresser. Stain and finish the side panels, then glue up the dresser’s two side assemblies, and take them through to final finish.
Making Web Frames, Drawer Dividers and Supports
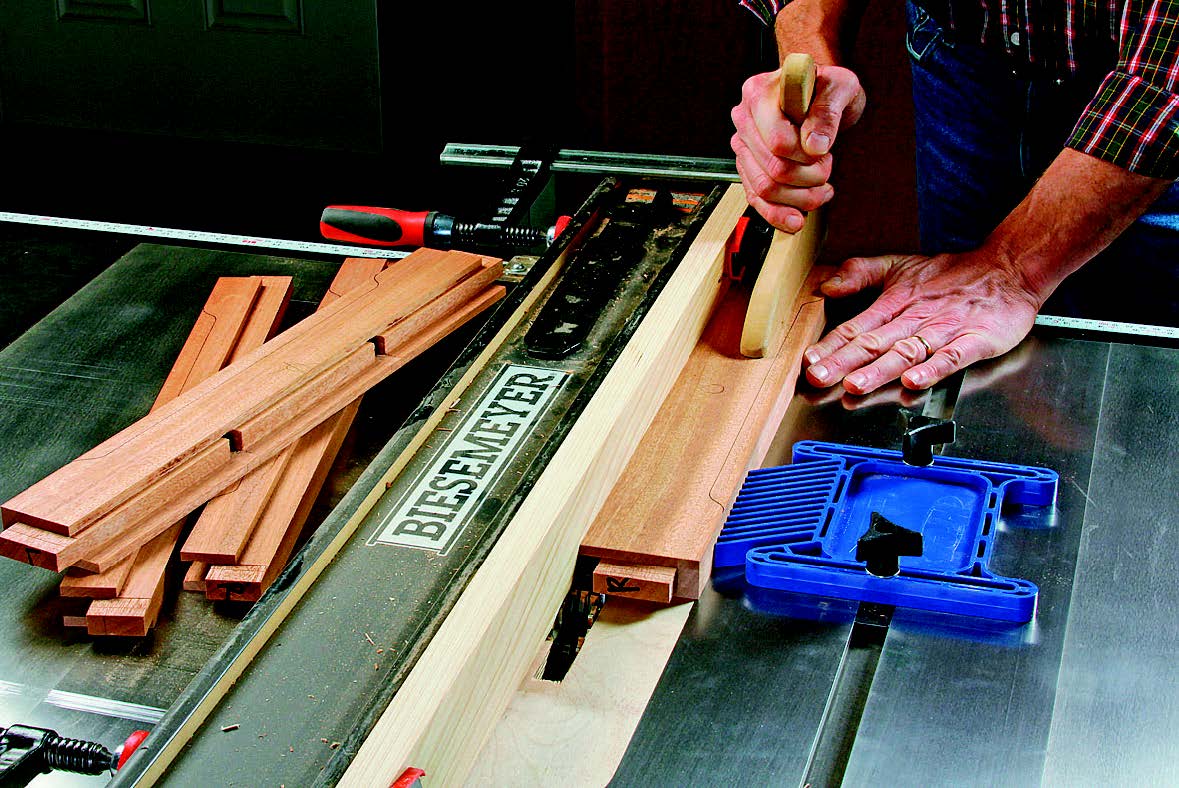
Next up, you can build the five web frames. One of the crucial aspects of the web frames, given how long they are, is to start with your flattest stock. Give it time to settle and distort as you prepare it, so you can correct any minor twisting or bowing before assembly. The web frames’ construction couldn’t be simpler: the fronts and backs are connected by three cross rails with tongue-and-groove joints: 1/4″-thick, 1/2″-long tongues on the rail ends fit into matching grooves in the fronts and backs.
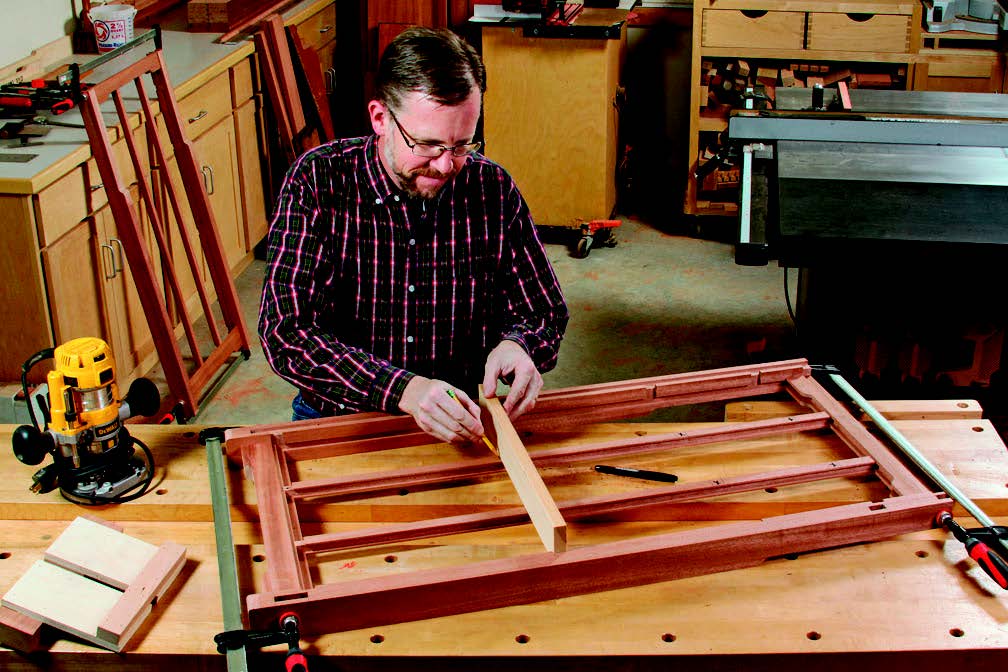
Once assembled, the back corners of all five web frames need to be notched to accommodate the back legs. Cut these notches 5/8″ wide and 1/8″ deep. Next, notice in the Drawings that both the vertical drawer dividers and the upper drawer supports fit into 3/4″-wide, 1/8″-deep dadoes running across the web frame fronts and backs. Refer to the additional Drawings in “More on the Web” to lay them out, then plow these dadoes across the web frame fronts and backs with a router and a long fence or slotted jig. (For specific step-by-step instructions to make the web frames, our “More on the Web” coverage provides the full details.)
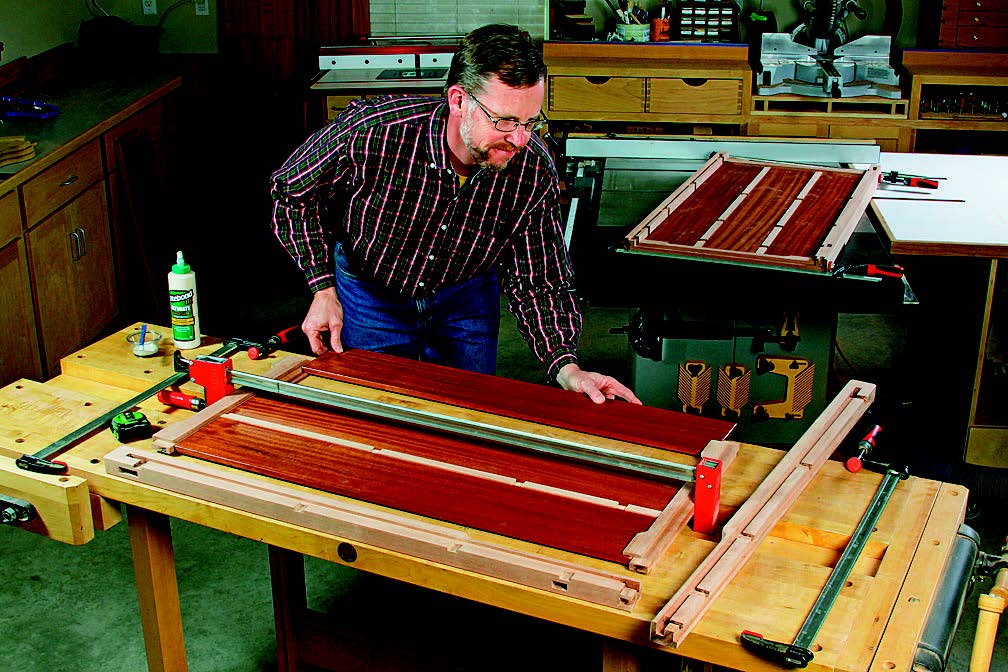
The four vertical drawer dividers are made with the same tongue-and-groove joinery as the web frames, but it’s important to get their sizing dialed in accurately: they must keep the web frames flat along their length, in order for the drawers to fit properly and squarely.
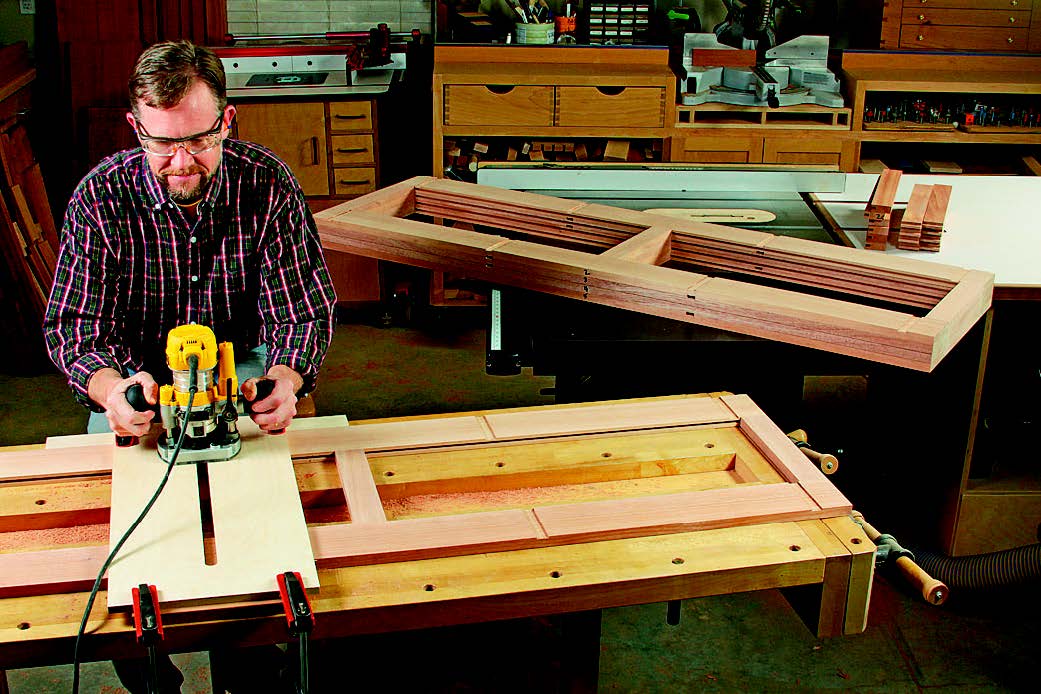
So, build them carefully. To that end, I dry assembled the carcass to verify the lengths of the various divider fronts and backs while making them. A dry assembly is also a convenient time to measure and cut the upper drawer supports and the back panel to size. Check their fit with a test installation, then disassemble the carcass.
Forming the Front Rails and Upper Rail Assembly
The front rails are the last items to make before assembling the carcass for good. Prepare strips of stock for the top, center and bottom front rails. Rip and crosscut the three rails to final size, then mill 1/2″-thick, 3/4″-long tenons on the part ends. The top rail tenons are flush with the rail’s top edge and 3/4″ wide; the center and bottom rail tenons are centered on the part widths and are 1″ and 1-3⁄4″ wide, respectively. Now trace and cut the cloudlift profile onto the bottom rail’s bottom edge, and ease the rails’ front edges with 1/8″ roundovers.
Notice in the Exploded View that the front ends of the upper drawer supports are hidden behind short slats that tuck between the top and center rails. Mark the inside edges of these rails for 1/2″ x 1/2″ mortises that will join the short slats to the rails. Cut the mortises 1/4″ deep, and square up their ends, if needed. Prepare blanks for the short slats, as well as the half slats that will fit flush against the legs. Raise tenons on the ends of the full slats to fit the rail mortises.
Round over the front edges of the short and half slats. Set the half slats aside, but glue the short slats into their rail mortises to create a subassembly. I also cut tiny 1/4″ x 1/4″ x 3/4″-long cleats and glued them into place on top of the center rail, against the outside edges of the short slats and 1/2″ back from the rail’s face. These serve as mounting points for the wood filler pieces that will fill the narrow openings at the end of this rail subassembly, later.
Two faux rails flank the middle drawers and hide the front edges of those web frames. Prepare these rails, but leave them overly long: they’ll simply glue onto the front edges of the web frames after the carcass is assembled, when you can trim them to final length and fit them accurately.
Assembling the Carcass
You’re nearly ready to assemble the carcass, but there are still some final details to finish up. The top web frame needs attachment points for the dresser’s solid wood top panel, and the web frames can provide a convenient means for stiffening the long front rails. There’s also the matter of securing the drawer dividers that align vertically in the carcass. The fact that the upper drawer supports line up with the top divider ends, and the left top drawer divider end aligns with the
middle drawer divider ends, makes attaching these pieces to the web frames more difficult. I accomplished most all of this with slotted screw holes and pocket screw joints. (Find more details in our More on the Web coverage.) You’ll be quick to notice that fastening these vertical dividers to the web frames adds a tremendous amount of rigidity to the carcass framework. The dividers also help keep the web frames perfectly flat across their length. Additionally, you need to cut the various notches into the front corners of the drawer dividers so they’ll fit around the front and faux rails. The online Elevation Drawings provide dimensions for these notches. Cut them carefully with a jigsaw.
At this point I sanded, stained and finished all the carcass parts but kept the front edges of the middle drawer web frames bare, in order to glue the faux rails onto them. Now, with a deep breath and long pipe clamps, you can assemble the entire carcass, installing the web frames, rails, drawer dividers and upper drawer supports on the side assemblies. Drive screws into all your planned locations. Cut, glue and clamp the faux rails in place to wrap up this major step. Leave the back panel off until the drawers are installed.
Building the Dresser Top
If you built our Greene & Greene Nightstand project, the construction of this dresser’s top will be familiar, since it’s exactly the same. Glue up the top’s center panel and prepare blanks for the breadboard ends. Bore three 7/8″-deep mortises into the top face of each breadboard end for square plugs, using a 5/16″ chisel in a mortising machine. Now set up your router table to mill a 3/8″-wide, 1-1⁄4″-deep mortise along the inside edge of each breadboard end. Stop these mortises 1/2″ from the part ends. With that done, raise tenons on the ends of the top panel with a dado blade and table saw or a router and fence to fit the mortises you’ve just made. Cut 1/2″ shoulders on the ends of the tenons.
Fit the breadboard ends onto the center panel, and mark the locations of the square peg holes onto the panel tenons with the tip of a 5/16″ brad-point drill bit. Remove the breadboard ends. Bore a 5/16″-square through-mortise at the marked center point, and 5/16″-wide, 1/2″-long mortises at the other two.
Round the corners of the breadboard ends with 1/4″-radii. Then ease their edges, plus the long edges of the panel, with a 1/8″ roundover bit. Finish-sand the three parts. Spread glue along the center 6″ or so of the tenons, and slip the breadboard ends into place, clamping the ends to the panel.
While the glue cures, make up six 5/16″-square plugs, 15/16″ long, to fill the plug mortises. I used ebony and gently sanded one end of each plug into a “pillow” top. Both the wood species here and the pillowing detail are traditional Greene & Greene aspects of these plugs. Tap them into their holes carefully with a dab of glue, until just the top 1/16″ “pillowed” portion stands proud. Stain and finish the dresser top.
Building the Lower Box-joint Drawers
After the long haul of making the carcass, you may be relieved to learn that this dresser’s drawers aren’t terribly difficult to build. The front corners meet in symmetrical box joints, and the back corners are simple rabbet-and-dado connections.
The size and layout of the box joints on these drawers changes from one row to the next, so unfortunately, a conventional box joint jig won’t work here. Instead, I made up pairs of plywood templates for the three drawer joint sizes. I cut the drawer face pin-and-socket patterns first with a dado set, then knifed the layout for the drawer sides using the face templates as guides. But, for the drawer side templates, I marked their patterns .008″ smaller than the face layouts at every cut, using an automotive feeler gauge. This clearance allows for an easy slip fit of the joints without looking “loose.” (For the complete details on fitting and building the drawers, see our More on the Web coverage.)
Bore the square mortises for the plugs 3/8” deep, then use the spur centers of the mortise chisel to locate a 7/64” bit for drilling through holes for the screws. Screw each pin to its socket with 1-1⁄2″ panhead screws hidden in recessed screw
holes and covered by 5/16″-square plugs. After the drawers are assembled, mount them on their slides in the carcass.
Adding the Secret Drawers
The three shallow secret drawers on top are even easier to build! The boxes assemble with 1/4″ x 1/4″ rabbet-and-dado joints. Locate the drawer bottoms 1/2″ up from the bottoms of the drawer sides if you use the self-closing King Slide® hardware we suggest. The instructions that come with the slides provide the details you’ll need to install them on the upper drawer supports. After these drawers are hung, add mahogany drawer faces with a tight reveal to simulate a frame-and-panel look — this, and the lack of a need for drawer pulls, is the special effect that makes them “secret”! Then, position and pin-nail or glue the half slats and filler pieces into the open spaces at the ends of this row.
Finishing Up the Last Details
Now’s time to slide the back panel into place and fasten it to the web frames with brads. Mount the top on the dresser with screws driven through the top web frame, and complete the drawers with some custom arched wood pulls. You can read how I made those in our More on the Web coverage. The pulls on the larger two drawers are heftier than those on the five smaller drawers, yet the end effect is still a pleasant and interesting visual “balance” once they’re installed. And, if you look closely, you’ll notice that the front faces of all the pulls aren’t flat — they’re gently curved to continue the curved theme suggested by the rounded ends on the box joint pins and the pillow-topped plugs. Finally, find a couple of helpers with strong backs to move this testament of your hard work to its new bedroom home — you deserve the break!


