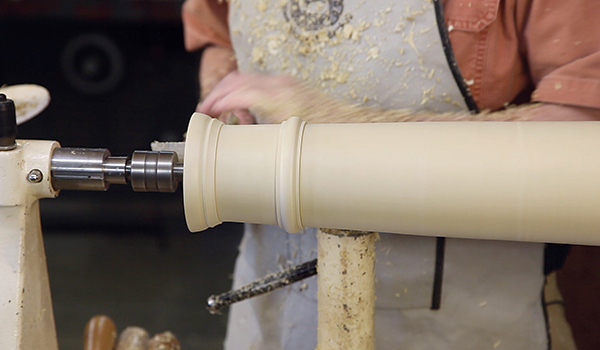
In architecture, a column used as a vertical support is as old as civilization. Columns, however, do not always bear load: architects often use them for purely decorative purposes or to delineate space — think about public buildings where columns are used in parallel rows to form pathways or in circles to form gathering spaces.
Later in this article, I’ll tell you how to make a fern stand as an exercise in turning columns. First, however, it’s time for a lesson in history.
Greek Origins
Technically, any vertical support, whether square or round, could be called a column. Most of us think of columns as round, however, because the ancient Greeks came up with classifications of round column styles we still use today. The Greeks’ column styles not only beautified these essential building supports, they also developed a shape that corrected perspective, no matter where the viewer is standing. The Romans later adopted the Greek styles — and today’s architects are still using them.

The Greeks created an entasis taper. At about one-third its height, a column’s taper narrows inward to its capital (the decorative top). Sometimes the capital is placed directly on the column that’s supporting it; sometimes a square plate, called an abacus, is interposed between the column and the capital to broaden the support.
The Romans sometimes also tapered the column downward toward the plinth, the square block that better distributes the load to the foundation. This convex entasis taper corrects the illusion of curving inward that a straight taper appears to have.
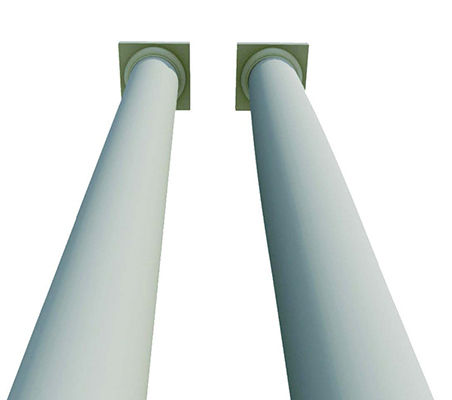
While scholars have tried to come up with mathematical formulas for the entasis taper, there is no evidence that the ancients crafted it in any way other than by eye. That’s the way I have always made columns: get the ratio right, then just turn a slight bulging taper. See the illustration above.
Greek Revival
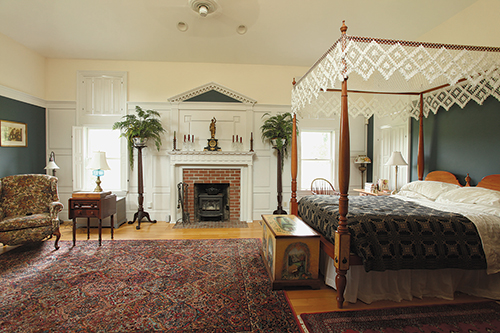
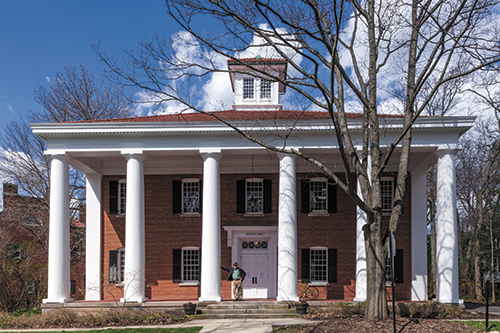
About the time of the founding of the U.S., Greek Revival architecture became the predominant style, especially in public buildings. It spoke to the egalitarian ideas of the new republic. Greek Revival looked back to the Greeks’ temples for its inspiration, so the facades of Greek Revival buildings are stylized temple fronts. Outside columns define the portico (from porticus, the same Latin root word that gives us “porch”) of a temple. Many churches and synagogues you can see today get their exterior look and feel from Greek Revival styling. The style was carried to the inside of buildings with things like fireplace surrounds also looking like temple ends.
So, what did Greek temple fronts look like? They, as well as Greek Revival buildings, often have massive columns of large diameter towering multiple stories. This is because a wood or stone column will buckle (bend sidewise) when the length exceeds 11 column diameters. Therefore, a column necessarily has to get bigger in diameter as the height increases. A 6′-diameter column can go to 66 feet without buckling. Of course, Greek columns taper, but the taper is quite slight, and the diameter stays hefty toward the bottom, where it counts. The most slender columns are about a 10:1 ratio.
Flutes, Astragals
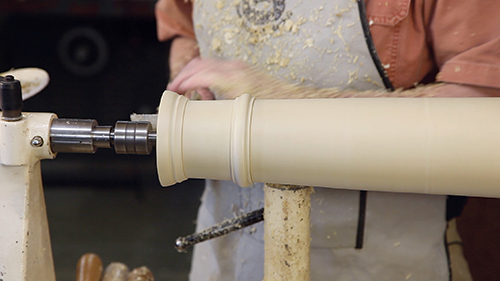
Most of the stone columns you see, whether classical Greek or modern, are fluted with about 20 flutes. In my observations of a lot of Greek Revival architecture, I have noticed that most wood columns are not fluted. However, if you want to flute a wood column, there are lots of router jigs that can be used in conjunction with your lathe to do the job handily. You simply use a core box bit of appropriate size.
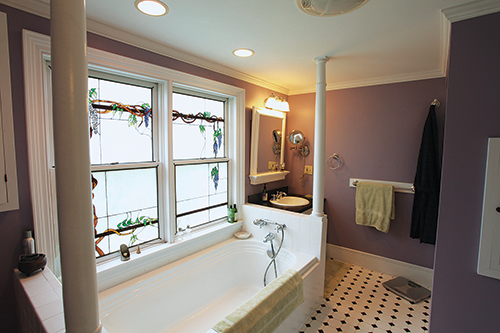
If you plan to turn a wooden column, you will also want to consider that most Doric columns and some of the other styles have a molding, called an astragal, just below the capital. The astragal molding is a raised band with a bead centered on it.
Grecian Column Orders
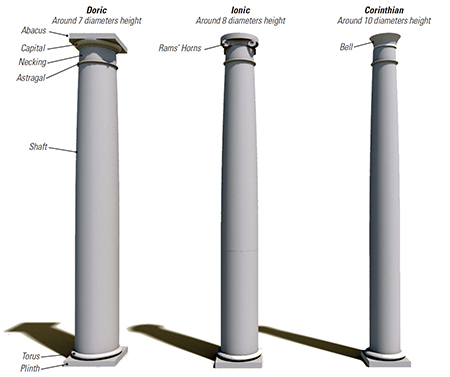
Each of these orders (classifications) is progressively more slender and graceful, but all are under 11 column diameters so they can bear loads up to the compressional limit of the material. The stubby proportions of the Doric column, at 7 diameters, lend themselves to furniture supports and the fern stand in this article. Ionic or Corinthian columns are better for engaged columns applied to furniture.
The diameter at the plinth and under the capital are also a ratio based on the height of the column. For columns up to 15′ (all furniture columns), it is a top to bottom ratio of 5/6.
Most furniture columns are no more than three feet, so I am not afraid to adjust the ratio to make the taper look right. This is to say that 5/6 is a good starting point — but trust your eye and turn what looks good!
Doric Column Fern Stand
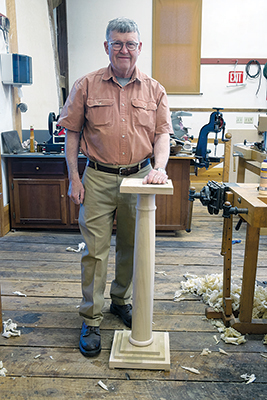
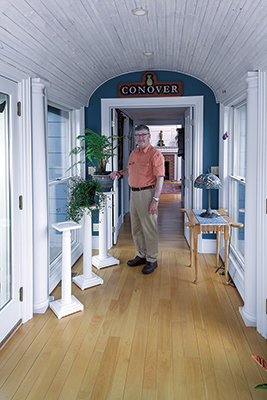
Speaking of turning wood, it’s time to get back to that fern stand I promised. As an exercise in turning columns, I thought we would make a fern stand which is useful to elevate anything from plants to artwork. The support is a 31″ Doric (it has a circular capital at the top) column with an astragal. The base is inspired by a temple portico with steps up to the column. The top is simply a square of wood, but you can scrape a pocket for the pot or artwork you want to elevate to make the elevated item less prone to gravity. You can often find a plastic tray at a garden store that you can scrape the recess to fit so that haphazard watering will not cause problems.
You will need to find an appropriately sized piece of wood: most functional Doric columns are at least 4″ in diameter. I turned the column for this fern stand to 4-1⁄2″.
Starting at about a third of the way down the column, I used a sharp roughing-out gouge to turn the bottom third to a nice, smooth finish.
Use a beading and parting tool and a set of calipers to establish the diameter just under the capital of about 3-3⁄4″. Make sure you plan for the astragal during your layout, because it is hard to put wood back if you turn to the final taper from the get-go.
You’ll then remove the wood between the astragal and the capital; this area is called the necking.
If this is your first column, it may be useful to draw it full-size first to get the taper right. A piece of shelf paper is great for this task. Draw a centerline, followed by the base diameter of 4-1⁄2″ and the diameter under the capital of 3-3⁄4″. Now carry the 4-1⁄2″ to the top. From one-third the height, draw a diagonal line to the capital. Draw the entasis by flexing a thin strip of wood between the 10″ height and the 3-3⁄4″ line just under the capital. The entasis must always lie between the two straight lines. Find points to take caliper measurements in the Drawings. Once you have more experience making columns, you can do this by eye.
Remove wood to create your desired taper, then move to skew work.
The astragal for this fern stand is a 1/2″ bead with a shoulder on each side. Use the beading and parting tool to bring the shoulder down to just proud of the column. Make sure your shoulders are the same height on both sides. Then turn the bead with a spindle gouge.
I also turned the capital with a molding at its bottom edge.
The torus is a disk of wood with a half-round bead faceplate turned on the edge.
To create the base, I glued pieces together to form the steps. I used four 1/4″ x 1″ x 1″ blocks to create feet for underneath the base.
To assemble the base, the easiest way is to drill a center hole in each piece and use a dowel to center everything during glue-up.
The fern stand is best painted. Greek columns are all about form, and paint better carries that message. Have fun and trust your eyes while experimenting with the column, an ancient — but still relevant — form.
Click Here to download a PDF of the related drawings.


