
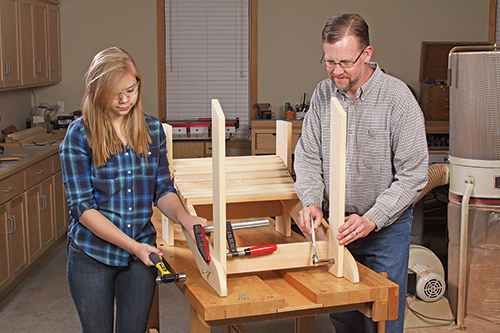
There’s nothing quite like an Adirondack chair to while away some lazy time outside on a summer day. Its countoured back and seat make this chair comfortable to sit in but still very easy to make. With some help, my 15-year-old built this chair in just two long shop days.
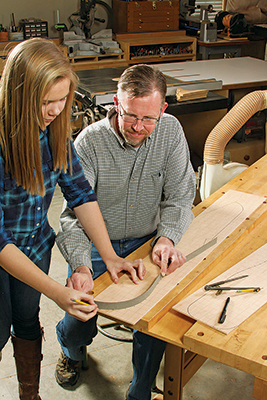
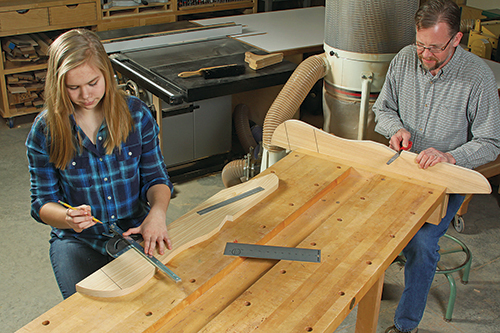
The trick to tackling the curved seat frame and armrest shapes is to start by making a pair of plywood or hardboard templates. They’ll help you trace and duplicate pairs of matching chair parts, and you can save the templates for re-use. Make the template patterns by first drawing a 1″ x 1″ grid on your template pieces, then lay out the shapes with dots that match the gridded drawings on page 58. Draw the shapes, dot-to-dot style, cut them out and sand the templates to refine their edges. They’re worth the fuss!
Making the Seat Framework
Adirondack chairs often weather all four seasons outside, so it makes sense to build them from outdoor-tough wood. Cypress is readily available in our area, and it’s an excellent option because it both resists rot and repels wood-boring insects. Other good alternatives are cedar, redwood, mahogany, white oak or teak. You could even build your chair from ordinary pine lumber, but be sure to paint it. Pine won’t stand up well to Mother Nature unless it’s protected.
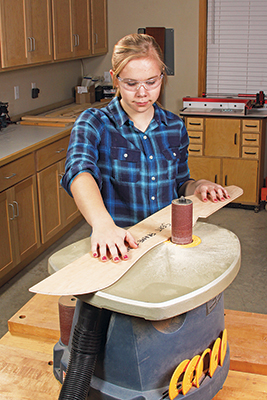
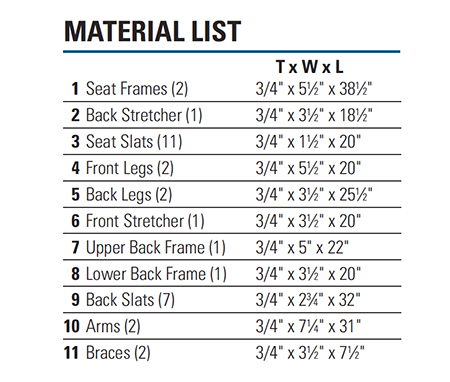
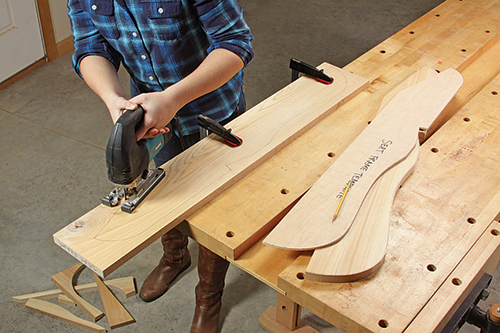
Regardless of which wood you choose, gather enough 3/4″-thick stock for all of the chair parts, according to the Material List. Trace the two seat frame pieces with your template, and cut them just outside the layout lines with a jigsaw. Template-rout the seat frames to final shape, either at the router table or with a handheld router. Then remove the template, and clean off any sticky tape residue with acetone or mineral spirits. File the lower back frame notches to change them from a tight curve (where the router bit won’t reach) to a square corner instead.
Now, mark the outside faces of the seat boards with pairs of angled lines to set the front leg locations, while the parts can still be laid flat. The front edge of the front leg is 4″ from the seat frame’s front end (see Drawing).
Rip and crosscut the back stretcher and the 11 seat slats to size. Use a 1/4″-radius roundover bit in your router or router table to remove the top edges, ends and corners of the seat slats. This will be a big help in reducing splinters!
Time for some assembly. Fasten the back stretcher between the seat frames, 6-3/4″ in from their back ends, and attach the frontmost seat slat to hold the seat frame assembly together. Use 2″ screws driven into counterbored pilot holes to assemble these parts. (Note: We chose to counterbore all of the screw holes in order to fill them with wood plugs, later, to hide the screw heads.) Install the remaining 10 seat slats, spacing them about 3/8″ apart. Here’s a tip: 3/8″-diameter dowels set between the slats make handy spacers.
With the seat framework completed, cut the front and back legs to size, as well as the front stretcher, then miter cut the top ends of the back legs to a 33° angle.
Fasten the front stretcher between the front legs with counterbored screws so its top edge is 6-3/4″ up from the bottoms of the legs. Center the stretcher on the width of the legs. Now stand the front leg assembly on your bench, and fit the seat framework down between the legs, resting it on the front stretcher. Align the legs with the layout lines you drew previously on the seat frames, and clamp the parts together.
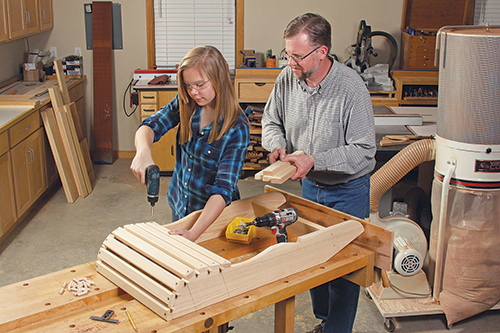
Lay out and drill a pair of 1/4″ pilot holes through each front leg and seat frame for 2″-long carriage bolts that will secure these parts. Tap the bolts into place, and use a washer, lock washer and nut to complete the front leg joints.
Install the back legs the same way and so the sharp tips at the tops of these two legs point inward toward the chair back. The back legs should butt against the back face of the back stretcher. Use single 2″ carriage bolts for these joints.
Template Routing
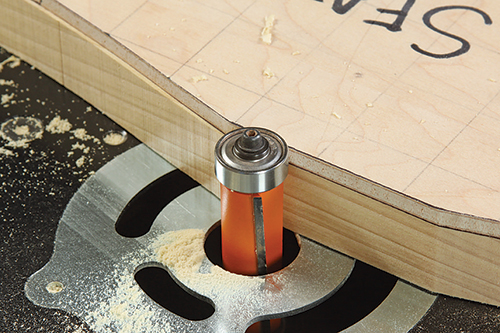
Template routing is one of woodworking’s primary ways of duplicating shapes, and it’s handy when you need to replicate parts with compound curves, like these seat frames. Use your rigid template to trace the shape onto your workpiece blank, then cut it out about 1/16″ outside of the traced lines. Adhere the template to the wood with carpet tape.
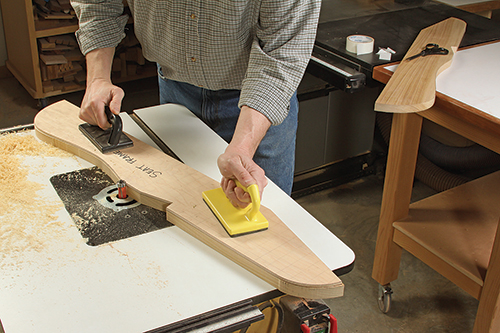
Now, the pilot bearing on the end of a flush trim bit can follow the shape of the template precisely while the cutter trims off the excess wood, producing a perfectly matched part. It’s a technique you can use often for all sorts of applications.
Adding the Back
Start building the chair back by ripping and crosscutting a pair of workpieces for the upper and lower back frames. For the upper back frame, use a compass to round its back corners with 2″ radii and the front corners with 1/2″ radii. Then draw a 23″-radius curve along the front edge, centered on the part length, with an adjustable trammel. The deepest sweep of this curve should be 2-1/2″. Draw a broad curve along the front of the lower back frame, too, but reset the trammel for a 15-1/2″-radius instead. The curve should be 1-1/2″ deep in the middle.
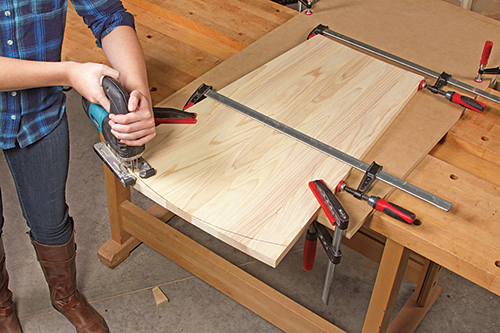
Cut all the back frame curves with a jigsaw, and sand the edges and faces smooth. With that done, attach the upper and lower back frames to the chair with counterbored 2″ screws. Align the front curved edge of the upper back frame piece with the front inside corners of the back legs, and center it side to side before driving the screws.
Next, create a 32″-long tapered template for the back slats, starting with a piece of 2-3/4″-wide template material. Reduce this width to 2″ at the template’s bottom end. Once it’s made, trace the template onto seven back slat blanks, and jigsaw the slats to rough shape. Template-rout them to final size, just as you did for the seat frames.
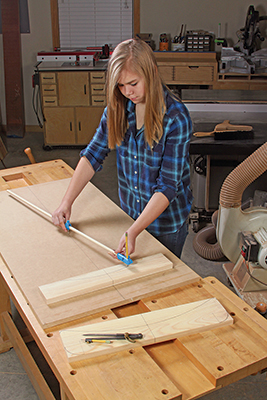
The top ends of the slats need to be shaped into a gentle, 21″-radius curve. So, arrange and clamp them together on your workbench, and draw the top curve with the trammel. Now, mark their bottom ends with a straight line that’s aligned with the bottom edge of the center slat. Trim the bottom ends of the slats along this straight layout line, and cut the top curve to shape. Sand the ends smooth. At this point, take a few minutes to remove all the sharp edges and ends from the slats with a 1/4″ roundover bit in your router. Sand the roundovers to blend them in.
To attach the back slats to the chair, start with the middle slat. Center it in the curves of the upper and lower back frames, and align its bottom edge flush with the bottom face of the lower back frame. (We found it helpful to clamp a board to the bottom face of the lower back frame to serve as a “shelf” and alignment aid for all the back slats.) Attach the slat with a single counterbored screw to the upper and lower frames.
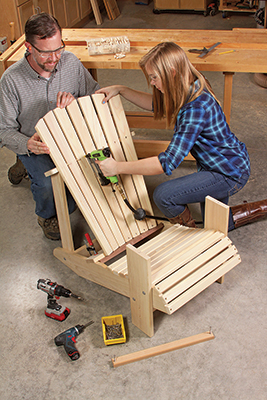
Go ahead and position the rest of the back slats. Space them 3/8″ apart at the upper back frame but only about 1/8″ apart at the lower back frame. We tacked the slats in place with a 23-gauge pin nail at each joint to hold them temporarily (18-gauge brad nails would be fine, too). Tacking provides a helpful “third” hand, especially if you don’t have a daughter to help you. Mark the slats for screws and drive them in, two screws per slat. You might want to remove the rearmost seat slat for this, in order to gain better access for driving the bottom slat screws.
Making Wood Plugs
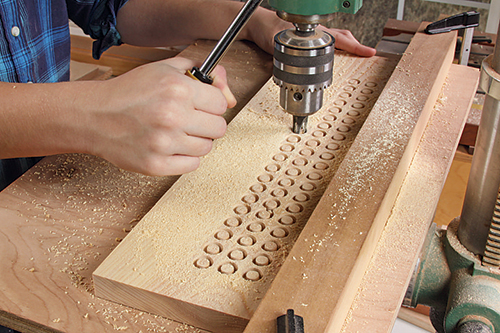
Wood plugs are the best way to hide screw heads. They won’t shrink and fall out like wood putty can, and when made from scraps of the project’s wood, plugs make screw locations nearly vanish, even under a clear finish.
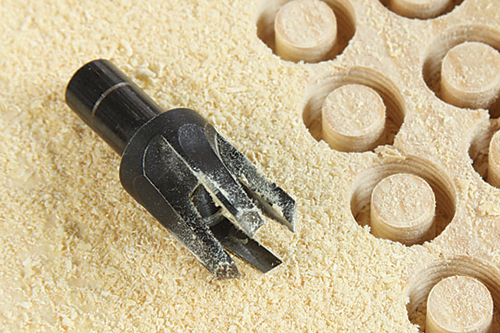
A steel, tapered plug cutter creates them quickly and easily on a drill press. Once the plugs are bored into a piece of scrap wood, break them free with a screwdriver. Then push or tap the tapered end into the screw-head hole with a dab of glue.
Making and Installing the Arms
All that’s left to do on your chair is to make and install the arms and their supportive braces. Use your arm template to trace two arm shapes onto wide stock, and cut them out. Template-rout them to final size.
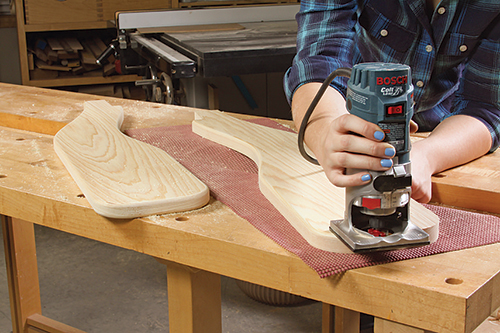
Ease the sharp edges around the arms with a router and roundover bit, but keep the edges where the arms notch around the back legs. Sand the arms and their roundovers smooth.
You’re ready to position the arms on the legs. Align their bottom faces to a layout line on the back legs drawn 20″ up from their bottoms. The inside edges of the arms should overhang the inside faces of the front legs by 3/4″ to 1″.
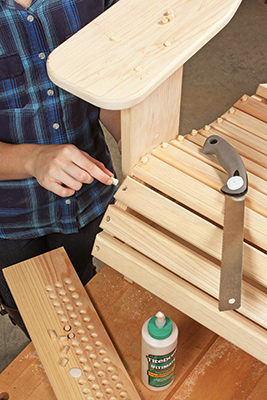
Drive two counterbored 2″ screws down through the arms and into the front legs to attach them. Then, carefully drill across the notched back ends of the arms and through the back legs with a long 1/4″ bit. Center a single hole on the lengths of the arm notches. Tap a 3-1/2″ carriage bolt through it, and secure with a washer, lock washer and a nut.
Now add a pear-shaped brace beneath each arm. Make these, starting with a plywood template to establish the shape. Once you’ve rounded over the edges and sanded them smooth, install the braces with three counterbored screws: one down through the arms and two through the legs, driven into the braces.
Consider an Eye-Catching Finish!
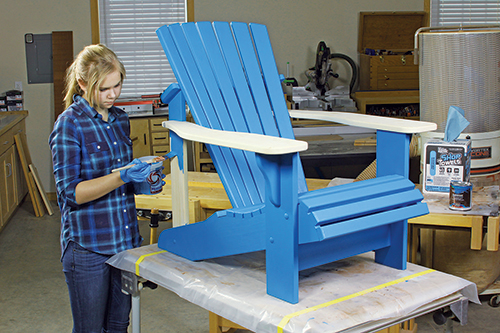
Plug all the screw holes, and finish the chair with exterior paint or stain. Adirondack chairs are often painted white or in vibrant primary and pastel colors. If you’ve used an exterior-tough wood, you could also just leave the wood bare and it will weather to a silvery gray color.


