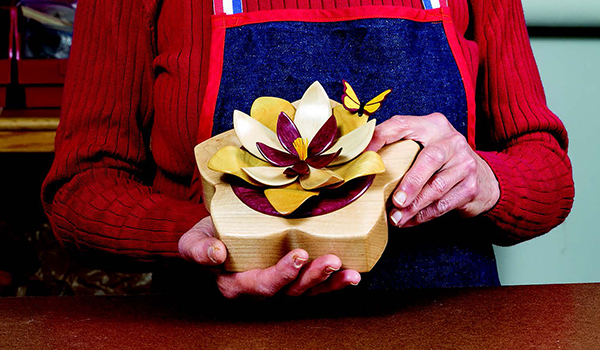
Looking for something fresh and different, I decided on a box with a floral decoration that would rival any found on fancy cakes in bakery windows. I started by covering the hard maple blank for the box body with clear packing tape to reduce burning, and attached the pattern, aligning it with the grain.
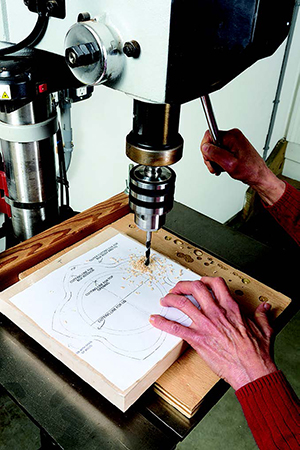
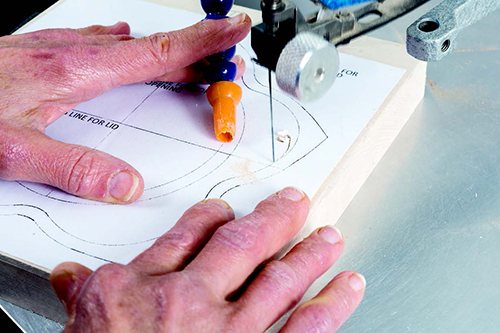
I drilled an entry hole inside the inner cutting line, inserted a #7 Polar blade, and cut out the center of the box. I removed the pattern from the center waste to save for the lid and lid liner.
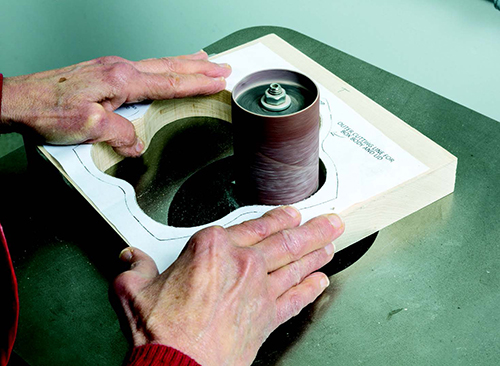
I smoothed the cut area with my spindle sander, and hand sanded the lower edge to remove “fuzzies.” I glued the body to the wood for the bottom, and clamped it in a press. After 10 minutes, I removed the piece, cleaned up squeeze-out, and re-clamped it. When dry, I cut the box perimeter.
Next, I attached a copy of the box pattern to the wood for the top, aligning it as for the box body. I drilled a hole inside the smallest circle, inserted a #3 blade, and cut the opening.
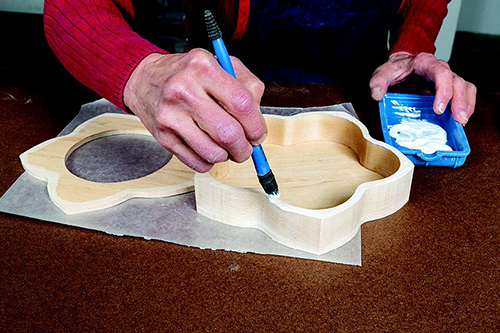
I then cut the outer profile. To smooth the piece, I used both spindle and detail sanders. I brushed a sealer coat of shellac on the box interior and lid underside, avoiding gluing surfaces, and sanded the pieces smooth when dry. I then glued on the top and clamped the assembly until dry.
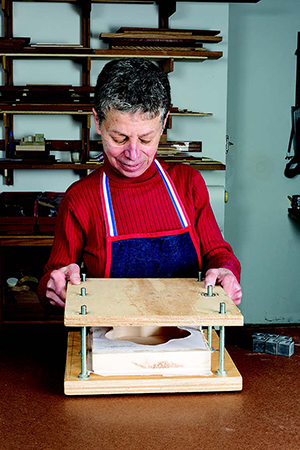
To rough-sand the sides of the box, I used a 3/4″ spindle for the in-curving spaces and a belt sander for flatter areas.
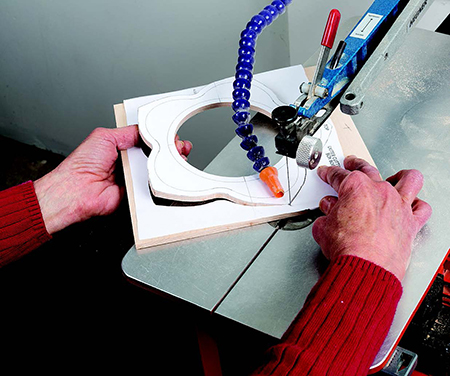
I then used a detail sander for the top, bottom and the flat sides of the petals, and a small pneumatic drum between the petals, working through the grits to 220.
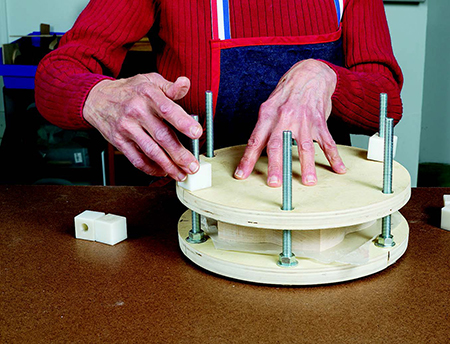
The same drum softened the box edges, and was followed by hand sanding. I applied a sealer coat of shellac to the outside of the box, then sanded smooth.
Making the Lid
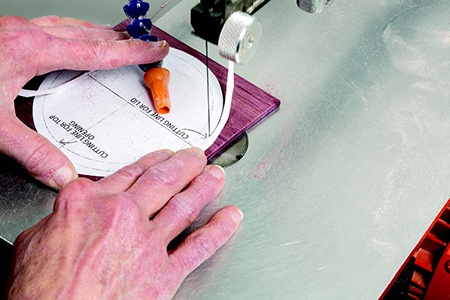
To make the lid, attach the reserved pattern to the purple heart and mark the center with an awl. Cut the perimeter with a #3 blade; remove and save the remainder of the pattern for the lid liner.
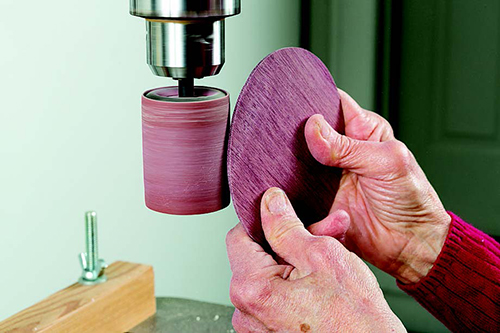
Sand the edges smooth with the belt sander, and use a pneumatic drum to curve the upper edge. I sanded both faces to 220-grit and softened the lower edge by hand.
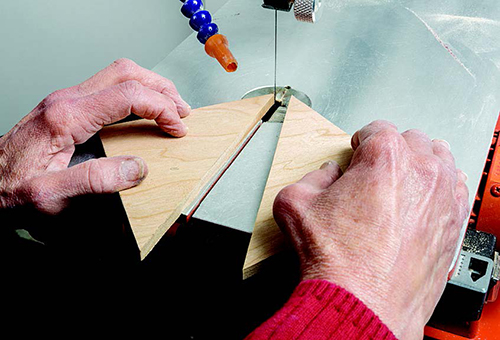
To minimize the tendency of very thin lids to cup, I made a thicker lid liner from two squares of wood cut into segments and re-glued so that all sides were either face or end grain. First, I cut each square on the diagonal, jointed the cut edges, inverted one half, and re-glued the pieces to create a chevron.
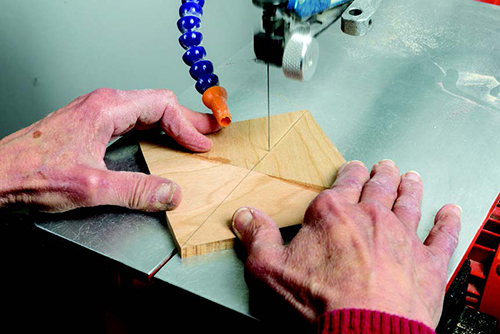
I cut each re-glued piece in half on the diagonal and exchanged halves so that when glued, each new blank would have either face grain or end grain on all edges. blank, cut the lid liner, and sanded the piece smooth. To check the fit, I attached a loop of tape to one side of the lid liner and held it in the top opening to check the clearance when rotated. I sanded any high spots lightly with the belt sander.
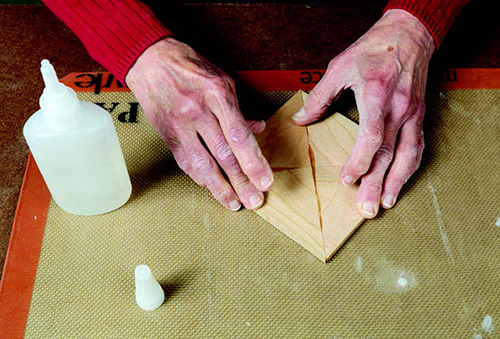
To position the liner so that the lid is centered, attach it to the underside of the lid with a loop of masking tape, and hold the pieces firmly together. Insert the lid into the box, grains aligned, and measure the distance from each indentation to the lid’s outer edge. If there are deviations, move the liner and remeasure. When the lid is centered, make alignment marks on the lid and liner, and separate them.
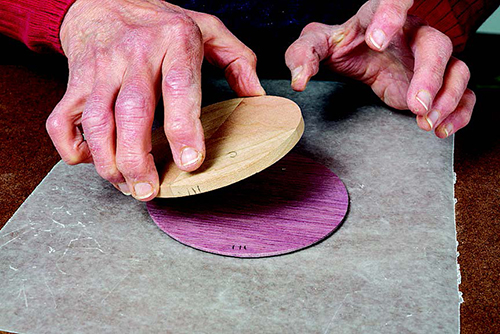
I applied drops of Nexabond glue across the liner surface, placed it on the lid using the alignment marks, and held the pieces firmly until just set. I used a makeshift clamp to ensure a good bond, then let the pieces set fully. I masked a 2-1⁄2″ area in the center with blue painter’s tape and applied a sealer coat of shellac to both sides of the piece. When dry, the tape was removed and the lid sanded smooth.
Forming the Petals
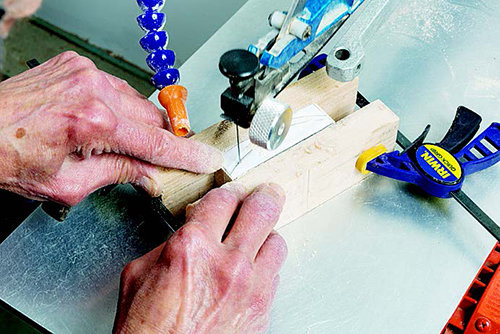
The contoured flower petals are what really bring this box to life. I attached each petal pattern to its corresponding blank, allowing for one extra of each type, and switched to a zero-clearance insert. For the yellowheart and aspen petals, I sandwiched the blank on edge between blocks of wood, using small clamps for stability, and cut the side profiles with a #7 Polar blade for the yellowheart and #5 for the aspen.
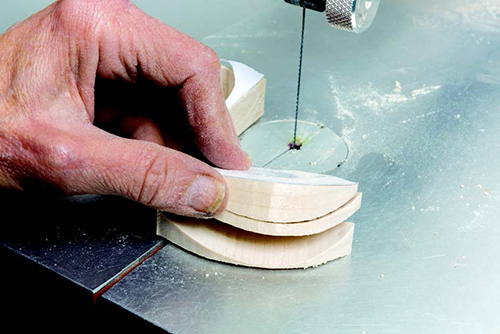
After cutting the sides, remove the blocks and tape the pieces together. Place the blank on its back, and cut the petal outline, then remove the petal from the blank. For the purpleheart petals, I used the #5 blade and clamps without support blocks, cutting two petals from each blank.
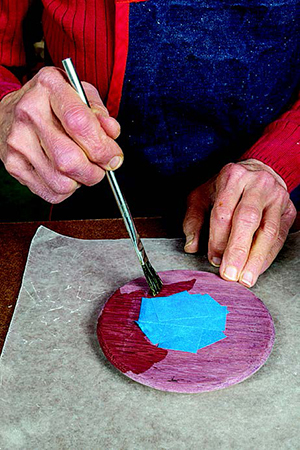
A belt sander worked well for smoothing the petal’s edges and flat surfaces, then my spindle sander for the curved areas. I sanded them to about 3/32″ thickness, and finished up with a small pneumatic drum and 220-grit sleeve, thinning the petal to about 1/16″, and rounding over the top edge. I masked the gluing surfaces and applied a sealer coat of shellac. When the petals were dry, I sanded the finish smooth.
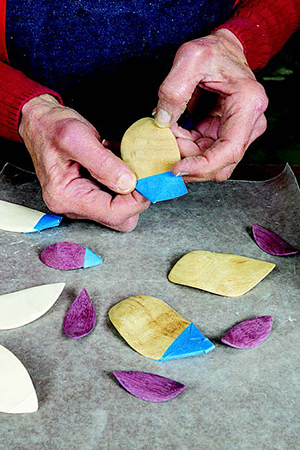
Before gluing on the yellowheart petals, I did a “dry run” by attaching a loop of masking tape to the underside of each petal and pressing it into place on the lid. The gluing area of each petal should be flat, the bottom tips should meet at the center, and their outer points should alternate with those of the box.
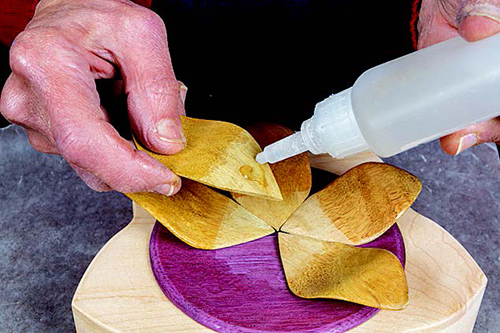
Sand the bottoms and sides of the petals as needed. Glue the petals on, one at a time, using Nexabond, and hold them firmly until set. Repeat this process with the aspen petals, placing them between the yellow heart petals, tips meeting at the center. Do not attach the purpleheart petals yet.
Making the Stamens
Clamp the lid to the drill press table and drill a 3/16″-deep hole at the center with a 1/4″ bit. Tape the purpleheart petals into place. Their tips will overlap the drilled hole. Mark the overlap, remove the petals, and sand the tips to meet the edge of the hole.
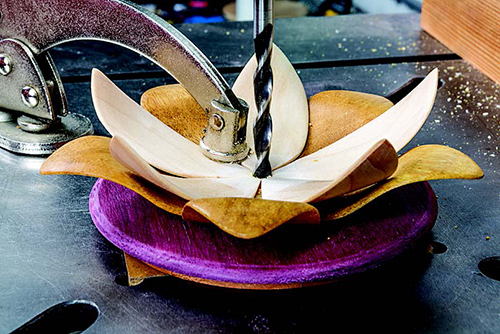
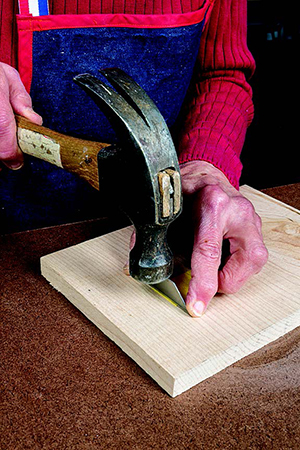
Reposition the petals and glue them into place. To make the stamens, place the strip of yellow veneer on scrap wood and use a razor knife blade to cut thin strips along the grain, tapping with a hammer to cut the strip. Cut about 25 stamens and gather them for a dry fit.
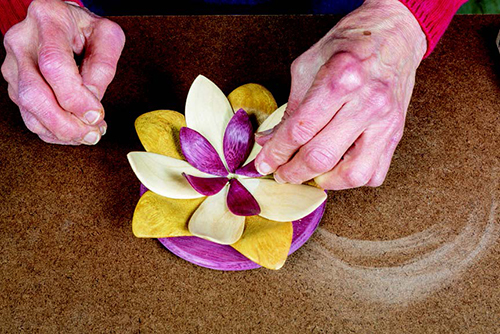
They should fill the hole and flare out slightly. Remove the stamens and hold them together at the top. Place two drops of Nexabond into the hole, push the stamens in firmly, and adjust them as you’d like. Use a tweezers to remove any that break. If you prefer, you can use commercial stamens made for cake decorators.
Making the Butterfly
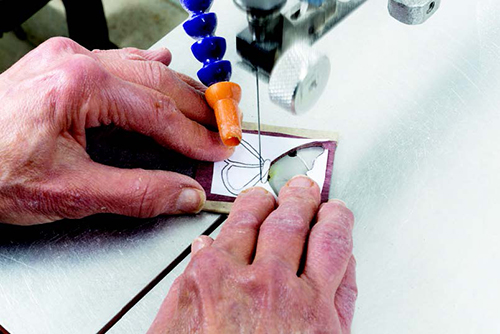
To make the butterfly, stack the two pieces of purpleheart together and secure their edges with masking tape. Attach the butterfly pattern and cut along the outside of each wing with a small blade. Select the best two pieces and sand their edges and faces. Tape the four pieces of yellow veneer in the same manner, but sandwich them between thin wood for stability. Attach the butterfly pattern and cut the inner wing pieces. Select the four best pieces of each shape and glue them to both sides of the wings. Sand the wings smooth and the gluing edges flat. Sand a slight bevel where the wing will attach to the body.
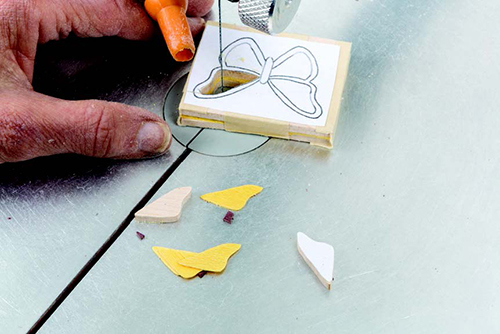
Now cut a 1/8″-wide strip from one long side of the ebony and cut the strip in half to make two bodies. Choose one, and flatten the sides and round the ends. Apply Nexabond to the beveled edge of one wing, using a toothpick to spread it evenly. Place the body on a nonstick surface, hold it firmly in place with a toothpick, and attach the wing.
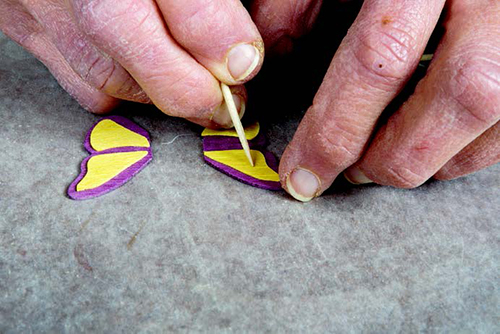
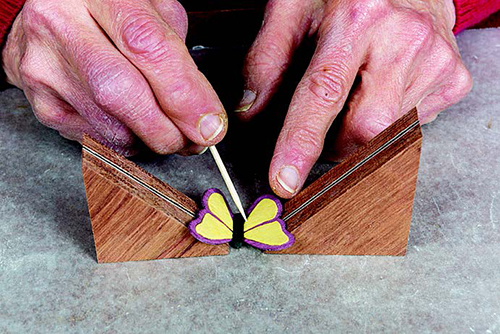
Use a small wedge to hold it at the desired angle until the glue is dry. Repeat with the other wing and let set until firm. Apply a coat of shellac to both sides of the wings and the top of the body. Decide where you want the butterfly to land and sand that area of the petal. Attach the butterfly with Nexabond and hold until set. Apply several coats of spray lacquer to the lid assembly and box exterior, rubbing between coats with 0000 steel wool as needed.
Now you have a nice-looking box that you can use for your own storage needs, or it will make a great gift. If all of your butterfly wings came out looking great when you were stack-cutting them, you can even let your fancy take flight into another project.
Click Here to download a PDF of the related drawings.


