What type of lathe should I buy?
As the author of several books on woodturning, the designer of a lathe (the Conover Lathe, no longer in production) and a founding board member of the American Association of Woodturners (I’m member #004), it might be an understatement to say that people frequently ask my advice about which lathe to buy or which lathe is the best. They always want a simple answer, like “Buy an Acme Model XJ4, as purchased by Wile E. Coyote in the Warner Brothers ‘Road Runner’ cartoons.”
It’s not that simple. What you need depends on your budget, space and turning goals. Do you want to do mostly spindle turning (creating a cylindrical object)? Or faceplate turning (using a metal disc, the faceplate, to attach wood to your lathe so you can turn an item that can’t be secured simultaneously on the headstock and tailstock)? Will turning be your principal woodworking pastime, or are you buying a lathe to augment your general woodworking?
Types of Lathes
Today, lathes come in three flavors: mini, midi and fullsize, each with strengths and weaknesses that make them more or less appropriate for certain kinds of turning tasks.
For example, mini lathes are great for turning pens, small items and miniatures. Midi lathes are more appropriate for creating furniture spindles and medium bowls. And full-size lathes can tackle any turning task.
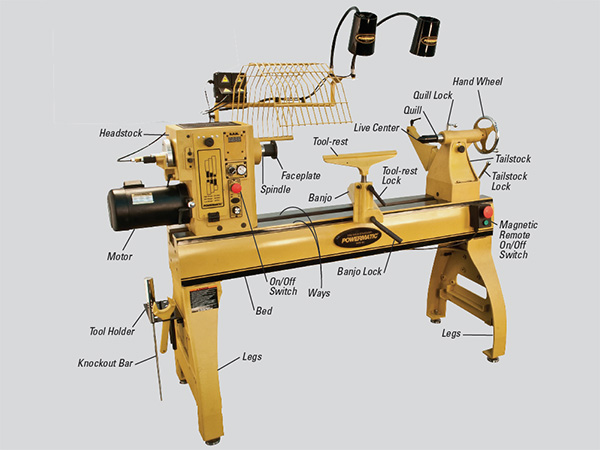
Modern lathes have a bed made from cast-iron or welded steel, the top of which sports a set of ways: two parallel strips of constant width and spacing on which the headstock, tailstock and banjo (tool base) are mounted. While the headstock is fixed at one end of the bed, the tailstock and banjo are free to slide on the ways to suit the turner’s application. Lathes come with at least one tool-rest, a drive center, a live center and a faceplate.
It is fair to note that increases in price usually mean improvements in usability. As you pay more, the machine gets heavier, with friendlier controls. For example, very low-cost lathes tend to have levers on the banjo that collide with each other, making adjustment difficult. Paying more gets you a tailstock, banjo and tool-rest that lock without undue force being necessary.
If you’re in the market for a lathe, let’s look at what else you should be looking for.
Choosing a Lathe: Capacities That Matter
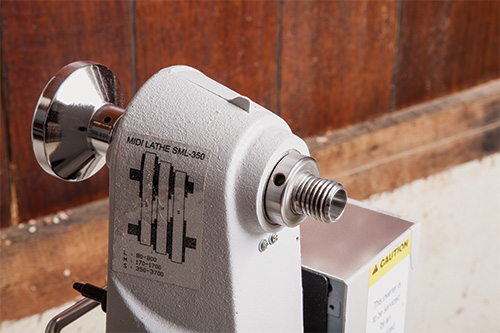
Spindle Diameter: All mini and midi lathes have a 1″ spindle with eight threads per inch. While this is more than adequate for turning furniture spindles and bowls up to about 12″ in diameter, it is not adequate for heavy faceplate work. That is because a 1″ spindle can flex between the headstock bearings with the high forces exerted during heavily laden faceplate work.
Therefore, most large lathes use either a 1-1/4″ or a 33 mm spindle (still with eight threads per inch). Converted to decimals, these spindle sizes are 1.250″ and 1.299″ — very close. What the .049″ difference does is to increase the rigidity over 1″ from 2.44 times to 2.85 times, because the stiffness of a round bar increases by a power of four as diameter increases. Small increases in diameter noticeably increase strength. Still, this is not enough difference to choose one spindle over the other.
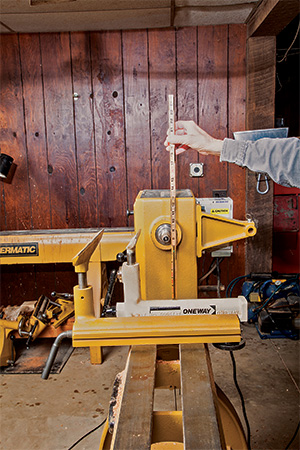
Swing: Manufacturers list the “swing” measurement as twice the center height — what the machine will swing over the bed. The true swing of a lathe, however, is center height over the banjo, because this base for the tool-rest has to be under all spindles and most faceplate work. Two lathes with the same swing could have different banjo heights. Many manufacturers do now list swing over banjo as well as over the bed, but it pays to check.
If your primary goal is to spindle turn furniture parts, you are unlikely to need to turn bigger than a 4″ diameter, so a 6″ swing over the banjo is more than adequate.
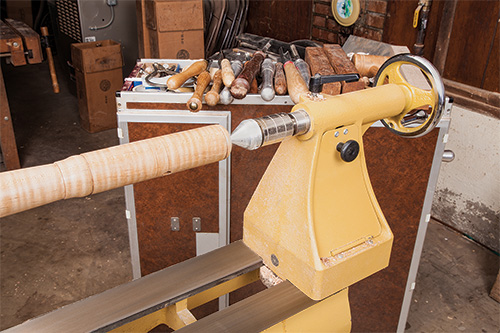
Center to Center Distance: Between center distance is often listed as the measurement that results when calculating the distance from the lathe’s spindle nose to its tailstock nose, with the tailstock flush with the end of the bed. You need to realize though, that the drive and live centers needed to hold a spindle while you’re turning lessen this distance considerably. Many manufacturers are now listing the true between-center distance with the lathe’s supplied centers.
That being said, most supplied centers on mini and midi lathes are inferior. This is especially true of the live center; upgrading to a better one will lessen the center to center distance by as much as 3″. In most cases, you can also gain back an inch or two of space by hanging the tailstock off the bed by this amount.
If your goal is to use your lathe in a home workshop to spindle turn furniture parts, you’ll need a lathe that has 29″ to 36″ between centers.
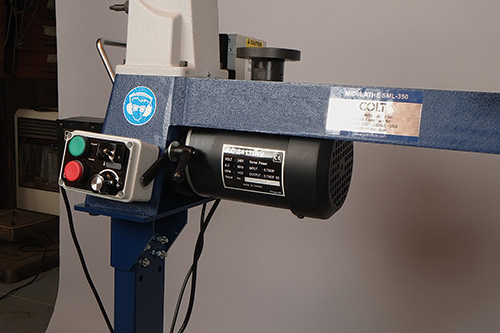
Power and Speed Controller: Electric motor power ratings are often overstated. Generally, multiplying most mini and midi lathes’ stated power by about .75 will get you a lot closer to the actual power. The reason for this is that the maximum horsepower rating can only be maintained for a few seconds before the motor burns up. What really counts is the continuous rating.
The Europeans list motor power in kilowatts, a much fairer value of the continuous, or true, power. Since there are 745.7 watts in a horsepower, it is easy to figure out the horsepower from a kilowatt rating.
Mini lathes come with a 1/2hp motor, which is probably closer to 1/3hp but is more than adequate for this size lathe. Midi lathes typically are outfitted with a 1hp motor, but this delivers closer to 3/4hp at the spindle. The fact that almost all variable-speed mini and midi lathes have a DC (direct current) motor and controller contributes to this. Again, this is generally sufficient for home workshop and small furniture shop needs.
Modern full-size lathes have a minimum of a 1-1/2hp three-phase induction motor linked with a variable frequency drive (VFD). A VFD takes your single phase 60 hertz house current and converts it to three-phase current at any cycle rate between 2 and 60 hertz. Since the speed of an induction motor is controlled by the phase rate of the current, this allows accurate speed control with negligible loss in power at low speeds. DC motors and controllers, in contrast, have a more pronounced power drop-off at low speeds.
VFDs also allow a remote switch to be attached to the controller. This allows a second set of stop and start switches to be magnetically attached anywhere the turner deems convenient. This is both a nice convenience and a safety factor.
All 2hp and larger motors will require a 220-volt outlet. All mini and midi lathes will run on 120 volts.
Weight: When it comes to lathes, weight is considered advantageous. Vibration is inversely proportional to weight, so heavy cast-iron machines tend to soak up vibration. In the last 20 years, however, machines made from welded steel — especially the bed — have come to the forefront. If designed properly, the welds act like a crack in a wine glass and stop vibration.
Three Lathe Classes
As I mentioned earlier, today there is a broad offering of mini, midi and full-size lathes. Let us take a look at each of the categories in turn.
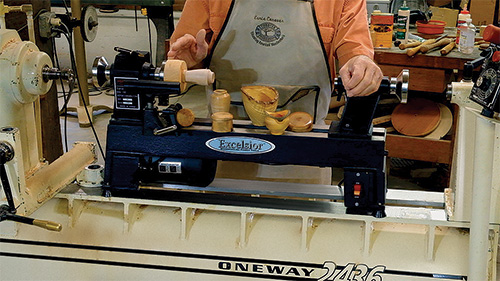
Mini Lathes: During the last decade of the 20th century, a number of manufacturers brought out small bench lathes with a short bed. Aimed at the rising tide of pen turners (the first pen kits came out in 1987), they were dubbed “mini lathes.” These small lathes found great popularity with model makers, teenagers and those just wanting to try turning without spending a fortune. Mini lathes typically have a 1″ – 8 spindle, 8″ to 10″ swings and 12″ to 15″ between centers.
The cheapest mini lathes only have four or five pulley steps for speed control; better ones have a DC motor and controller. While the only furniture part you can turn on the average mini is a knob, bed extensions are available for many of them. With a bed extension, a mini can be morphed into a bench lathe usable for most furniture work. If you just want to try turning, a mini can be a great first stepping stone to a great hobby. Likewise, it is a sensible choice if you have a child that wants to turn or if your ambitions are strictly pens and miniatures.
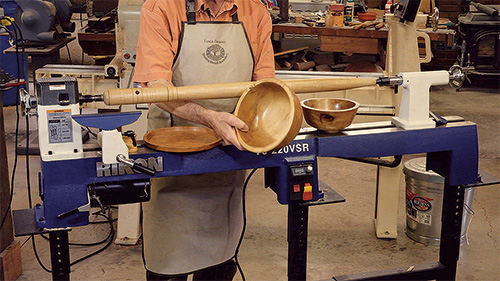
Midi Lathes: During the first 10 years of this century, many manufacturers beefed up the bed of their mini lathes and raised the 1″ – 8 spindle height to yield a 12″ or better swing. The delineation of mini being 10″ or smaller and midi being 12″ and bigger is now part of the popular lexicon. A midi lathe would be Goldilocks’ pick: not too big, not too small, enough center to center distance with a bed extension, adequate variable speed power and a reasonable cost. A recent trend is to also step the banjo and tool-rests up to 1″, which adds rigidity and allows swapping of tool-rests with bigger machines.
Midi lathes are, in fact, pretty much the standard workshop bench lathes of my youth with variable speed in almost all cases. Happily, almost all companies offer stands as well.
Typically, adding one extension increases the nose-to-nose distance between the spindles to between 36″ and 45″. A midi lathe is a great choice for furniture builders but is still great for pens and miniatures. You can turn tiny things on a big lathe, but not vice versa. Midis are also very adequate for bowl turning (if this is your goal, forget the bed extension). The 1″ – 8 spindle and power does limit the midi to light faceplate work: you can only turn bowls up to about 12″ in diameter.
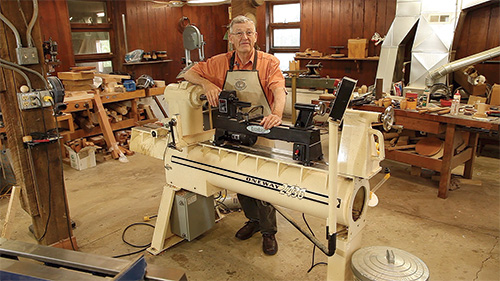
Full-Size Lathes: The really big lathes in this category once catered to millwork shops and pattern makers, but today they are the choice of serious hobby turners, especially bowl turners. Most full-size lathes now sport modular beds that can be extended for very long work with swings over the bed as large as 24″.
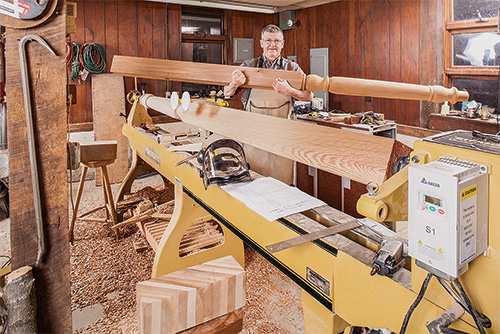
This means they can turn anything from porch posts to huge bowls. All have a minimum of 1.5hp motors, but most sport 2hp, with 3hp being an optional upgrade. Industry standard is now VFD speed control. Full-size lathes can do it all.
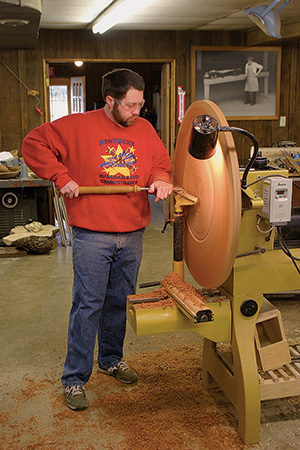
Most of the full-size lathes now have the ability to slide the headstock close to the end of the bed, turning them into “bowl lathes.” The idea is to make the bed shorter, allowing the woodturner to stand where the headstock would normally be, giving them great access and leverage during turning. If you turn a lot of bowls, especially big ones, the advantage of this setup cannot be overstated. (Another solution is the ability to turn the headstock nose about 45˚. This allows slightly more faceplate swing and much better access during faceplate work, but it is not as good as a true bowl lathe.)
Setting Up Your Lathe
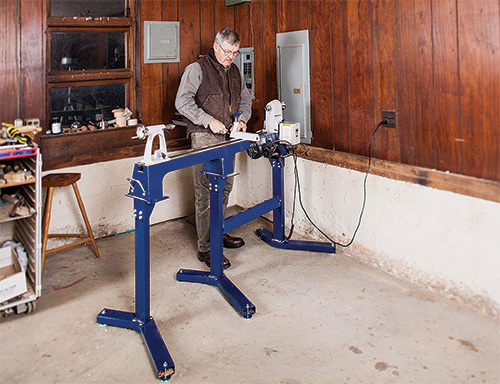
Once you’ve brought your new lathe home, it’s time to set it up. If it’s a mini lathe, one of the attractions for the small shop owner is that you can store it under a bench when not in use. When it comes to use, however, you will find the lathe works better if you affix it to the bench in some way. C-clamping each end or grabbing each end in the dogs of a workbench are great options. If you cannot clamp directly to the lathe, bolting the lathe to a 3/4″ piece of plywood that can then be clamped to the bench is a workaround.
When it comes to larger lathes, most shop owners place them against the wall. This may be all right for spindle work, but it limits faceplate work. I think it’s better to place a lathe away from, or at least at right angles to, a wall. You will need about 24″ of clearance between the headstock and the wall to accommodate the knockout bar.
Leveling Your Lathe
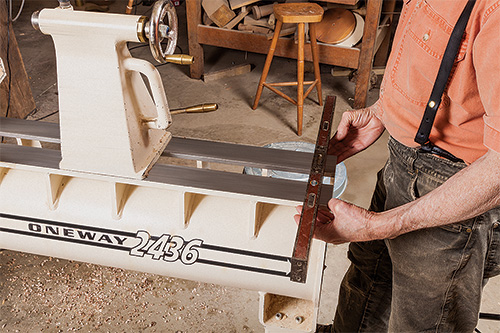
Proper leveling is probably one of the most overlooked factors in setting up a lathe. It should be level along the length of the ways and across the ways at each end. Across at each end is most important, because different states of level at each end of the lathe may introduce a twist into the bed (often the reason centers don’t align properly). A good builder’s level is a sufficient tool for this task. Simply adjust the leveling screws in the lathe’s stand or legs so that the ways are level end to end. Now, alternately place the level across the ways just in front of the headstock and at the opposite end, and adjust the screws until each end is dead level. It is best if you do not have to move the lathe after leveling.
Budgeting for Tools
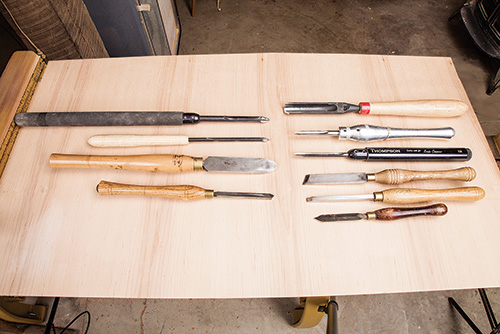
When buying a lathe, you also need to budget for tool sharpening systems and tools — which tools depends on your woodturning goals. (Mini lathe users can get by with cheaper miniature tools.) I’ve compiled my recommendations for tools for both spindle and faceplate turning into a spreadsheet, available online.
I prefer to buy turning tools ad hoc, rather than in sets, which can include tools you will never use or workhorse tools in the wrong size. Avoid bargain basement carbon steel sets and, unless your turning ambitions are very modest, avoid carbide tools. Here’s why: If you just want to turn a few projects, they’re an economical choice because you will not have to buy a grinder and the jigs necessary to sharpen conventional tools. On the other hand, they’ll never leave the crisp edges, glassy surfaces or refined beads in spindle work that properly sharpened conventional tools will.
I suggest buying tools made from high-speed steel, or from powdered metal, which offers even more edge holding time between sharpening.
Yes, you will have to sharpen your tools, using a bench grinder to grind them to the proper shape. (They seldom come that way.) Buy as good a grinder as you can afford, such as a slow-speed grinder that comes with aluminum oxide wheels. A buffer is great for honing spindle tools after grinding.
Safety Equipment
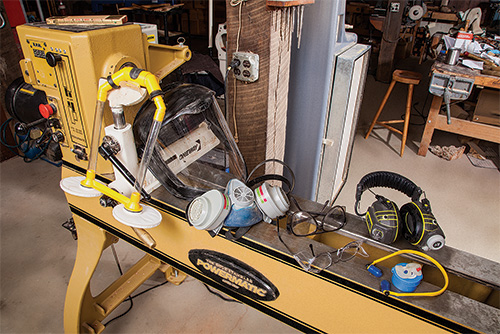
You’ll also need to consider safety equipment and safe practices. Minimum eye protection for turning is eyeglasses, with side shields, that meet ANSI Z87.1 standards. If you wear prescription glasses, your optometrist can make you a pair that meet the Z87.1 standards, or you can wear clear glasses that meet the standard over your prescription glasses. An even better option is to wear a face shield that meets the Z87.1 standard — most actually exceed it.
Hearing protection during most turning is wise. Roughing out work, as you start your project and quickly remove material from your eventual bowl or a spindle, can emit sound over 80 decibels as the tool is alternately cutting wood and air.
Dust protection is most problematic around lathes, so anything that can be done to suck up dust before it gets into your lungs is good. You can put the hose from a HEPA vacuum near where you’re working to capture a lot of the dust. Back up this dust collection option by wearing an automotive type dust mask or, even better, a respirator.
And, when it comes to turning on your lathe, don’t be a speed demon. Faceplate work never needs to exceed 1,200 rpm, with 150 to 800 rpm for initial roughing.
Spindles up to 2″ need an initial speed between 500 and 1,400 rpm, depending on the skill and experience of the turner.
All this is to say that the lathe is just the tip of the iceberg. The best of lathes is useless without equally good tools. Many give up on turning because they never properly shaped and sharpened the tools, so a proper grinder and jigs are a necessity. I know a few turners who had to quit because they inhaled too much dust. Look at the total package, and not just the lathe.


