Make a Northwoods Canoe Paddle

Make a Northwoods Canoe Paddle

Learn to make a traditional solid wood canoe paddle, a tool that travelers in these parts have been making and using for hundreds of years.

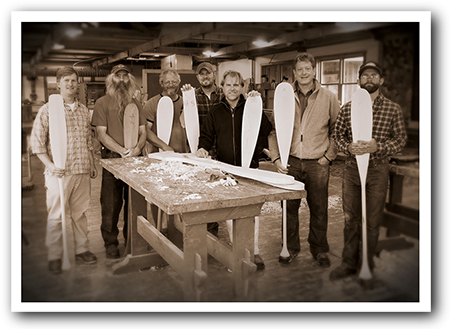
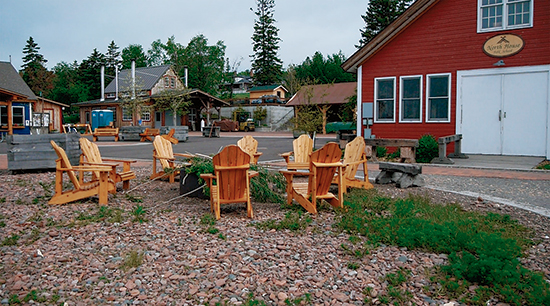
There’s a special place on the shore of Lake Superior, in Grand Marais, Minnesota, that combines the loves of handmade crafts, the outdoors and northern traditions. That place is the North House Folk School, a school that offers classes about such varied topics as woodworking, pottery, blacksmithing, traditional outdoor skills, boat making and cooking. I recently spent a couple of days there when the activities on campus included basket weaving, sausage making, canoe building and, in my case, making a paddle

north-house-folk-school

I can explain the basic process of making a paddle and share the plans with you, but I don’t think I’ll do the experience justice. You can learn to make most projects with a good set of plans and instructions, but the benefits of attending a class at a school like North House are meeting and working with other people that share your enthusiasm and the insights you gain from the instructor. Mike Schelmeske, a resident of Grand Marais who has been making paddles and other hand tools for over 30 years, taught my class. He’s made nearly 200 paddles and helped others make another 200.

VIDEO: Paddle Making at North House Folk School

Choosing the Wood

Contrary to many assumptions, a paddle does not have to be made from moisture-resistant wood. As long as you apply a finish and hang your paddle to dry thoroughly after each use, you can make a paddle out of just about any wood. The best wood species for paddles are both strong and lightweight.

Mike’s go-to choice is basswood. Other popular options include white cedar and Alaskan yellow cedar. These woods tend to have less character to their grains, but they are light- weight and easy to shape. If you’d like something with more interesting character, then you might choose a hardwood, such as ash, black cherry or walnut, but these woods will be heavier. Another consideration to keep in mind is that more interesting grain patterns tend to be more challenging to plane. Whatever species you choose, start with a piece that is 5/4″ thick by at least 7″ wide by roughly 60″ long (the length depends on the intended paddler’s height; see photo, page 46). It’s also best to select a board that has a symmetrical growth ring pattern.

Design

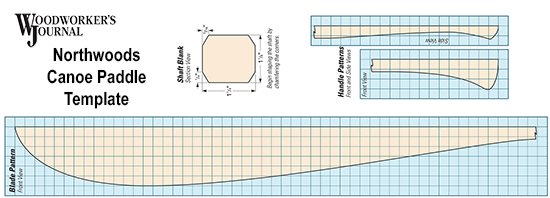
There are countless variations of paddle designs. Mike had a selection of several templates that he has collected over the years. He was even kind enough to share his 26″ Northwoods beavertail style blade and handle templates for you to use (see Drawings). We made a traditional solid wood paddle, but you can also laminate multiple pieces together and use the same templates and techniques to make a laminated paddle. Keep in mind that using multiple wood species and grain directions in the same paddle blank may create hand planing challenges.

Download Canoe Paddle Template PDF
canoe-paddle-template-2


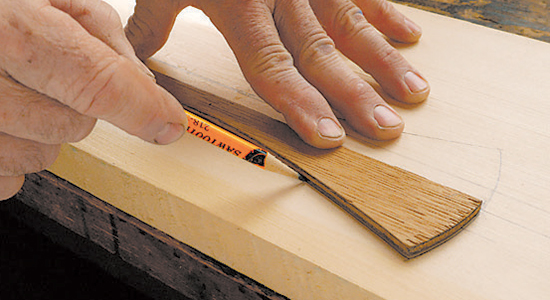
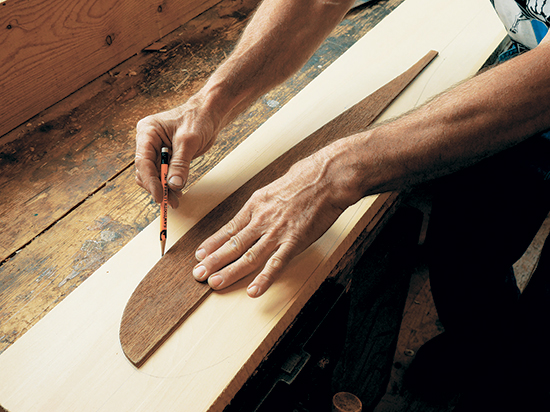
Mark the center of the board’s growth ring pattern on the end of the board. Then draw a centerline on the wide face. Determine how long your paddle will be and mark the top and bottom ends of the paddle on the centerline. Then trace the blade and handle (inset photo) patterns on both sides of the centerline. Measure 9/16" out on either side of the centerline and draw lines to designate the 11⁄8"-thick shaft between the blade and handle. Next, use a band saw to cut out the paddle shape.
Mark the center of the board’s growth ring pattern on the end of the board. Then draw a centerline on the wide face. Determine how long your paddle will be and mark the top and bottom ends of the paddle on the centerline. Then trace the blade and handle (inset photo) patterns on both sides of the centerline. Measure 9/16″ out on either side of the centerline and draw lines to designate the 11⁄8″-thick shaft between the blade and handle. Next, use a band saw to cut out the paddle shape.


Mark the center of the board’s growth ring pattern on the end of the board. Then draw a centerline on the wide face. Determine how long your paddle will be and mark the top and bottom ends of the paddle on the centerline. Then trace the blade and handle patterns on both sides of the centerline. Measure 9/16" out on either side of the centerline and draw lines to designate the 11⁄8"-thick shaft between the blade and handle. Next, use a band saw to cut out the paddle shape.
Mark the center of the board’s growth ring pattern on the end of the board. Then draw a centerline on the wide face. Determine how long your paddle will be and mark the top and bottom ends of the paddle on the centerline. Then trace the blade and handle patterns on both sides of the centerline. Measure 9/16″ out on either side of the centerline and draw lines to designate the 11⁄8″-thick shaft between the blade and handle. Next, use a band saw to cut out the paddle shape.
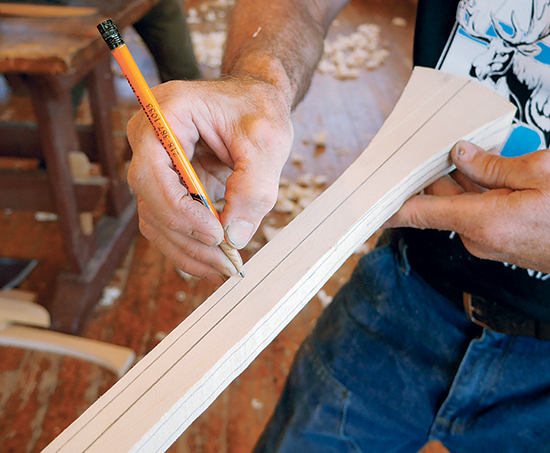
Mark lines along the length of the shaft that are 1/4" in from each edge on the top and bottom faces. Then mark lines 5/16" in from each edge on the side faces. These lines designate the radius of the shaft edges.
Mark lines along the length of the shaft that are 1/4″ in from each edge on the top and bottom faces. Then mark lines 5/16″ in from each edge on the side faces. These lines designate the radius of the shaft edges.
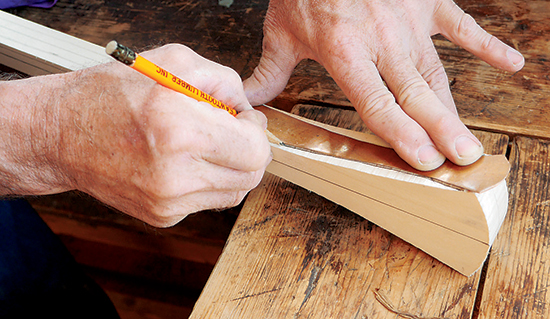
Trace the Side View template onto the side of the handle. Notice that the top of the template extends beyond the corner of the handle so that it aligns with the longest point at the handle’s centerline.

Shaping

The steps to make a paddle are fairly easy to follow (see below). As the 
old woodcarver’s joke goes, you simply start with a piece of stock and remove all the wood that doesn’t look like a paddle. Depending on your ability with a hand plane, making your first paddle will take the better part of a weekend. You can speed up the initial blade planing process with a power planer, but the rest of the shaping is best done with hand planes, a spokeshave and maybe a carving or crooked knife.

The goal is to remove as much material as you can without compromising strength. The most common mistake for participants in my class was actually being too cautious and not removing enough material. Unfortunately, knowing when to stop removing material is something that comes with experience — another reason attending a class with a seasoned instructor was helpful.

Step-by-Step:
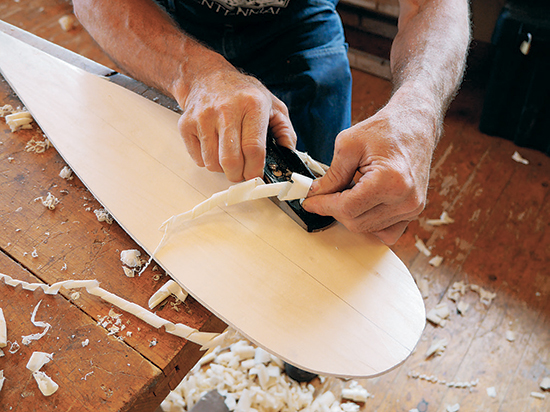
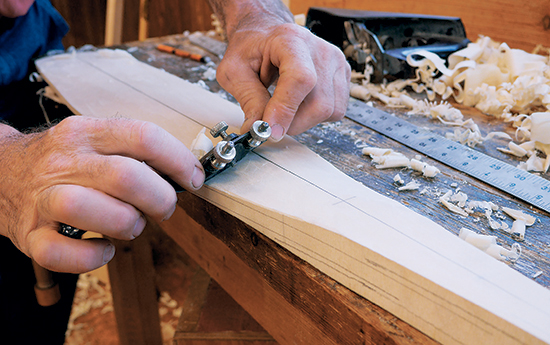
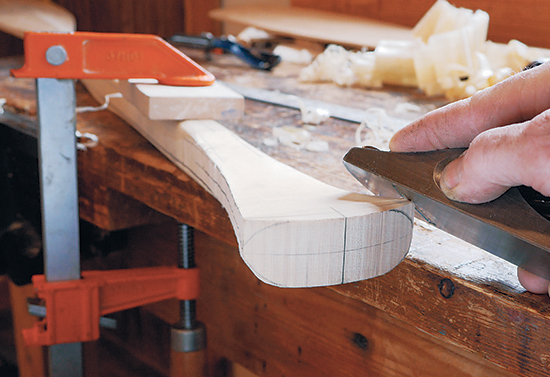
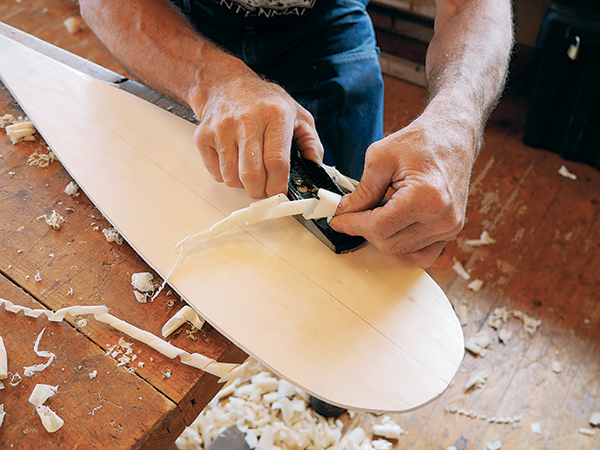
1. The tip and edges of the paddle’s blade should be 1/4" thick or slightly less. Mark this thickness on the edge of the blade. Use a jack or smoothing plane to taper the blade faces. Start the taper 2" to 3" below the intersection of the blade and the shaft.
1. The tip and edges of the paddle’s blade should be 1/4″ thick or slightly less. Mark this thickness on the edge of the blade. Use a jack or smoothing plane to taper the blade faces. Start the taper 2″ to 3″ below the intersection of the blade and the shaft.
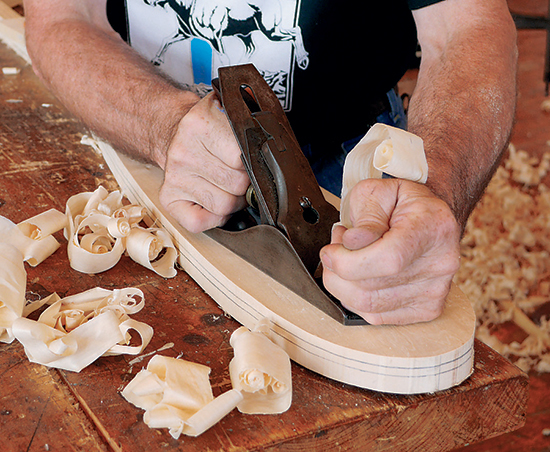
Draw a new centerline on the blade faces. Use a block plane to taper from the centerline out to the edges of the blade. This taper should be flat and not rounded. Use a straightedge or the edge of the plane sole to check for high spots.
2. Draw a new centerline on the blade faces. Use a block plane to taper from the centerline out to the edges of the blade. This taper should be flat and not rounded. Use a straightedge or the edge of the plane sole to check for high spots.
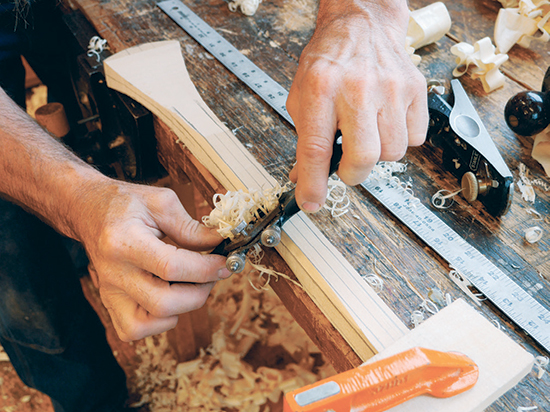
3. Use a spokeshave to shape the transition between the shaft and the blade. The goal is to create a smooth, seamless transition. Remove small amounts on each side of the shaft and check frequently to keep the transition symmetrical.
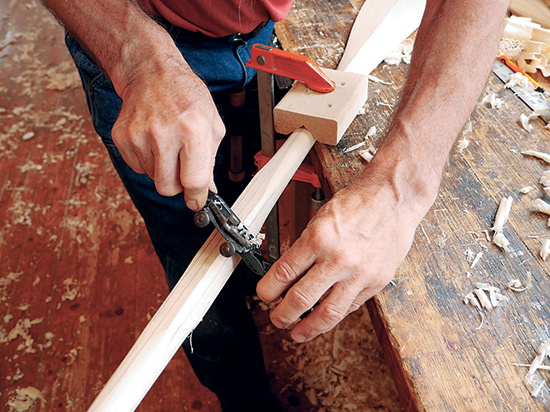
4. Shape the shaft, using the lines you drew (see photos on previous page). Round over the edges to create a comfortable grip. The amount of roundover is a matter of personal preference. Leave a short section in the middle of the shaft square for clamping.
4. Shape the shaft, using the lines you drew. Round over the edges to create a comfortable grip. The amount of roundover is a matter of personal preference. Leave a short section in the middle of the shaft square for clamping.
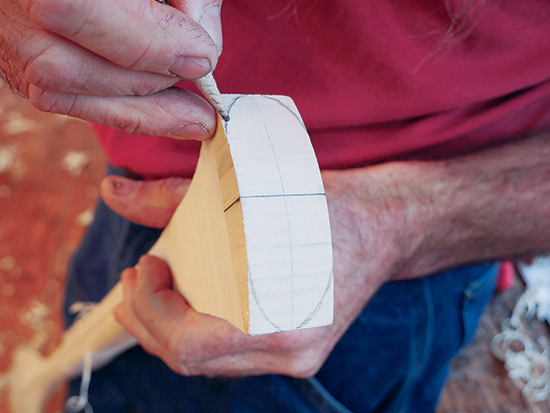
5. Draw radius corners on the end of the handle. Like the shaft shape, the amount of radius is a matter of personal preference. Some people prefer a flatter handle, and others prefer a more rounded, bulbous handle.
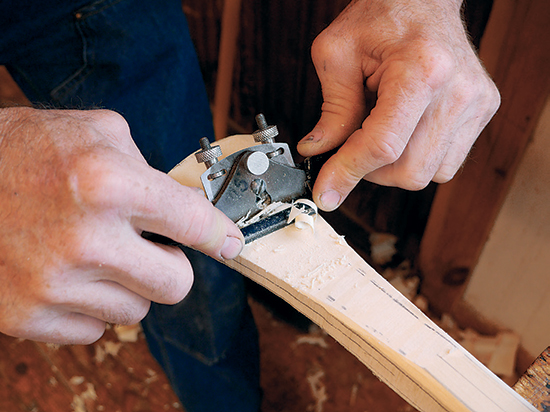
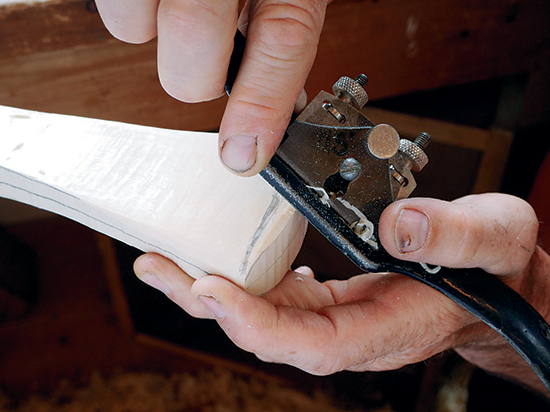
6. Use a spokeshave to create the concave sides of the handle, using the lines drawn on the side of the handle. Test the grip and continue to remove material until the grip is comfortable.
7. Shape the radius corners with a block plane. Work in from the end of the handle to prevent chipping on the edges. Continue shaping the handle with a combination of the block plane, spokeshave and carving knives.
8. Round over the top of the handle. Try to create smooth transitions between all surfaces of the handle and shaft. Cradling the handle and using a push- ing motion works well for making controlled cuts on the end grain.
9. The final shaping step is to reposition the clamp on a finished section of the shaft, using a clamping block with a V-notch to secure the paddle. Then shape the last section of shaft to smoothly blend with the rest of it.

Finishing

There are two schools of thought when it comes to finishing a paddle. One approach is to use a marine varnish or epoxy to provide maximum protection. The downside of this approach is that when the finish eventually breaks down, it requires more work to refinish. The other approach, the one that Mike endorses, is to apply an oil finish, such as tung oil finish, that will seal the wood, but does not create a thick film layer. An oil finish must be reapplied more frequently, depending on how much use the paddle gets. In either case, the best way to keep your paddle in good condition is to hang it up to dry thoroughly after each use.

Whether you make one for yourself or as a gift, making a paddle is a very satisfying project. It will pay you back everytime you use it. Even if you choose not to make a paddle, I highly recommend seeking out a craft school in your area and enrolling in a class. The experience will leave you with new skills, a new project and new friends.

Dan Cary manages and creates digital content for Woodworker’s Journal and former Editor in Chief of HandyMagazine. Follow him on Instagram and Twitter at @danrcary
paddle-class-2014-2


Posted in: