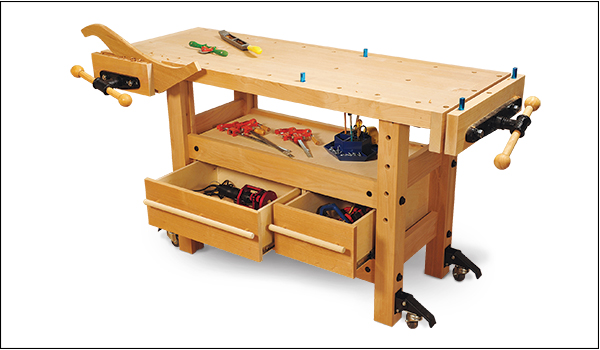
A workbench is just as much of a shop tool as a table saw or hand plane, and a well-made bench makes the simplest of tasks (planing an edge, sanding a panel, sawing a part to length) easier and more comfortable. After living with a lightweight “economy” workbench in my shop for years, I decided that it was high time to build a well-designed, seriously heavy-duty bench that had all the features I’ve been sorely missing. The workbench I designed combines some elements of traditional workbenches, typically intended for use with hand tools, with features that better support the work style of most contemporary woodworkers, who work with a combination of hand and portable power tools.
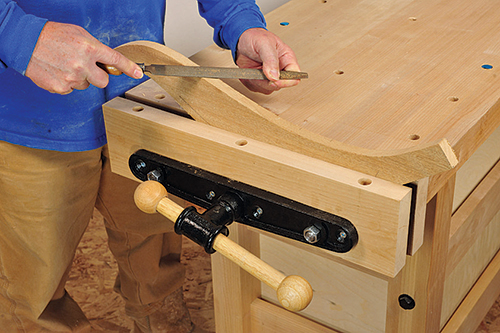
At the heart of my bench is a thick top laminated together from strips of hardwood. The 60″-long, 22-1/2″-wide surface is large enough to support big panels and provides an ample surface for clamp-ups and assembly work, while still being compact enough to fit even in a smallish workshop. As is traditional, my bench features both a front vise and an end vise. Both of these heavy-duty vises have a large clamping capacity and a quick-release feature for rapid adjustments. The end vise, which is the full width of the bench top, has holes for bench dogs and is used in conjunction with a series of dog holes. Bench dogs and other hold-down accessories help clamp parts to the bench surface.
The heavy bench top is supported by a sturdy base made up of 3″ square legs laminated together from thinner stock joined with wide stretchers. The longer stretchers attach to the leg assemblies with strong bolts screwed into cross dowels. The bolts allow the base to be taken apart, which makes it much easier to transport or store. Casters allow the bench to be rolled around the shop; when retracted, the legs remain firmly planted on the floor.
To provide storage, my bench features two deep drawers which ride on over-travel full-extension drawer slides. A wider drawer stores clamps, portable power tools, etc., and a narrower drawer is for smaller stuff. The housing containing the drawers is nestled into grooves in the base’s long stretchers and is positioned far enough below the bench top so as not to get in the way when clamping parts to the top. The housing’s upper surface provides a handy shelf, great for keeping clamps or bench dogs close at hand, as well as for catching screws or small parts that accidentally drop through the dog holes.
Making the Bench Top
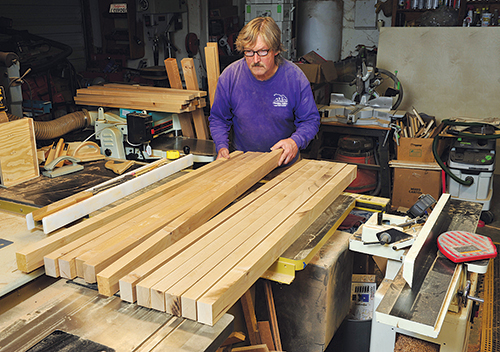
One of the hallmarks of a great workbench is a hardwood top that’s thick enough to hold bench dogs steady and take all manner of pounding and heavy work operations without buckling or flexing. I made the top of my bench out of some locally sourced maple, but any good grade (the less knots, the better), close-grained hardwood will do. I started by planing 8/4 stock down to 1-7/8″ thick, then ripping 12 strips, plus a few extra, that are 2-5/8″ wide and about 58″ long.
Unless you have a 24″ planer, it’s easiest to do the glue-up in stages: glue together two subassemblies of six strips each, then run these through a thickness planer and glue them together to form the final top. After discarding any strips that are warped or have other fatal defects, arrange them in two groups of six strips each. I mark a cabinetmaker’s triangle atop each group with a pencil, to help keep the strips in the right order and orientation. When you’re ready to glue the subassemblies together, set your strips on a truly flat surface, such as a table saw table covered with paper. It’s important to spread the glue quickly and evenly on each strip, so use a glue roller.
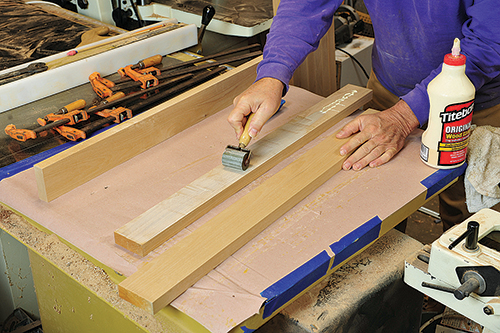
First, run a thick bead of glue along the length of the strip, then use the roller to spread a thin layer over the entire joint surface. To prevent a dry joint, apply glue to all mating joint surfaces. It takes a lot of clamping pressure to squeeze the strips together so that all the joints close tight, so it’s necessary to use heavy-duty pipe or bar clamps for the glue-up. Once strips are clamped, use a rule to check that the subassembly is flat before setting it aside to dry. After the glue has set, remove all the rubbery glue squeeze-out with a scraper, then leave the subassemblies to dry overnight — if you wait until the glue is rock-hard, it’s a lot more work to scrape the beads off.
Next day, run each half top through the planer until it’s exactly 2-1/2″ thick and dead flat. Before gluing the halves together, square up the two edges that will be mated, then cut slots for a half dozen #20 plate joinery biscuits, spacing them evenly along the length of the two mating edges; the biscuits help align the top halves. After gluing and clamping, make sure that the top halves are perfectly aligned and dead flat before setting the assembly aside to dry.
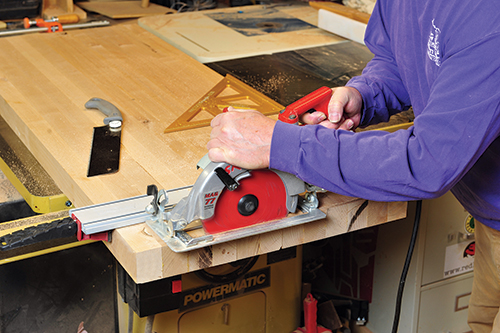
To cut the short ends of the bench top square and even, I used a straightedge clamped across the width of the top (underside up) to guide a portable circular saw (this task is much easier to do with a big radial-arm saw, if you happen to have one). To avoid splintering and tear-out, set the saw’s depth of cut just shy of the top’s full thickness, then use a fine-toothed Japanese pull saw to finish the cut and a low-angle block plane to clean up the end surface. After trimming one end, measure and mark the other cut so the top ends up 57″ long.
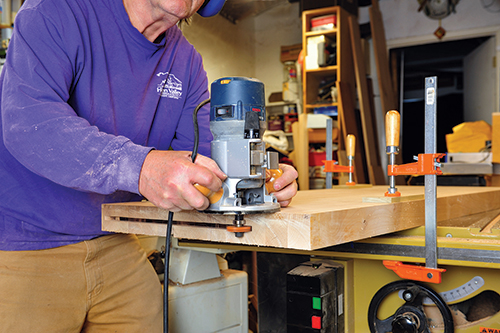
After cutting out the top’s two end caps (see the Material List), use a kerf cutting bit in a router to plow a 3/8″-wide, 1/2″-deep groove (centered, thickness-wise) into the ends of the bench top and mating faces of the end caps. Stop the kerf cuts about 1/2″ shy of the ends of each member. Cut two 3/8″ x 1″ x 20″ splines from 1/2″ Baltic birch plywood, then attach the narrow end cap to the end nearest the side vise, only applying glue to about 8″ of the middle section of the spline and groove, to allow for expansion and contraction of the top.
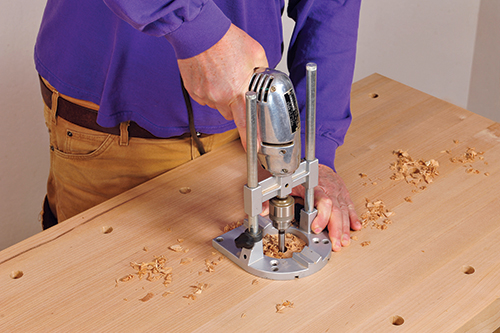
Next, it’s time to drill the three rows of bench dog holes through the top using a portable drill fitted with an alignment device. After marking the location of each hole, first drill a series of 1/8″ pilot holes, then enlarge each with a 3/4″ Forsner bit. Only bore deep enough for the Forstner bit’s tip to come through, then flip the top over and complete each hole from the reverse side. Also bore dog holes into the top edges of the end vise face and its mating end cap, spaced to match the dog hole rows in the top.
Bench Height
The exact height of a bench top is a matter of personal preference, and small height differences can make a big difference in your comfort level when working at your bench. Most workbenches are between 33″ and 36″ high (good for woodworkers between 5’9″ and 6’0″ tall). But if you’re building a bench just for yourself, it’s best to match your body height and the kind of work you’re doing. A good rule of thumb for a bench used for general woodworking is to make the top even with the end of a long-sleeve shirt’s cuff with your arm hanging by your side. For sawing, sanding, etc., a lower bench height—up to a few inches below your shirt cuff—allows you to put your body weight into such strenuous operations. Conversely, for fine work like carving or doing repairs, raising bench height a few inches above your cuff keeps you from having to bend over too much, which can cause lower back pain. If you’re in doubt, another approach is to build your bench with the legs a little longer, then cut them shorter until the top’s height feels just right.
Assembling the Legs
The sturdy base that supports the bench top consists of two leg assemblies joined with 1″-thick, 4″-wide stretchers. The end pairs of legs are permanently joined with loose tenon joints and connect to each other via long stretchers secured with heavy bolts and cross dowels.
Begin building the base by making the four 31-1/2″-long legs. Each is laminated together from three pieces of 1″-thick stock: a middle 2-3/4″-wide layer sandwiched between two 3″-wide outer layers. The 1/4″-deep valley created along the inside surface of each leg helps anchor the long stretchers.
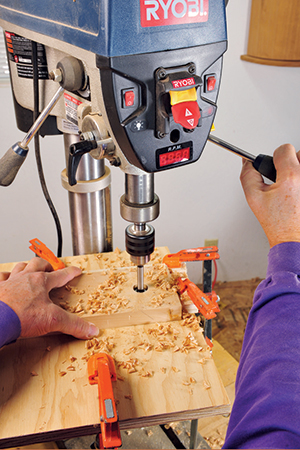
When gluing up the legs, make sure to keep one edge on all three strips flush. Once dry, sand the non-valley side of each leg smooth, then use a drill press fitted with a 1/2″-dia. bit to bore the two holes in each at the locations shown in the Drawing for the cross dowel bolts. On the leg that’s located at the front-vise side of the bench near the end vise, drill a series of 3/4″ holes, 2-1/2″ deep, as shown. (These are used with a bench dog to support the ends of long workpieces clamped vertically in the front vise.)
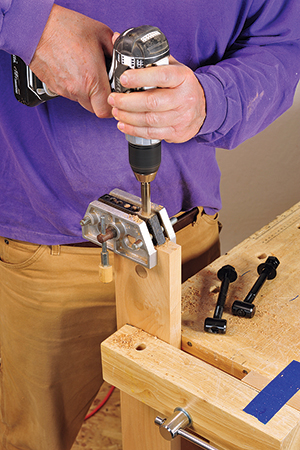
After cutting the four long stretchers to size and length, bore the 7/8″ holes for the cross dowels, centering them widthwise and spacing them 2″ in from both ends of each stretcher. To bore the holes that intersect the dowel holes, use a dowel jig to guide a 1/2″-dia. bit chucked in a portable drill. Now, on the table saw, use a dado blade stack set to 1/2″ to plow a 1/2″-deep groove along the inside face of each long stretcher, spaced 3/4″ down from its top edge. These grooves serve to support the bench’s drawer housing.
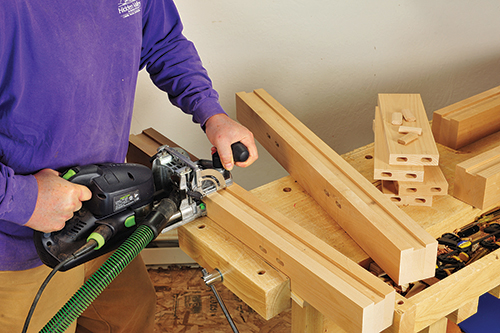
Each pair of legs at the ends of the bench connect to the short stretchers with loose tenon joints. Cut these stretchers to size and length and chop two mortises into both ends of each (I used the Domino system to make mortises for 10 mm x 50 mm tenons, but you could use whatever joinery method you choose, so long as the resulting joints are solid).
Center the mortises on the thickness of the stock and space the outer edge of each mortise about 1/2″ in from the edge of the stretcher. Next, chop matching mortises into the inside-facing sides of the legs, spacing them as shown in the Drawings.
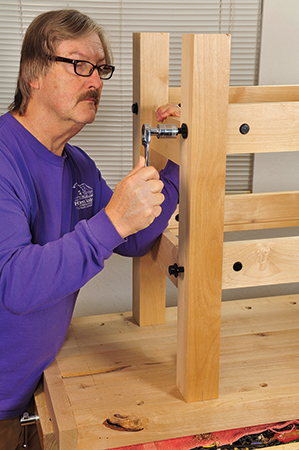
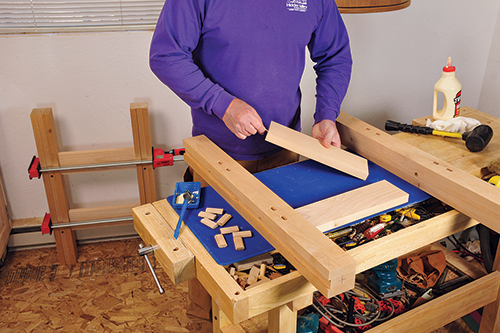
Glue each pair of legs together with a pair of short stretchers, making sure that the assemblies are nice and square. Once the glue is dry, press the cross dowels into their holes in the long stretchers and bolt them to the leg assemblies. Don’t tighten the bolts too much, as you’ll need to remove one of the leg assemblies when gluing up the drawer housing later.
Mounting the Vises
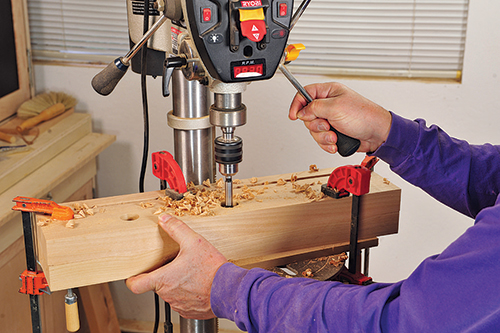
To prepare for mounting the bench’s twin vises, set the bench top upside down on a sturdy work table, using an old towel or blanket to protect the top from scratches and dings. Press a spline into the groove in the wide end cap and set it into the end of the top — don’t glue it in yet. Remove the end vise’s guide rods and screw/end plate assembly from the base, then set the base against the end cap and center it, widthwise, on the underside of the top. Mark the exact position of the base’s three 1″ holes (two for the guide rods, one for the vise screw) on the end cap. Remove the cap, clamp it and the end vise face together, and drill three 1-1/8″-dia. holes through both at the same time using a drill press.
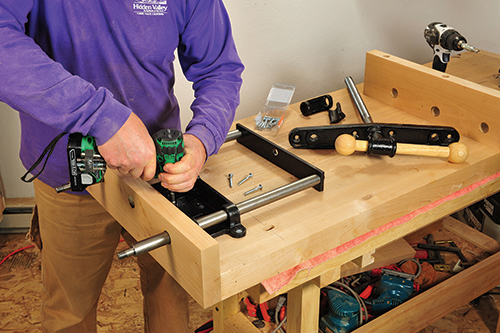
Now glue the wide end cap in place as you did with the narrow cap earlier, then position the vise base. Use a self-centering drill bit to bore pilot holes at each mounting hole location. After enlarging each pilot hole with a 7/32″ bit, drive six #14 x 2″ flat head screws to attach the base. Next, reinstall the guide rods, set the vise face onto the rods, and replace the vise screw assembly. Now drill 5/32″ pilot holes for the four #12 x 1-1/4″ screws that secure the wood face to the vise’s metal end plate.
The Drawers and Drawer Housing
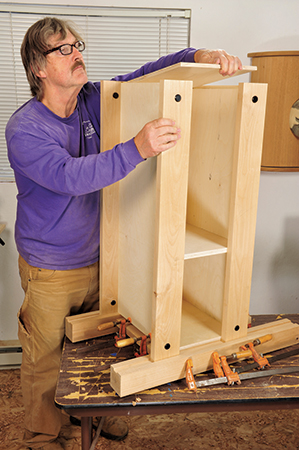
After cutting out all the parts for the workbench drawer housing from Baltic birch plywood, as per the Material List, use a dado blade and table saw to cut 1/2″-wide, 1/4″-deep rabbets into both short ends of the top and bottom. Also plow a 3/4″-wide, 1/4″- deep groove in the top and bottom for the bulk head, as well as a 1/4″-wide, 1/4″-deep groove in the top, bottom and sides. These are for the housing’s 1/4″ plywood back panel. (See the Drawing for the position of these grooves and, if the plywood you’re using is undersized, adjust the width of the groove as necessary.) After sanding the housing parts smooth, glue the bulkhead to the top and bottom, with all their front-facing edges flush. After clamping, measure to make sure the top and bottom remain parallel and square to the bulkhead.
To keep all housing parts aligned properly when gluing up the rest of the assembly, remove one of the leg assemblies from the base, then set it vertically onto a work table. Now set one of the housing sides into place, spread glue onto the rabbets in the top and bottom, and slide them into the grooves in the long stretchers (do NOT glue the top and bottom into the grooves!). After clamping this joint, drive a few brads to strengthen the joint. Now slip the housing’s 1/4″ back into its groove and glue and clamp on the other side of the housing. When the glue is rubbery hard, scrape off any excess, then bolt the leg assembly back on.
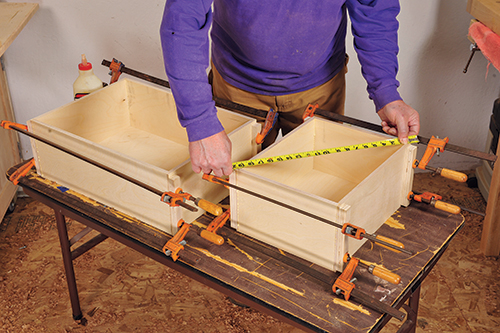
The drawers for the workbench are simple, but strong, built entirely from 1/2″ Baltic birch plywood, including the bottoms. After cutting all parts to size, use a dado blade to cut the 1/2″-wide, 1/4″-deep rabbets in the ends of all the drawer sides. Use the same 1/2″ dado stack to plow into all drawer sides, fronts and backs the 1/4″-deep grooves that capture the drawer bottoms. Space these grooves 3/8″ up from the bottom edge of each part. After sanding the parts smooth, apply glue to the rabbets and clamp each drawer together. Drive some small brads through each rabbet, to add a little extra strength to these joints. Before leaving them to dry, measure each drawer’s diagonals; if they’re not equal, it means the drawer isn’t square and needs a bit of tweaking.
To lend easier access to the drawer contents, I mounted the drawers on 14″ side-mounted over-travel drawer slides, which extend further than regular full-extension slides. After screwing slides to the housing’s sides and bulkhead 1″ up from the housing bottom, set the drawers in place and check that each glides smoothly. When closed, the drawer box fronts should be flush with the front edges of the housing sides and bulkhead.
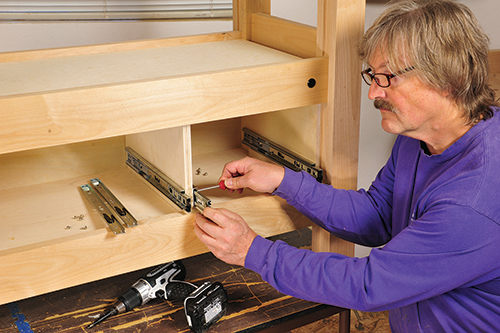
Now mount the actual drawer faces, both of which are cut from the same hardwood as the rest of the bench. Drive a pair of screws into the back of each face from inside the drawer, then check to make sure that the gap around each face is even before driving the screws home.
Instead of using store-bought drawer pulls, I decided to make my own pulls from dowels. These long pulls are easy to grab and, because they’re mounted just below knee level, all it takes is a little leg shove to close the drawers. Cut two pieces of 7/8″ birch dowel for the pulls themselves. These are supported by 1″ lengths of 1/2″ dowel: three for the wider drawer, two for the narrower one. To create sockets for the support dowels, counterbore a series of 1/2″- dia., 1/4″-deep holes evenly spaced along the pulls (as shown in the Drawings) into the back of the pull dowels on the drill press. Next, drill 3/16″ holes concentrically through the support dowels, for the #8 x 2-1/2″ screws that secure the pulls to the drawer faces. Drill holes for these screws through the drawer faces and boxes, then screw the pulls and support dowels in place.
Assembly and Finishing
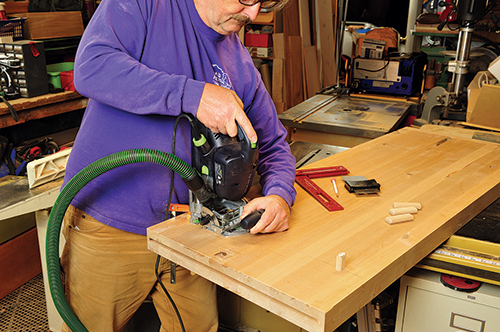
After tightening the cross dowel bolts on the base until they’re good and snug, remove the drawers and set the base upside down onto the bench top laid upside down on a work table. Position the legs so that the top overlaps them by 1-1/2″ on the long sides, then adjust the base lengthwise until the legs closest to the end vise are 5″ away from the inside of the wide end cap. After tracing around each leg, lift the base off and set it upright. Loose tenons are used to join the top to the base. I use the Domino machine to chop a single, centered mortise into the upper end of each leg, for a 14 mm x 100 mm loose tenon. I then carefully position the Domino to plunge-cut four matching mortises in the underside of the bench top. There’s no need to glue the tenons in; the weight of the top is enough to hold it securely on the base. Plus, you can easily remove the top if you need to transport or store the bench in the future.
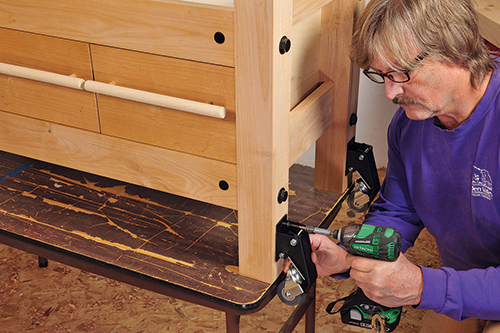
Before applying a couple of coats of finish to the completed bench (I used wipe-on polyurethane), sand the entire assembly smooth. It’s best to hand sand the top using only a large sanding block, so as not to ruin its flatness. Chamfer or round any sharp edges with a small block plane. After finishing, screw the heavy-duty casters onto the lower ends of the legs. All it takes is a flick of the toe to lower the casters and make the heavy bench super easy to move around the shop.
Click Here to Download the Drawings and Materials List for This Project.


