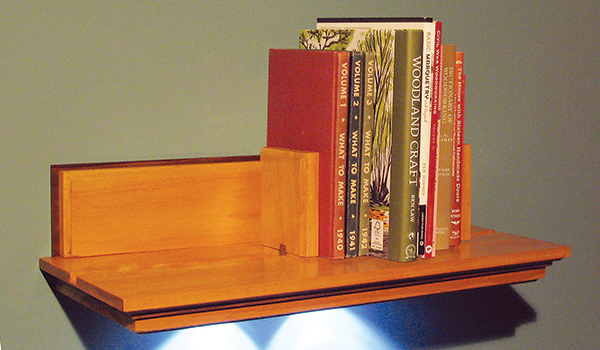
A good-looking bedside shelf that holds a small collection of special books and a memento or two can provide a really nice touch. And gentle, battery-powered LED lights will aid in nocturnal perambulation, especially if you share a bed with someone who is a light sleeper. This blind-mounted shelf will handle both of those tasks with ease. And you can build it in a weekend, no sweat.
Kicking it Off
We made this lighted bookshelf from Red Grandis® Eucalyptus, a plantation- grown variety that looks good and is easy to machine. We also added some local black walnut to our design as an attractive accent.
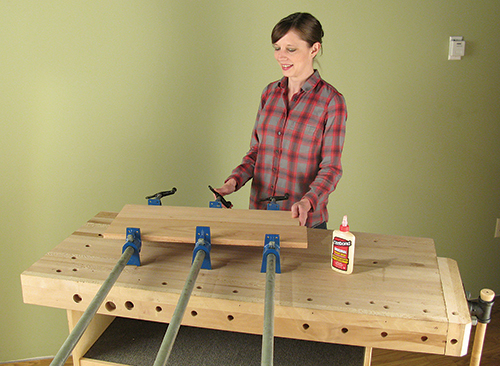
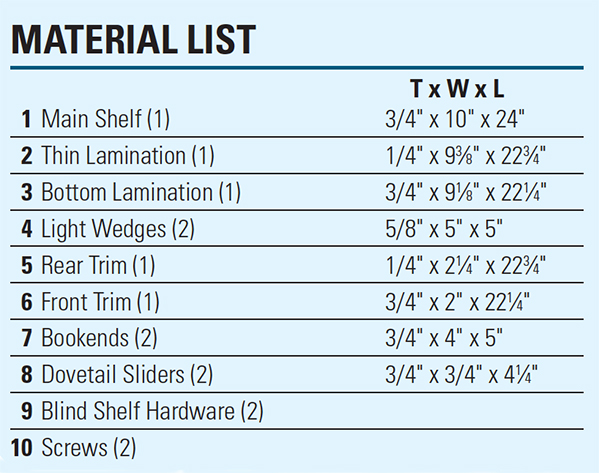
You will need some pretty wide boards for the main shelf components, so if your stock is narrower than about 10″, you’ll need to butt join enough 3/4″ stock to make the main and bottom laminations (pieces 1 and 3). Chances are you will need to do the same for your 1/4″ stock to serve as the thin lamination (piece 2).
While those pieces are in clamps and the glue is curing, you can go ahead and make the front and rear trim pieces and the bookends (pieces 5, 6 and 7). Rip and cut them to length and set them aside for the moment. Then, when the glue has cured in your larger panels, scrape off the squeeze-out and cut the pieces to final size, according to the Material List.
Start Shaping
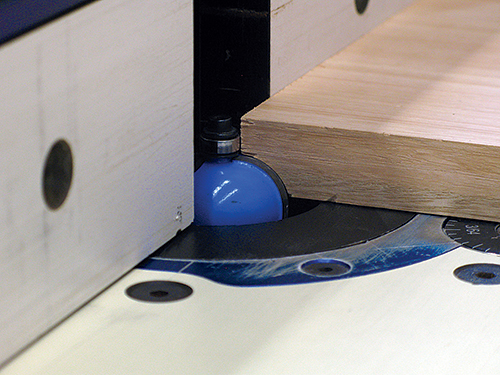
Most of the 3/4″-thick pieces on this shelf have a 3/8″ cove routed into their exposed edges and ends. It visually splits the thickness of the components in two. And, because each piece is smaller than the one above, when you assemble the stacked shelf components the edges form an attractive molded shape. The easiest way to form the cove is with a bearing-guided bit chucked into a router table. Rout the cove into the 3/4″ stock where appropriate.
Dovetail Details
One really nice detail of this shelf is that the bookends are attached to the shelf with dovetail sliders. As you can see in the Drawings, the sliders fit into a long dovetailed groove. This “locks” the bookends into the shelf and keeps them from falling off. The sliders are then glued and screwed to the bookends with countersunk screws.
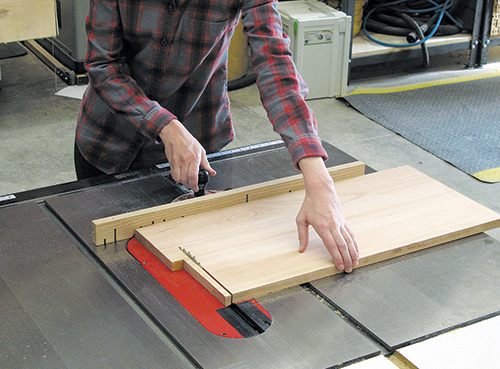
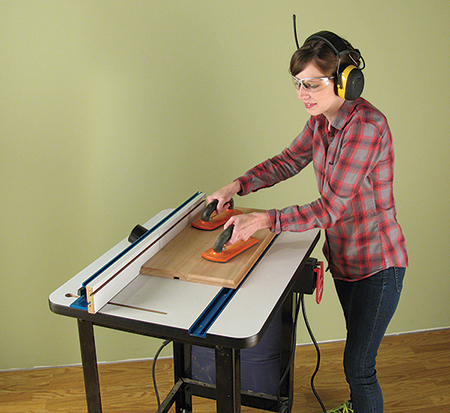
The best way to make all those parts fit together is to begin by plowing the dovetail groove into the top of the main shelf. Because dovetails need to be routed at their full depth, it is a good idea to remove some of the stock in the groove before you use the dovetail bit. You can use a 5/8″ straight bit in the router table, or even plow away some of the material on the table saw. Once you are ready to make the dovetail groove, mill it in one smooth operation, holding the board firmly against the fence and the surface of the router table. If you don’t have a router table, use a router with an edge guide.
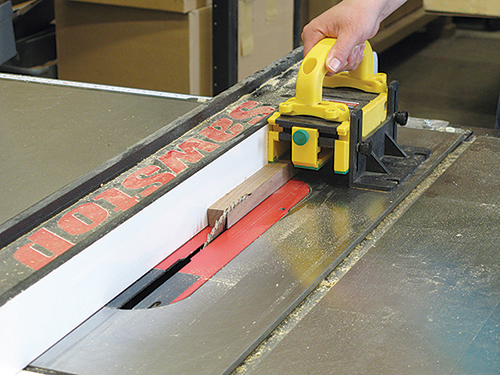
Now that you have the dovetail groove completed, it’s time to make the sliders (pieces 8). We made ours from 3/4″-thick walnut lumber to match our accent wood. You can make the slider using the dovetail bit in the router table, but if you don’t have a router table, your table saw will work in a pinch. Set the blade angle to match the dovetail bit … in our case, it’s 7˚. Then rip an overly long piece of stock (a blank several inches longer than the two sliders added together), a small amount wider than the groove. Flip the piece around and form the matching angle. We used a GRR-Ripper® 3D Push Block to hold the stock securely. Test the fit in the groove — it should be a smidge too wide — then estimate how much material you need to remove to have it fit and recut the piece. Remember, you can always cut more stock away, but putting it back onto the piece is much trickier. When the slider blank moves easily through the groove, you’ve got the fit you need. Then cut each slider to length. If you look at the Drawings, you’ll see the sliders have some additional material removed.
Now for the penultimate step in this process: cutting matching notches in the bookends to fit the sliders. The easiest way to do that is to put a slider in the groove and trace the shape of the notch onto the bottom of each bookend. Now you can cut the angles of the notch with a handsaw. Next, you need to remove this waste. We did that by nibbling it away on the table saw using a sacrificial fence mounted to our miter gauge. You will need to adjust the fit on these notches — do that with a sharp chisel. When they all fit together well, drill countersunk holes up through the sliders and then glue and screw the sliders to the bookends.
Notching the Dovetail Sliders
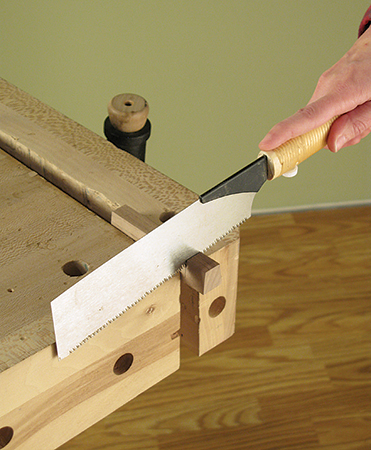
The properly fit sliders have additional stock removed so that the material not joined to the bookends sits flush with the surface of the main shelf. We used a Japanese hand saw to remove that stock.
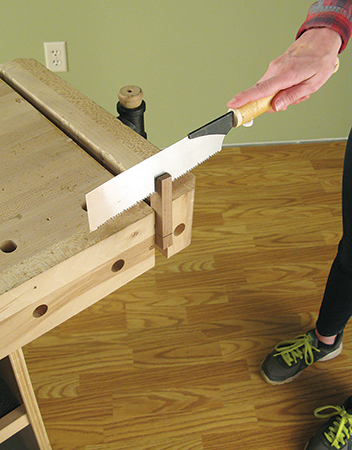
Insert the slider blank into the dovetail groove and mark it level with the top of the shelf. Step to a workbench and complete the layout of the notch (see the Drawings). Make the two cuts, then fit it back into the shelf groove. Use a random orbit sander to sand it even with the top of the main shelf.
Racing to the End
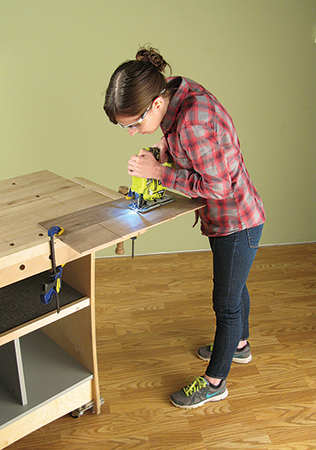
There are a few more machining steps to go on this shelf. The first is to remove a large rectangular section from the bottom two laminations to make room for the light wedges. Lay out the shapes and cut the stock using a handheld jigsaw.
Now make the two light wedges (pieces 4) from 5″-wide stock. We used some pine we had on hand. We cut the wedges on a band saw, but you could form them using a handsaw if that works better for you.
That’s it for “making pieces,” but now you need to do the assembly. That means sanding the flat pieces individually before glue-up rather than later. We glued up the back trim subassembly first and set it aside for the time being. Then move to the shelf pieces. Even though it is a simple assembly, go ahead and test fit all the parts together. Remember, glue-up is not a step you can easily reverse. When everything fits as it should, glue and clamp all the laminations together. You can glue the light wedges in place simply by putting glue on both surfaces and “rubbing” the wedges in place until they grip. No clamps needed!
Preparing for Hardware
Before you glue the back trim subassembly in place, you need to drill a couple of holes and chop a couple of mortises for the blind shelf hardware (pieces 9). Start by laying out the hole locations at 16″ apart. It should be stated that when you mount a “floating” shelf like this, you need to mount it to wall studs (usually 16″ apart) or with substantial wall anchors. Your judgment in this task is critical to the shelf’s success.
Installing the Blind Shelf Hardware
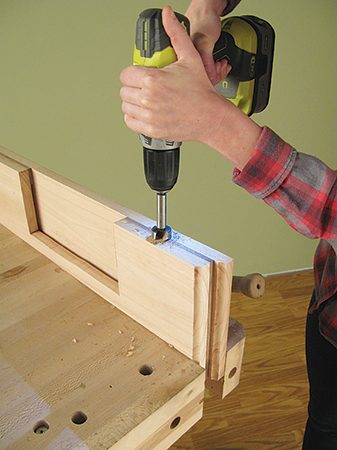
Mark two hole locations 16″ apart on the shelf and grab a 1”-diameter Forstner bit to drill shallow 1/8”-deep holes. Now switch to the extra-long drill bit required by the hidden shelf hardware, drilling into the center of the shallow holes.
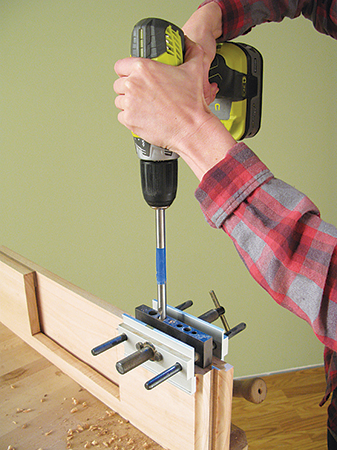
Guide the bit inside a doweling jig, if you have one, to keep it drilling straight. Then place the assembled shelf hardware into the holes, square up the backplates, and trace around them.

Chisel these two mortises so the backplates will recess flush with the shelf edge.
Finalizing the Last Details
Take a couple of minutes and look carefully for glue squeeze-out. Get rid of it if you find some. Then give the shelf parts a final sanding at 220-grit. Find the back trim subassembly you made earlier and glue it in place on the shelf, doing your best to avoid squeeze-out. When the glue has cured, you are ready to apply a finish. Here’s some good news if you’re new to this wood species: The Red Grandis takes stains well, so if you have a stain color in mind, test it on some scrap pieces to be sure you like it. Then go ahead and apply the stain and an appropriate topcoat. We used a wash coat of amber shellac to add color to the Red Grandis and also as a sealer. We followed that up with several coats of lacquer from an aerosol can. For small projects, a spray can works great, and the lacquer dries super fast.
The last detail is to mount the LED lights to the wedges. This is just a peeland- stick process. We also recommend putting a light coat of wax on the sliders to keep them moving smoothly in the groove. Then attach the shelf hardware to the wall studs with screws and push the shelf into place on them.
This good-looking, fun project can be completed in a weekend. The next time you need to get up at night, maybe for some cocoa, the LED lights will be just the ticket!
Click Here to download a PDF of the related drawings.
Hard to Find Hardware
Blind Shelf Supports (1 pr.) #20103
Stick-On Cordless LED Lights, 3-Pack #55196
7/16” Extra Long Drill Bit (1) #28855
3/4” D x 7/8” H x 7° x 1/2″ Shank Dovetail Bit (1) #91111
1-1⁄8″ D x 1/2″ H x 3/8″ R x 1/2″ Shank Cove Bit (1) #28855
Red Grandis Eucalyptus, Box of 10 Board Feet (1) #55211


