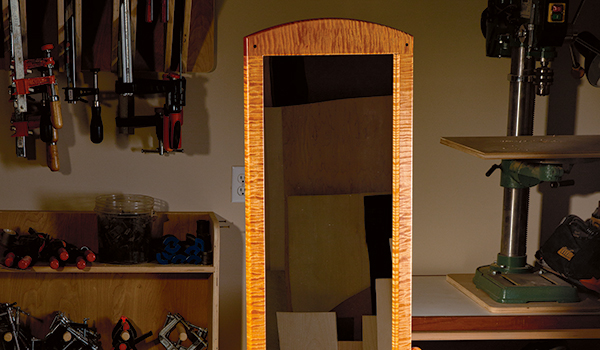
If, like me, you have teenage girls, you know the value of a mirror. Full-length? Bonus! But it’s equally handy for everyone in the family, too.
While you could pay to have your mirror glass specially cut at a glass shop, you could also purchase an inexpensive full-length mirror at a department store: use the mirror glass, discard the frame.
I happened to have an old wall mirror in need of a better frame. Whatever your source of mirror glass, be sure to adjust the Material List dimensions for the mirror frame rails and stiles, as well as the length of the stretcher, if your glass differs in size from the 14″ x 54″ mirror (piece 1) we specify here.
Building the Mirror Frame
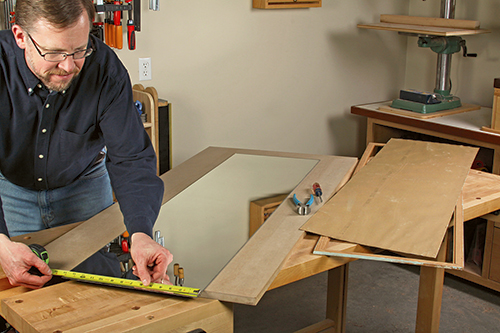
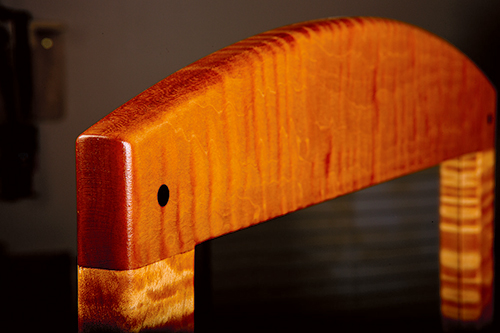
Since the mirror frame rails and stiles (pieces 2 and 3) will be in full view every time someone looks in this mirror, select this stock by prioritizing consistent grain pattern and color, with no visible defects. Rip and crosscut straight blanks for the parts, then lay out 1/4″-wide, 3/4″-long mortises on the rails.
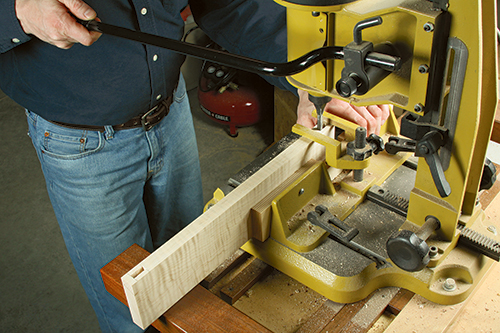
Position them 3/8″ in from the part ends. Hog out the waste to a depth of 1-1/4″ with a mortising machine and a hollow-chisel bit, or with a drill press and 1/4″ Forstner bit. Flip the rail workpieces end-for-end once the mortises are roughed in, and make a second round of passes to center the mortises exactly on part thickness.
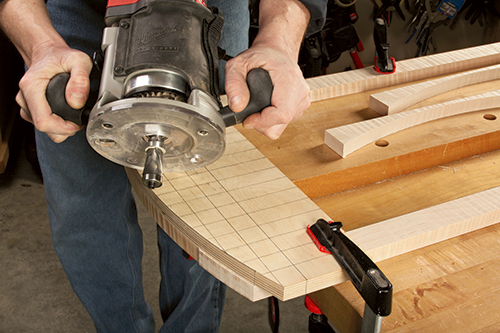
Square up the ends of the mortises and clean up their walls, if necessary, before you head to the table saw to cut matching tenons on the ends of the stiles. These tenons have 3/8″-wide shoulders on their ends and 1/4″ shoulders on their broad faces. After they’re cut to shape, check their fit in the mortises to make sure the joints close fully and the frame remains flat and square. If everything registers properly, glue the pieces together. Drill and install four short dowel pins (pieces 4) to lock these corner joints. We used walnut dowels throughout this project to add dashes of punctuating contrast to the figured maple.
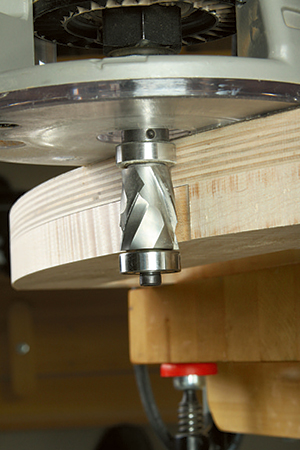
You could form the gentle curves on the ends of the frame one at a time, laying them out with a flexible batten, but a template will guarantee uniformity. Draw a grid on a piece of scrap that’s a few inches wider and longer than the frame rails, and trace the arch by bending a batten of thin plywood or Masonite®. Cut the template to shape, and smooth its curved edge carefully on a sander. Now use your template to draw the arches: position it so the curves will leave 1-1/2″ of stock on the ends of the rails. Cut the curves with a jigsaw, sawing about 1/16″ outside your layout lines. Then clamp the template to each rail so it is aligned with the layout line, and use a bearing-guided flush-trim or pattern bit to refine the curves to their final form.
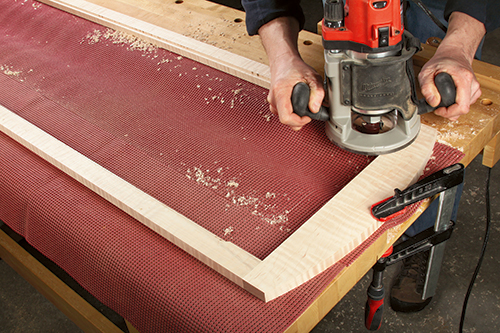
All that’s left to do on the frame for now is to rout a 3/8″ x 3/8″ rabbet around the inside back edge to make room for the mirror glass and back panel. Rout this recess in two or three deepening passes to minimize tearout, and chisel the corners square.
Making the Two Leg Sets
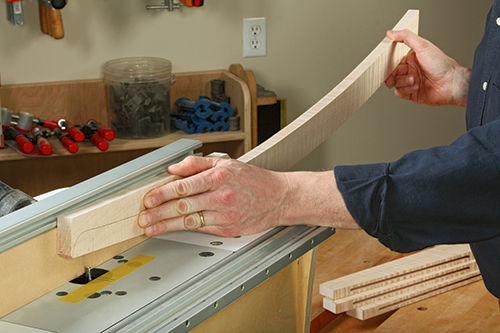
With four long, narrow legs like these, making them perfectly uniform not only prevents construction challenges but also ensures that the leg shapes will look great: you’d be surprised how little the deviation on a curve needs to be before your eyes can pick up the inconsistency! So, make a full-size leg template from void-free plywood or MDF, following the gridded drawing. Sand it carefully to fair the broad curves, and make sure you’re happy with its shape before you proceed.
Trace four leg shapes (pieces 5) onto your stock, laying out their locations so the grain pattern on each pair of legs will harmonize across the joint when you assemble the legs. In this regard, it’s ideal if you can at least make each pair of legs from the same piece of consistently grained wood; even better, make all four legs from one board. Then cut the legs out slightly oversize. If your stock allows for it, leave an inch or two of extra material along the top narrow edges of the legs for now. The excess material here will make handling the legs safer while you’re routing the spline slots in the next big step. Fix the leg template to each leg with double-sided tape. Template-rout the legs to shape up to, but stopping at, the (for now) extra-wide top ends. Remove the template.
Set up a 1/4″ straight or spiral bit in your router table to mill a 1/2″-deep, 12″-long spline slot along the flat inside edge of each leg. Start them 2″ down from the top curved ends of the legs. Mark the outer limits of your router bit on the router table so you know where to start and stop these slot cuts accurately. Mill them in a series of two or three deepening passes, flipping the workpieces from one face to the other each time to center the slots. Once the slots are done, square up their ends before trimming off the remaining waste material from the top ends of the legs and template-routing these final narrow areas to shape.
Now lay the leg pairs together with the slotted edges butted up. Do these edge joints form flat, “airtight” seams? If they don’t, run the splined edges over your jointer for a pass or two to flatten them completely. Next, plane a scrap piece of solid hardwood, about 1/4″-thick by 2-1/2″ wide and 16″ long, down to fit snugly in the spline slots. You want a good friction fit for these splines (pieces 6). Rip and crosscut the two splines to size, and carry out a dry fit of both leg pairs to be sure the joints close correctly. If they do, glue up two sets of legs, clamping the narrow top ends until the glue cures. In a couple of hours, scrape or sand the splined joints flush and smooth.
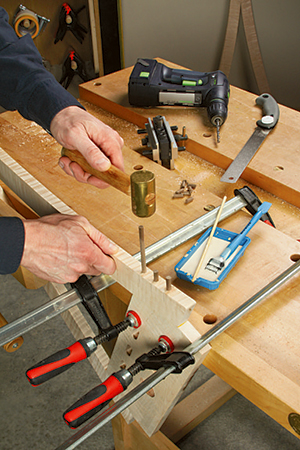
Follow the locations on the Drawings to locate and install six decorative dowels (pieces 7) near the top ends of each leg assembly. Use a self-centering doweling jig to align these holes evenly, and drill them with a sharp brad-point bit to avoid tearout around the rims of the holes. Dab glue into the holes, tap 1″-long dowels home and trim off the excess with a flush-cutting saw or a multi-tool. Sand the dowel areas smooth.
Machining the Arched Rails
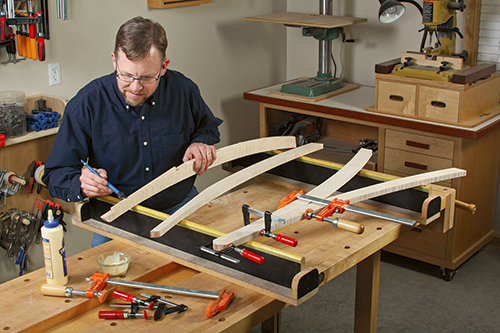
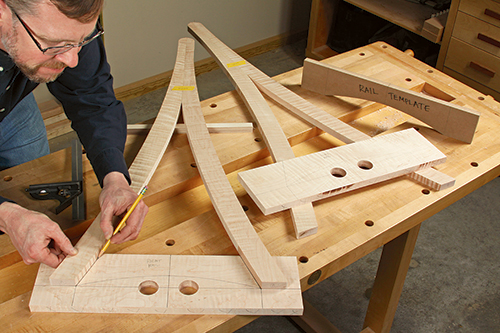
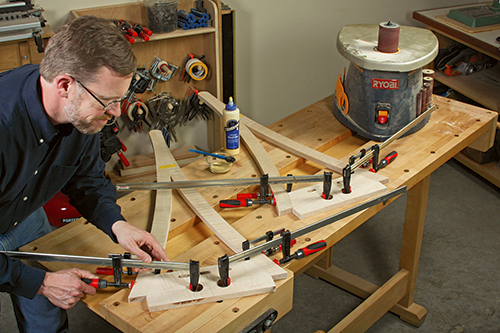
The arched stand rails (pieces 8) that join the legs at the floor also deserve consistent curves, so take the time to make a template to establish the shape of these two curves. Then use it to help lay out two overly wide and long blanks that will become the rails. Notice that there are a couple of reasons for using oversized stock: first, it will allow you to bore a pair of large holes below the curves of the rails to make the final glue-up easier when installing the clamps. Plus, the four angled ends of the two rails may not turn out to be exact matches, depending on how the leg stock has reacted to machining and assembly thus far: the legs might have moved slightly, making the length of each rail specific to its leg pair. The best way to account for this is to lay each leg set on top of its long rail blank and trace along the bottom inside edges of the legs with a sharp pencil to mark the ends of the rails accurately. Label each rail and leg set to keep their pairing clear.
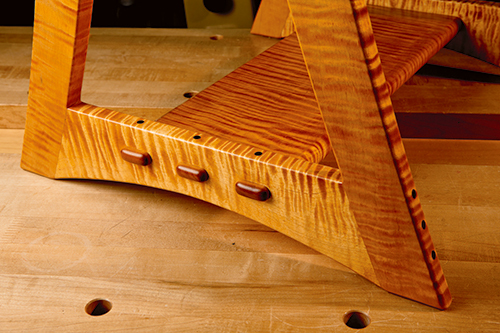
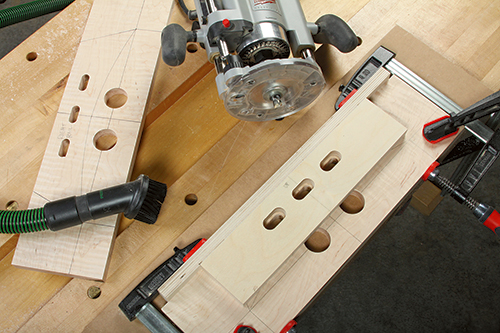
One of the distinctive and beautiful aspects of this full-length mirror are the six through tenons that join the sides of the mirror stand to the bottom stretcher. Your rails are nearly ready to cut out, but don’t do it before milling the three through mortises in each rail. They’ll be easiest to clamp in a jig while still rectilinear and overly long.
The mortising jig (see Drawing) I made for the task is simple in design: it’s just a plywood blank with three, 1-1/2″-long, 3/4″-wide slots cut through it and spaced 7/8″ apart (2-3/8″ from center to center). These slots will enable you to rout the actual mortises in both the rails and the ends of the stretcher using a 3/4″ O.D. rub collar and a 1/2″ spiral or straight bit in a plunge router. Trim the jig so the slots are exactly 3/4″ from one edge: this will position the rail mortises 7/8″ down from the tops of the rails. Screw a long, 1-1/4″-wide scrap fence to this edge of the jig: it will register the top edges of the rail workpieces during routing. One final note: you’ll also want the three slot sizes of the jig to match perfectly. I made a second template with just one slot, using a 3/4″ straight bit, and that became a “master” for flush-trimming the three jig slots to final, uniform shape. Sometimes it takes a template to make a template!
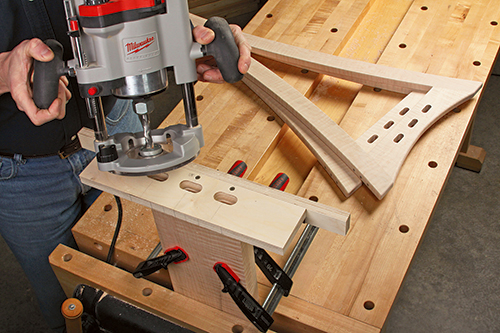
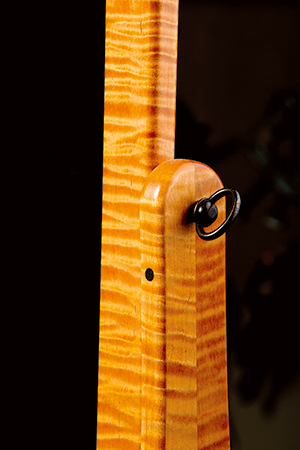
Clamp the final template to each rail, and rout the three through mortises in progressively deeper passes until the bit passes through each rail. When that’s done, cut and sand their angled ends up to the pencilled layout lines, and glue and clamp the rails between the legs. After the glue cures, drill and install the 12 long dowels (pieces 9) that reinforce these joints. Wrap up the leg pairs by rounding over their long outer edges with a 1/4″ bit and the inside edges with a 1/8″ bit. Bore a 5/16″ through hole, 1″ down from the top, for each pivot bolt.
Assembling the Stand
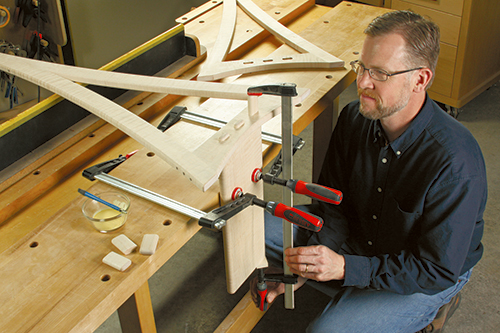
Rip-cut the stand’s stretcher (piece 10) to width, and cut it to length. Make sure to account for the overall width of your mirror frame, plus the thickness of the threaded inserts that protrude beyond the mirror frame for the pivot bolt hardware. Then grab the rail mortising template again and screw the end of a 3/4″-thick, 2-ft.-long scrap inside the template, flush against its fence. This way, you can clamp the template and the stretcher together in a vise vertically in order to mill three mortises on each of the stretcher’s ends. The “clamping board” also centers the mortises on the stretcher’s thickness. Rout them 1″ deep. Use a 3/8″-radius bit to round over the long edges of the stretcher.
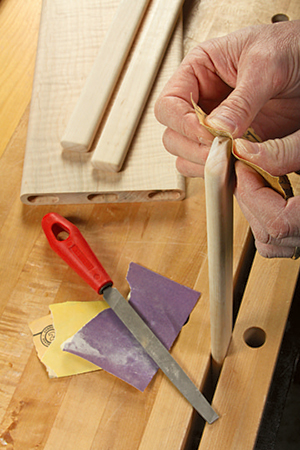
Your careful efforts at template mortising pay off now: if you set the stretcher between the leg pairs, the rail and stretcher mortises should line up exactly. If they do, you’re ready to prepare some long, solid stock to make the floating tenons (pieces 11) that will fit those mortises. Surface it carefully so it will slide into the mortises like a piston. Rip-cut the tenon material into three “sticks” that are exactly 1-1/4″ wide, and ease their long edges with a 1/4″ roundover bit in the router table. Then, round over the six ends of these sticks with a file and sandpaper before crosscutting the six 2″-long tenons to length.
Clamp the stretcher vertically to your workbench, and position a legset on top of it. Spread glue into the deep mortises, and insert the floating tenons. I used a bar clamp to push them all into place. Repeat the process for the second legset. Finally, drill three centered holes down through the tenons from the top edges of each rail, and peg the rails and tenons together with glued dowels (pieces 12) to complete the stand.
Finishing Up
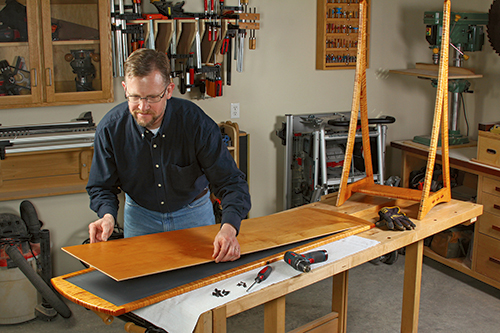
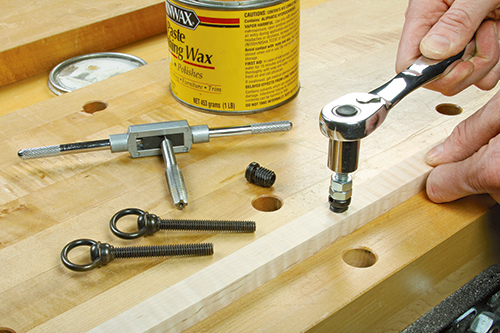
Install two threaded inserts in the mirror frame, centered on its length, then soften the back and front edges of the frame with 1/4″ roundovers. Cut a back panel (piece 13) to size. Apply stain and finish. When it dries, install the mirror and back panel with glass retainers (pieces 14).
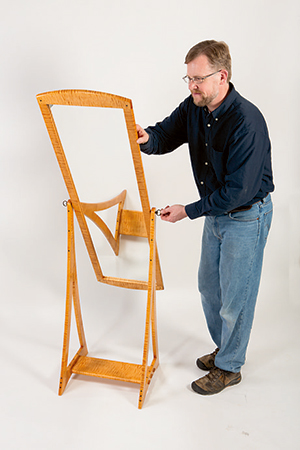
You’ll need to shorten the pivot bolts (pieces 15) with a hacksaw so the threaded portion is 1-1/2″ long. Slip the mirror frame into the stand, and thread in the pivot bolts to complete the project. Now you can check your daily wardrobe choice, and admire your craftsmanship, for many years to come.
Swivel Mirror Screws, Ant. Brass #31623
Glass Retainer Clips, Ant. Bronze #26884
1/4” Walnut Dowels, 36″ Long #20982
Click Here to Download the Drawings and Materials List for This Project.


