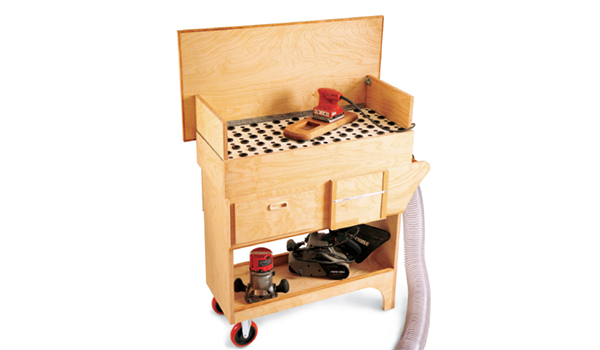
Sanding is not one of life’s little pleasures. One of the reasons I personally learned the skills associated with using a hand plane was to cut down on the amount of sanding I had to do as a furniture maker. But, like bifocals and high-fiber supplements, sanding is unavoidable in the long run — which is why this little downdraft sanding cart is so useful.
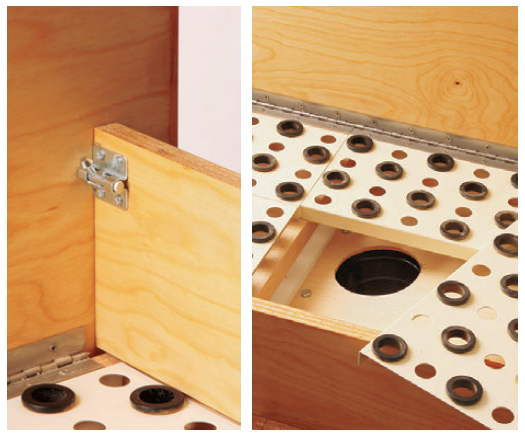
That this cart is truly effective is not an accident. Working with the staff at Woodworker’s Journal, we tried many different approaches and gadgets in mock-ups and prototypes before we got to this simple configuration. (Contributing Editor Sandor Nagyszalanczy’s expert advice was especially useful in this effort.) It’s designed to be connected to a standard 4″ dust collector hose. The end wings and back (which, when lowered down, becomes the top) tip up to create barriers that block the dust as it is literally thrown from the sander. Curiously, we found 1/4-sheet sanders to be some of the dustiest. The downdraft table panels — four steel plates with holes and rubber non-slip grommets preinstalled — allow the dust to be sucked down into the vacuum chamber. If you team up this table with a random-orbit sander that has its own dust collection system, your overall dust collection will be remarkably effective (although not 100% dust-free).
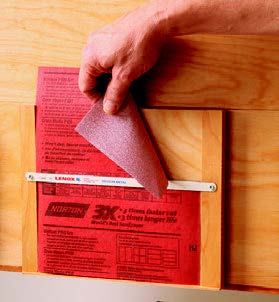
The other features that make this little cart even more useful include an aluminum-covered top that, when folded down, can be used for any number of shop tasks; storage in a drawer and on an open lower shelf; a handy little jig for tearing sandpaper into perfect quarters to fit jitterbug sanders; and two casters that allow you to move the unit around with ease. I think it will make a great addition to nearly any woodworking shop.
Starting Out
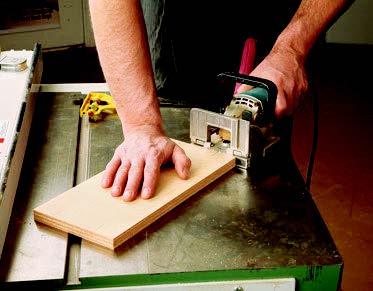
I used standard 3/4″ birch plywood to make the majority of the components of this cart. There is some 1/4″ plywood that forms the bottom of the vacuum chamber and a bit of solid hardwood on some of the edges (I used cherry) — but any type of veneer core plywood will do, and the hardwood is your choice as well. It’s a shop project … but, hey, it can still look nice!
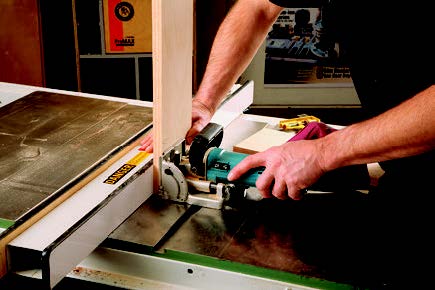
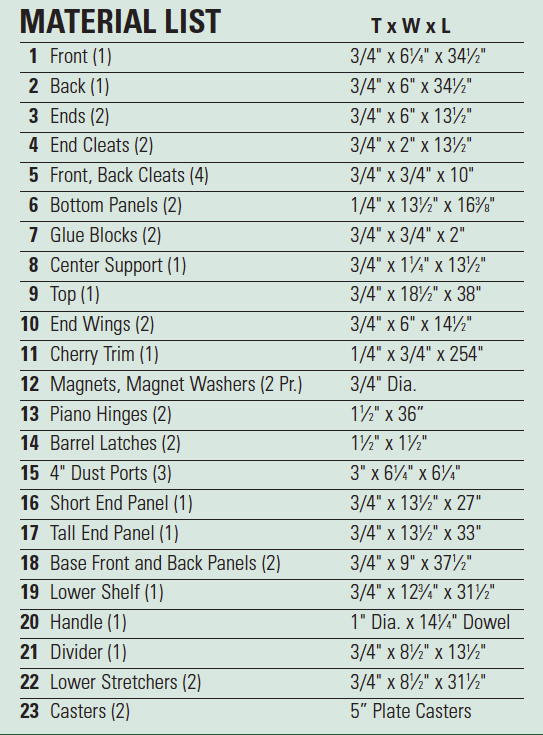
Use the Material List to cut out the front, back and ends (pieces 1, 2 and 3) of what I call the vacuum chamber — the top section that will eventually slide down onto the base. These pieces are butt-joined using biscuits and glue.
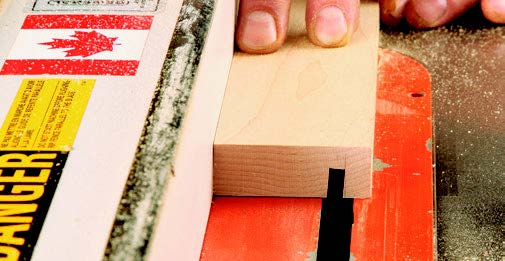
I put the sides up against the locked fence on my table saw to give me a 90° secure setup for slicing the biscuit mortises. When the pieces are prepared, go ahead and glue and clamp them together, checking for square as you do. Note that the front is 1/4″ taller than the back. Next, cut the chamber’s end and front and back cleats and bottom pieces (pieces 4, 5 and 6).
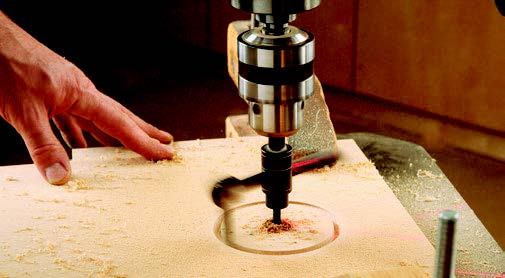
I used a circle cutting bit in my drill press to form the opening for the dust port into one of the bottom pieces. Check the Drawings for the location. Plow grooves into the chamber’s end cleats at a 7° angle, using a 1/4″ dado head.
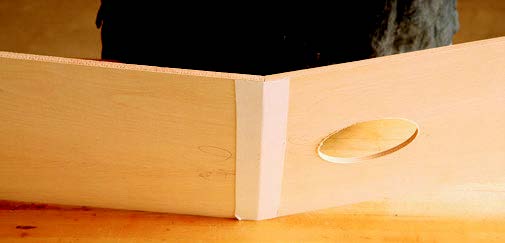
I found the best way to assemble and install the angled bottom into the vacuum chamber was to use a really strong tape (duct tape or its equivalent). Adhere a strip to the underside of the bottom pieces, apply glue to the seam, and then flex the bottom into a slight V.
Get ready for assembling the bottom and installing it into the chamber by flipping the subassembly upside down and setting it on three 1/4″ spacers. These spacers accommodate for the front’s extra height. In addition, place 1″ scrap blocks inside the chamber subassembly positioned against each end. The reason will become clear in a moment.
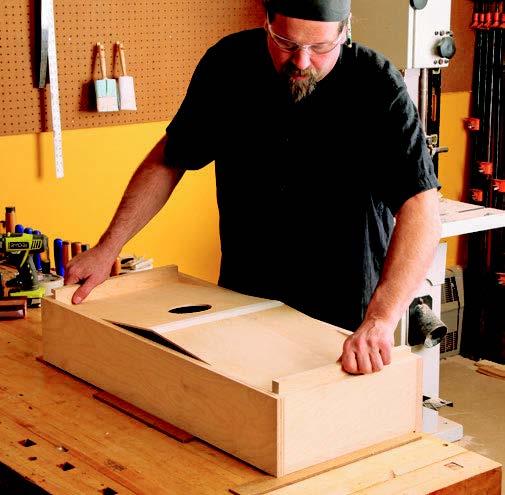
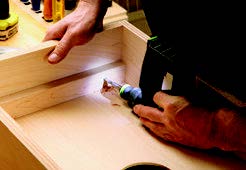
Install the chamber end cleats so their grooves fit over the ends of the thin bottom subassembly, and push the whole thing down until it stops on the 1″ scrap blocks you just placed. Then drill pilot holes and drive screws through the chamber end cleats. The four front and back cleats that support the chamber bottom are added next. I installed these using a simple “rub joint,” moving them gently back and forth until the glue tacked and grabbed.
Once the glue has cured, turn the chamber over and install the glue blocks and center support (pieces 7 and 8). The metal downdraft table panels rest on the center support and the chamber end cleats when you are using the cart. The last pieces to make and install on the vacuum chamber are the end wings and the top. Cut them to size from 3/4″ birch plywood. Trim the edges of the top with cherry hardwood and sand it flush (pieces 9 through 11). Now take a few moments to drill and secure the magnets (pieces 12) to the back panel (see Drawings) using epoxy. Fasten the piano hinge to the top edge of the chamber back (piece 2), then attach it to the underside of the top so the panel will stand up at 90° to the chamber when open. Transfer the positions of the magnets to the underside of the top, and mount the magnet washers. When that’s done, install the end wings to the chamber with more lengths of piano hinge (piece 13), positioning them so they are tight against the top when in the upright position.
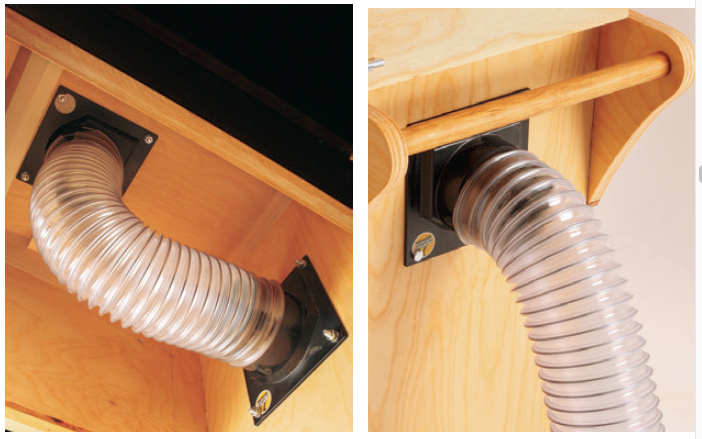
Attach the barrel latches (pieces 14 — available at your local hardware store) to the wings and then mark and drill holes into the underside of the top to accept their barrels. You are almost done with the vacuum chamber. Position one of the dust ports (pieces 15) over the opening you made on the angled bottom, mark and drill its mounting holes and use short hex-head bolts, washers and nuts to install it. Put the vacuum chamber aside for now and move on to building the base.
Constructing the Base
Construction techniques used in making the rolling base are stone simple, but still sturdy and practical. Start by cutting out the tall and short ends, front and back panels, lower shelf, handle and the divider (pieces 16 through 21).
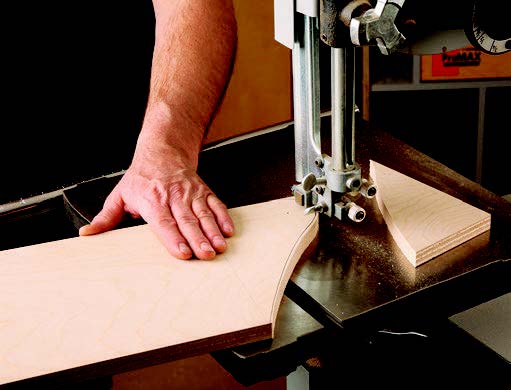
Grab the base front and back and get ready to shape their ends. I made a template from MDF to the exact shape of the end (see the Drawings for details). By forming the shape on a template, I could fair it up and get it just right. If I made a mistake, I could just start over on another piece of MDF — I wouldn’t have wasted a good piece of stock. Once the template was accurate, I transfered the shape onto the handle panels, stepped to the band saw and rough cut the shape just outside of the pencil line.
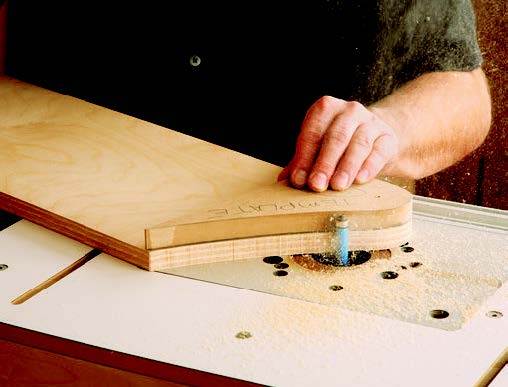
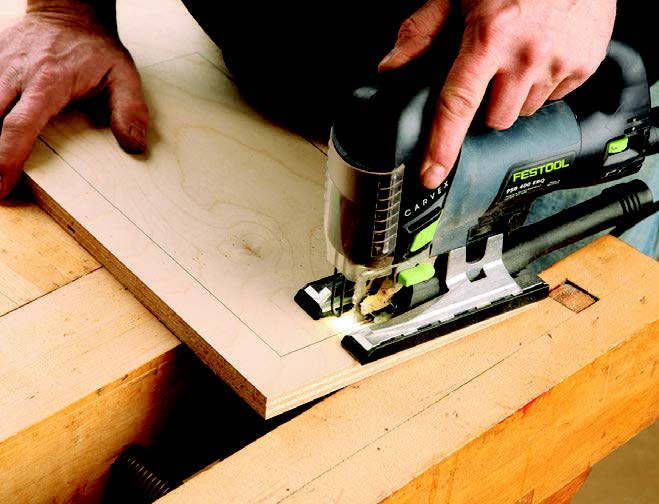
Then I chucked a pattern-routing bit into my router table. Attaching the template to the pieces with double-sided tape, I could carefully rout the shape. It left a nice smooth edge. Repeat the process on the other panel. Next, I selected one of the pieces to be the front and receive the drawer opening. I marked out and rough cut the opening with a jigsaw. I made another template to exactly the drawer opening size and template-routed that opening as well. Routing leaves the edges smoother than the jigsaw can. The pieces still need a pair of stopped holes drilled on their inside faces for the handle, plus some cherry trim along their lower edges. You also need to cut the bottom curve on the tall end piece and use the circle cutting bit to bore a dust port hole through it. Do that final prep work now, and you’ll be ready for assembly.
Get out your pencil and marking tools, because it is time to warm up your biscuit cutter. Mark out and locate the biscuit slots. When they are cut, dry-fit the base subassembly together so you can verify the fit and practice your clamping procedure. At this point, I would recommend finding a friend to help with the gluing and clamping, and it might be very helpful to pre-glue the biscuits into the panels so you don’t have to handle them during glueup. (While it’s not required, if you have a nail gun handy, well…you will find it very handy!)
While the subassembly is drying, make the lower stretchers (pieces 22). I started by cutting blanks and milling a 3/4″-wide x 3/8″-deep groove along the lengths of their inside faces. I stepped to the band saw to cut the stretchers’ bottom profiles to shape. Align these cuts so they turn the groove into a rabbet where the curved edge straightens out (see Drawings), and sand these cuts smooth. Add some hardwood trim to their top flat edges before fitting the stretchers against the bottom shelf and gluing them in place with biscuits. When the glue dries, attach the two casters (pieces 23) to the bottom shelf with short lag screws and washers.
Adding the Sandpaper Cutting Jig and Drawer
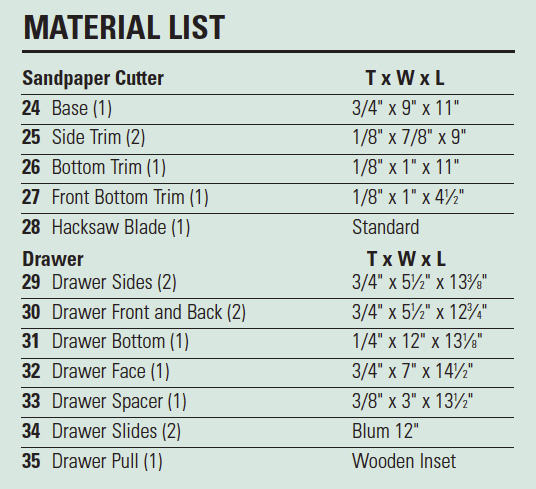
Build the sandpaper cutting jig next. Cut pieces 24 to 27 to size and assemble them with glue, as shown in the Drawings. Secure the hacksaw blade (piece 28) with #4 screws, and mount the jig to the cart with screws driven from the inside.
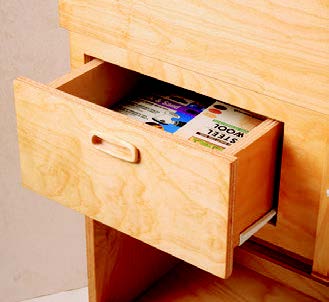
The last major bit of work is making and mounting the drawer. Cut the drawer parts (pieces 29 to 32) to size. The drawer box sides and ends have 1/4″ grooves formed on their inside faces for the bottom, while the front and back have rabbets cut as shown in the Drawings. Glue and clamp the drawer parts together. While it dries, secure the drawer spacer (piece 33) in place as shown on the Drawings. (The spacer is needed to help mount the left drawer slide.) Mount the slide hardware (piece 34) to the drawer box and carcass, and slide it together to hang the box. The drawer face requires a routed recess to accept the drawer pull (piece 35), which you can install now. Center the drawer face on the box and attach it with two screws driven through from inside the drawer. Way to go, you’re almost done!
Grab two more dust ports and mount them “back to back” on both faces of the tall end panel with bolts, nuts and washers. Drill some countersunk pilot holes on the inside faces of the cart ends to prepare for attaching the vacuum chamber. Grab the vacuum chamber and slide it down into position on the cart. Lift the cart up onto a bench, and drive screws through the pilot holes to attach the vacuum chamber to the cart. Now cut a length of flexible dust collector hose to fit between the dust port on the bottom of the vacuum chamber and the one on the inside face of the cart’s tall end. Secure it with tubing clamps.
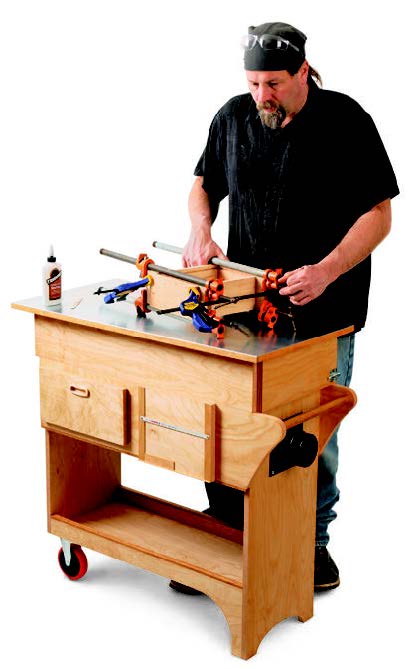
Two things remain to be done. First, glue a thin sheet of aluminum to the cart’s top using contact adhesive. (Most big box stores sell sheet aluminum.) Trim it to fit with a carbide chamfering bit in a router — it works surprisingly well. Sand off any sharp edges of the aluminum when you are done and your cart is ready for the last step — finishing. I used Watco® oil. It is really easy to apply, dries hard and can be touched up in a snap. It’s the perfect shop project finish.
Click Here to download a PDF of the related drawings.
