
In response to Chris’s question last week about box joints, several readers share thoughts and photos! – Editor
“You’ve landed on yet another topic I have some thoughts on. Reflecting on my many years of woodworking, I think that box joints have remained a construction technique staple for me. Some of my earliest projects—a toy box for our children and a (fairly large) firewood box for a friend— were constructed using box joints cut with a vintage 10″ Rockwell/Delta Homecraft bandsaw, no less. Their strength and elegance obviously made the tedium of the above technique worth the effort. As time went on, it was my go-to for making all manner of waste baskets, smaller firewood boxes for myself and my in-laws as well as small, lidded boxes to hold nothing in particular. By then, however, I’d gotten a table saw and dado set and built the common homemade jigs to achieve my favorite joinery. Most recently, (in the past 5 years, or so) I invested in the Incra I-Box jig and have been very pleased with the tea boxes, pencil boxes and cremation urns it’s turned out for me. Thank you for asking.” – Jayme Johnson
“Box joints resonate strongly with me. I love them. I own an Incra I-Box, but I seldom use it due to its hugely time-consuming setup and tweaking process. I find that if I have a bit of scrap, I can make one for whatever size I want the fingers to be faster than I can set up the I-Box. The one in the photo above is using a 1/4″-wide saw blade from Infinity Cutting Tools. It’s a perfect 0.025″, and I use it often for box joints, drawer bottoms and making groove/dado box corners, mostly for drawer construction. I love the extra glue surface, and all of them make an almost self-squaring corner; they never need much tweaking to be sound.” – George West
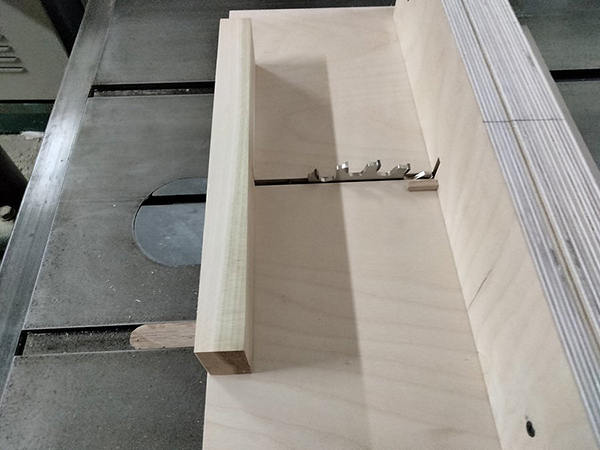
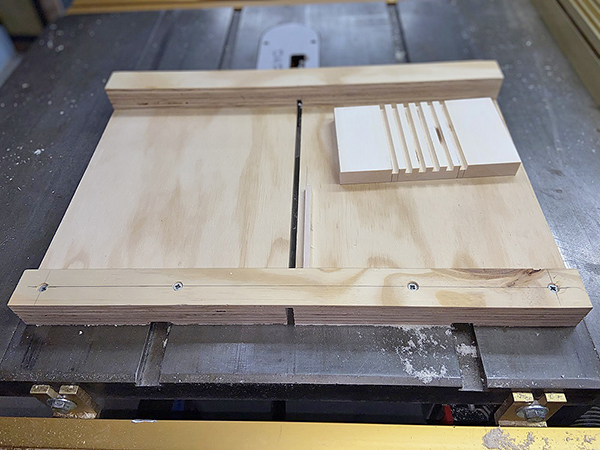
“Yes, I also spent many Saturday mornings with Norm! True to the ‘New Yankee’ principles, I go cheap and low tech for box joints, as with most things. I’ve made a small crosscut sled that has plywood with pin clamp-on attachments for 1/4″, 3/8″ and 1/2” box joints. I certainly don’t use them on every project, but when I do, there tend to be a lot of them. It was very tedious and time-consuming until I found a way to cut the time almost in half. For each pair of mating pieces, I start by cutting the initial slot in the first piece as usual. Then, without finishing all the slots in that piece, flip it and use it to index the initial cut in the mating piece. Now, mount both pieces with their initial slot on the alignment pin and proceed to cut all the remaining slots in both at the same time. Of course, you’ll still need the usual test cuts and adjustments to get the pin and slot spacing just right, but from that point on, it goes almost twice as fast as with the traditional one piece at a time approach. I haven’t found a downside, but I’ve never seen this suggested in any article or video and I’ve always wondered why.” – Henry Burks</strong
“I build Langstroth beehive boxes for a friend. The sides are joined with box joints glued and nailed with long galvanized nails—it’s very strong compared to nailed-butts. I made a jig for the table saw to cut the joints. It did not work and I was not comfortable working so close to the blade. The joints are now cut on the Hegner Polycut saw, very quick and very little fettling to fit.” – Phil Dupreez

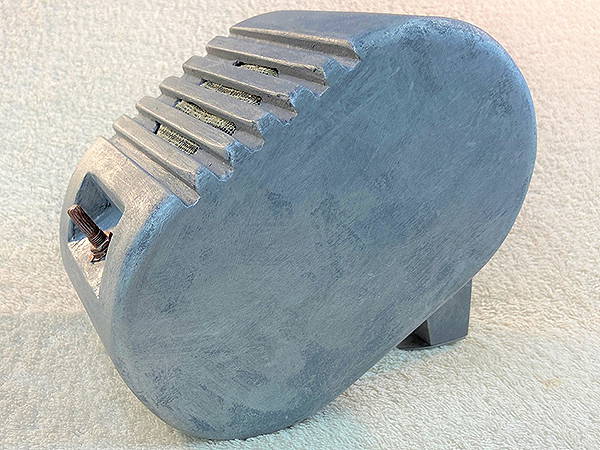
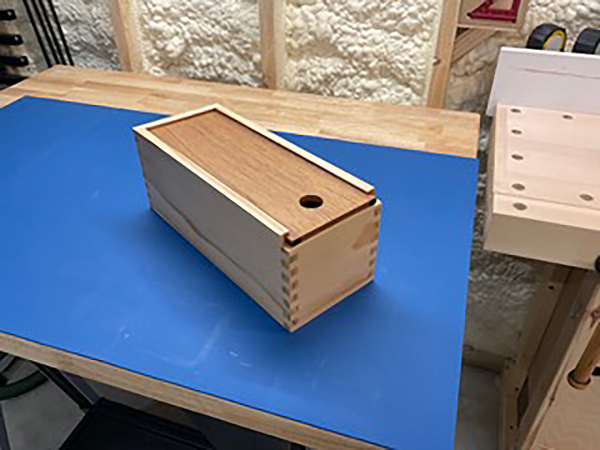
“I used a box joint jig to make a speaker grill, part of a Bluetooth speaker box (see photos, above).” – William Aulick
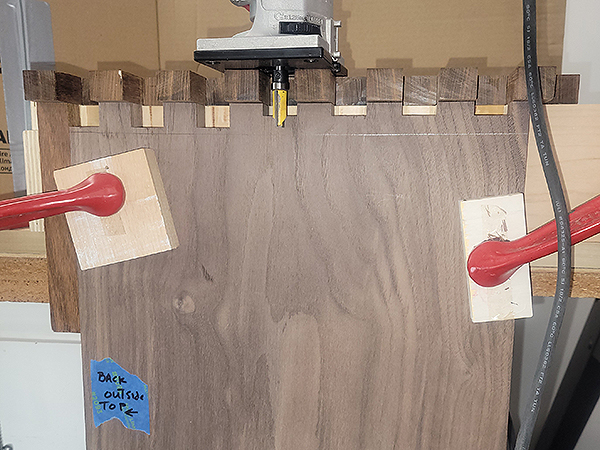

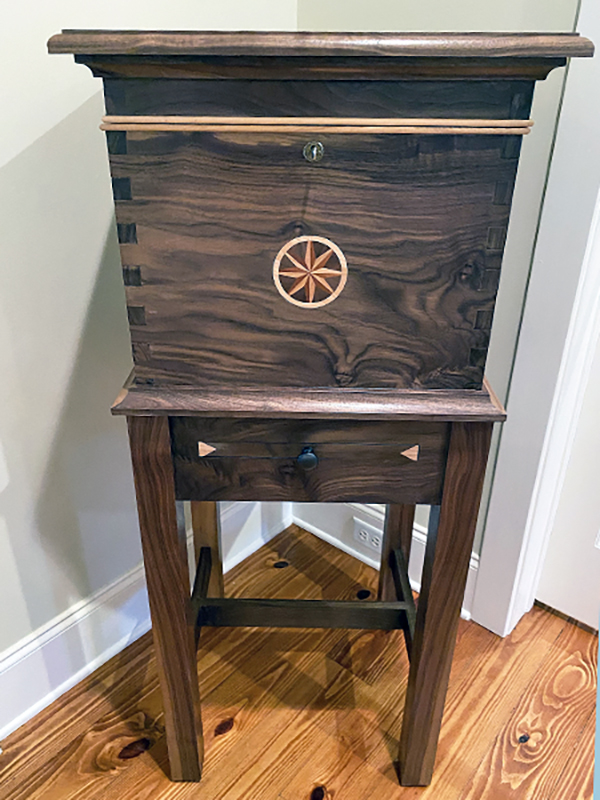
“I recently completed a walnut bourbon storage box (a cellarette, see above), and used 1″ box joints to join the sides of the box. I had never tried to do joints this large and ended up building three different box joint jigs before settling on the one I used to cut the 1″ pins and notches in 7/8″ black walnut. The first jig was a simple 1/4″ plywood routing template, but I was not pleased with the results. I couldn’t get the pins and notches perfectly aligned, no matter how carefully I measured and cut the template. The second was a sliding fence jig for my router table. It took me a couple of days to fabricate the jig and when I tried it, I found this jig good for milling small pieces of thin stock (jewelry box size projects) but impossible to control with the 18″-long x 13″-wide walnut as it passed over the 1″ router bit. I finally settled on an adjustable finger jig that I could use with my palm router and a 1/2″ inch pattern bit. This one turned out to be ideal for this job. The fingers are made of ipe, which is very hard, and attached to the jig base T-track with countersunk stainless cap bolts and square nuts. I was able to adjust the fingers to ensure that the pins and notches in the box sides aligned perfectly. I could clamp the stock securely to the jig to keep it rock steady during milling. The palm router and 1/2″ pattern bit were easy to control in the thick walnut. I could lower the router bit in increments to sneak up on the depth line so that there was almost no sanding required to make the pins flush to the sides of the box when I was done. The 1/4″ plywood template cost a couple dollars. The sliding fence jig was constructed from some leftover plywood off cuts (probably $10 worth of materials). The T-track, stainless cap bolts, square nuts, scrap lumber and ipe made the third jig the most expensive (probably $30 to $40). So, not particularly expensive, and it worked better than I might have guessed.” – Mike Campanella

“I guess I’m a bit odd in that I actually prefer the aesthetics of box joints to dovetails and similarly have made a great many projects with them. I make them almost entirely on the router table, and early on I got a Rockler jig. Even a dedicated jig as you know takes a number of test cuts to dial in perfectly, and I then batch out more parts than I need, just because. Those spares always turn into something for someone though, so no real loss of time nor materials. Here are a couple box joint project examples that I happened to photograph: the quintessential wine presentation box and a model train carrier. Keep the appreciated articles coming.” – Bill Hewett


