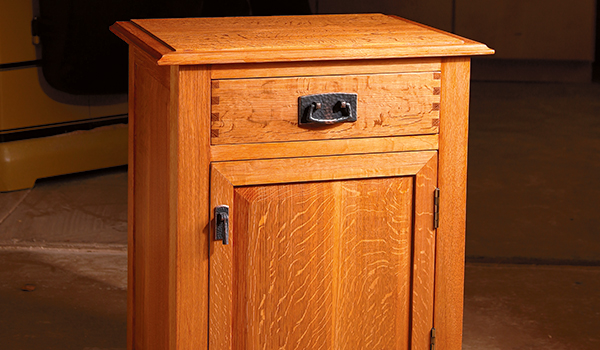
Well-known woodworker Norm Abram had the reputation of using as many power tools per project as was humanly possible. And while we probably can all respect that methodology, this project, on the other hand, turns that theory on its head. We built this classic little nightstand with essentially just one tool: a table saw.
I say “we” because this was truly a collaborative effort. I came up with the initial design, art director Jeff Jacobson refined the project, and woodworker (and regular Woodworker’s Journal contributor) Kimberly McKneelan helped out with the construction. All of this effort was to develop a table saw-based project to feature in our DVD, Mastering the Table Saw.
When it was done, we decided to put it in the magazine so more people could enjoy and build it. Made from quartersawn white oak lumber, it features a large interior compartment. We did not add shelves to this project, but you could certainly do so if you wish. The drawer as we built it is solid lumber throughout, with exposed box joints on the front and back.
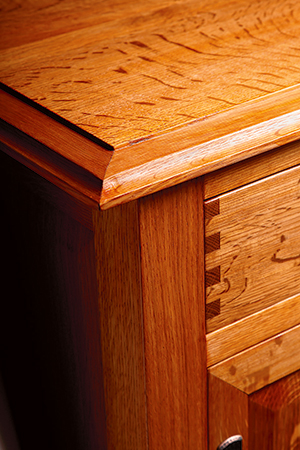
The top is constructed with a buttjoined panel surrounded by a coved molding, which is attached so there is a slight step-down, adding to the shape of the piece. Our finish is hand-rubbed amber shellac, which gives the piece a lovely glow.
Getting Started
As indicated, this piece was made almost exclusively using the table saw. So we used 3/4″ S2S (surfaced two sides) lumber straight off the rack. We straight-line ripped the stock, using a jig, to get clean edges that were ready to butt-join the various panels: top, sides, back and the door panel. We also made the drawer bottom and the bottom of the cabinet from glued-up solid wood panels, but if you chose to use plywood for those pieces, that would be totally understandable.
Just because we chose to eschew the joiner and planer during our stock preparation does not mean that you need to do so. In fact, I would recommend following your standard practice for stock prep. We made our “one tool” point here, but you don’t have to. With the stock ready to go, we glued up the various panels that would enclose the cabinet.
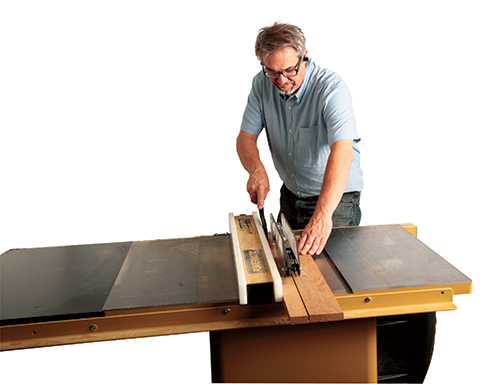
Making the legs is the next task at hand. Arts & Crafts-styled furniture, unlike Queen Anne or Federal furniture, does not use extensive ornamentation to look pretty. Instead, the Arts & Crafts philosophy relies on proper proportions, exposed and well-executed joinery and careful stock selection to achieve a pleasing look. The legs as we constructed them are a great example of how that philosophy is put to work. We could have made the legs from a 2″-square length of quartersawn white oak and they would have functioned just fine. But they would have had at least two problems: first, the quartersawn grain would have only been present on one exposed face of the legs (the other would have been hiding inside the cabinet). Second, the thick leg would be so chunky that we would have needed to notch the bottom around the legs, an unnecessarily fussy step. We could have solved the grain problem by using riftsawn stock, but the chunky problem would remain. So we chose to make each leg from a single piece of quartersawn 3/4″ stock, mitering the leg assemblies so that the figure flows around the corner and is nicely matched on the exposed faces of each leg. Start by selecting stock with attractive grain, then rip the pieces to form 2″-wide leg blanks (see the photos below). Then miter-cut the length of each piece; we took care to miter the edges where the pieces were ripped apart earlier, to ensure the grain pattern matched perfectly at the joint.
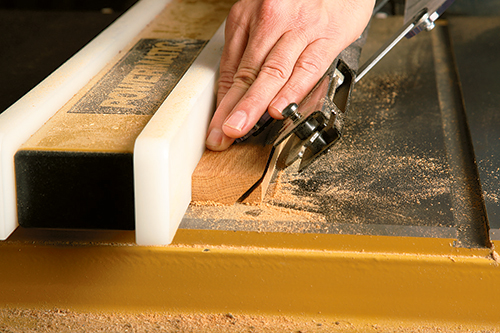
Achieving an accurate glued-up miter joint along these legs would have been tough duty, but we took the time to plow a 1/4″-wide groove down the middle of each mitered face. Then we formed splines to fit into those grooves to make the glue-up process easy and accurate. Before we plowed the grooves into the mitered faces, we sliced 1/4″-wide grooves down the length of their opposite edges to accommodate the frame-and-panel joinery of the carcass (note the grooves for the back panel are 1/2″ wide – see the Drawings). The panel edge thicknesses will be reduced to 1/4″ during the raising process. Wrap up the leg blanks by cutting angled feet into their bottom ends.
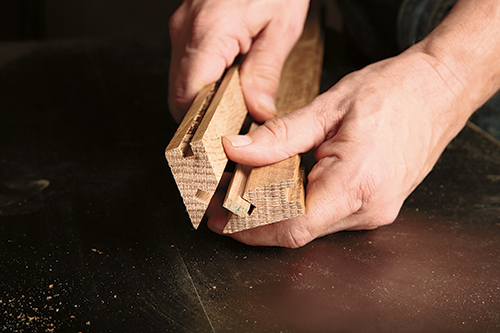
Now would be a great time to make all the carcass rails. They vary in length and width, but they all have the same type of tongue formed on each end (some thicker, some narrower), which will fit into the grooves you plowed into the legs. Find the details for these pieces in the Material List. (Go ahead and rip stock for the door stiles and rails as well.) After the carcass rails are cut to length and width, you can form the tongues at their ends. There are any number of ways to raise them, but we did it on the table saw using a tenoning jig and a 1/4″-wide dado blade in the saw. Use scrap lumber to set up the jig so that the tongues slip into the grooves with a gentle friction fit. When you’ve completed that task, leave the dado blade in the saw and plow grooves in the appropriate edges of the door rails and stiles for the center panel. See the Drawings for details.
Carefully glue up the leg subassemblies, then set them and the rails aside for now. It is time to start working on those panels that were glued up earlier.
Panel Prep
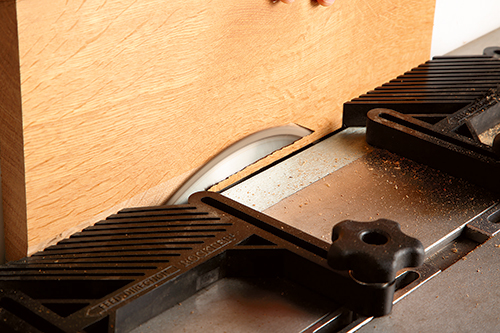
By now the flat butt-joined panels you worked on earlier should be ready to go. If they are not perfectly flat, you’ll need to address that with a hand plane or by sending them through the planer. Cut them to size using the Material List as a guide.
We used the table saw to raise the field area in the center of the panels. With the blade tilted about 10 degrees and raised about 1-1/2″, the bevel should taper down to approximately 3/8″. We put featherboards both in front and behind the blade so that the panel was held securely throughout the cut. Form the bevels on the end grain first, then follow up by cutting the remaining edges.
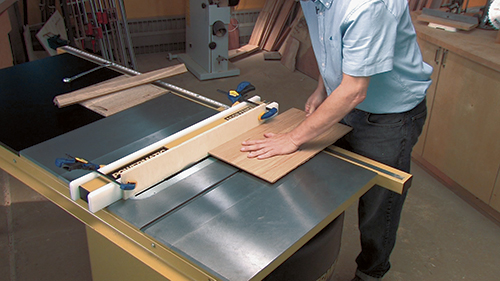
With the bevels formed on the panels, the next step is to shape a rabbet on the edges of your panels so that they fit properly into the grooves on the legs and the rails. Cut these rabbets with a 1/4″-wide dado blade in your table saw, adding a sacrificial fence affixed to your table saw’s rip fence to protect its surface. Use the Drawings to dial in the dimensions of the rabbet. The rabbeted edges should slide into the grooves in the rails and legs with a gentle friction fit. In this case, too loose is better than too tight, but just a bit of friction is perfect.
Again, we formed these bevels using the table saw, but if you have a router table and a good set of router bits for this task, there is no reason that you can’t go with what you are most comfortable doing.
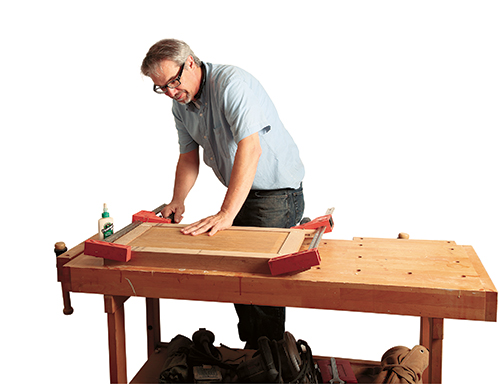
To get ready for building side, back and front subassemblies, you’ll need to sand and pre-finish the raised panels and the flat back panel you just machined. I like to use a cabinet scraper to remove the tooth marks from the beveled edges and then sand the overall panels up to 220-grit. We used amber shellac as our finish: here, apply at least two coats of the shellac before putting them into their subassemblies. With the rails, leg subassemblies and the raised panels prepared, make some real progress by gluing and clamping the side panels together. Follow the same procedure to glue up the door — although you will need to miter the corners of the door stiles and rails. We reinforced the door frame corners with exposed 1/8″ spline joints (see Drawings). Splines look nice and add strength and durability.
Details Make the Difference
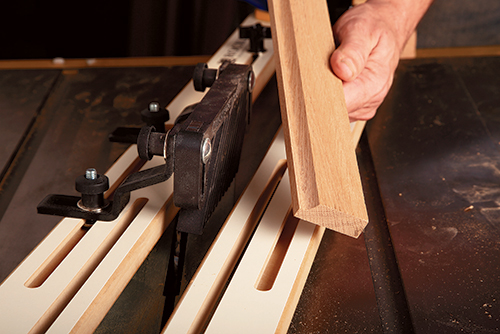
Before you get to move on to the final details, go ahead and finish gluing the carcass together. Grab the various rails, panels and filler strips, and do a dry-assembly of all the pieces before you get your glue bottle out.
We chose to groove the inside edges of the “door opening” legs. That way we could locate the upper and lower rails in place, then just fill the remaining open grooves with the strips cut to length. It worked really well and was nearly invisible. Cut the filler strips to size now as you test the overall assembly. When everything goes together well, glue it up and apply clamps. This is an operation that is best done with a buddy, or a really well identified glue-up plan!
With the carcass in clamps, move on to forming the top. In this cabinet, it is constructed from a glued-up panel of 3/4″ stock, selected for its attractive figure. Cut the panel to size and then raise a tongue around three sides of the top, as shown in the Drawings. Again, we did this with a 1/4″ dado in the table saw. We machined the molding entirely on the table saw. We shaped the cove using a cove-cutting jig, running the stock in multiple passes across the blade. Then we plowed a groove to match the tongue that was just milled in the top. (Our trusty 1/4″ dado setup once again provided the cutting power.) The key to this operation is to offset the placement of the groove to mount the molding slightly below the plane of the top. This adds shape to the top and provides a nice shadow line. (See the Drawings for the machining details.) With the molding ready to go, wrap the top’s three edges by mitering the molding to fit. Attach it with glue and clamps before moving on to final sanding.
The top is attached to the carcass with figure-8 tabletop fasteners — but before you attach the top, there are some cleats to glue in place. The drawer cleats and the bottom cleats are simply sticked-up stock that support the drawer and the bottom. Cut them to size and then glue them in place. When the glue cures, fit the bottom to the cabinet. It can be glued in place or screwed. Either choice is traditional and appropriate.
Adding the Drawer
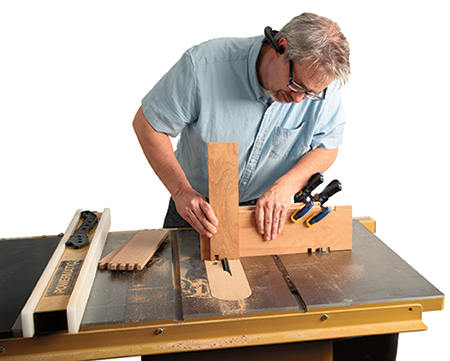
Made of solid lumber from stem to stern, the drawer again represents the best of the Arts & Crafts design ethos. The front and back of the drawer are made from 3/4″ stock, while the sides are 1/2″ material. As before, the drawer face should be selected and harvested from beautifully figured lumber. Install a box joint jig on your table saw — we used a shop-made version — and start your setup with scrap lumber milled to the exact thicknesses of the actual drawer material.
The critical component of box joint jigs, regardless if they are shop-made or store-bought, is the registration pin. It needs to be the same width as the notches you will be forming to interlock the wood together. Setting up the jig takes some trial and error, which is where that scrap lumber comes in handy. Look to the Drawings to get dialed in on the layout of the notches and pins. When the box joint cuts are done, reset the dado blade to the ubiquitous 1/4″ cutting width, and plow the grooves for the drawer bottom into the front and sides. You’ll notice that the drawer back is narrower than the drawer front. That is to allow the drawer bottom to slide into the assembled drawer box, underneath the drawer back. Because the drawer bottom is made from solid wood, it needs to be able to expand and contract freely, and this design allows it to move.
We do need to add a small mea culpa here: because we decided to do all the machining for this project on the table saw, we did make a quality compromise on the drawer. Ideally, the drawer bottom groove in the drawer front should be stopped. Instead, we just cut the groove from edge to edge. This left two small square holes in each side of the drawer (see the Drawing above), and we plugged them with small pieces of wood. They are nearly invisible, but you could avoid this by using a router and stopping the groove.
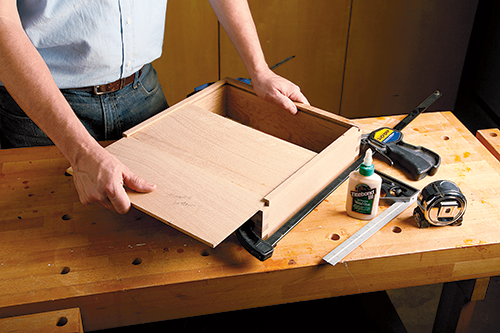
Test-fit the drawer pieces together and make any adjustments required for assembly. Carefully apply glue to the box joints, but only put dabs of glue for the drawer bottom in the groove in the drawer front, and then clamp it up and let it dry.
Wrapping Up
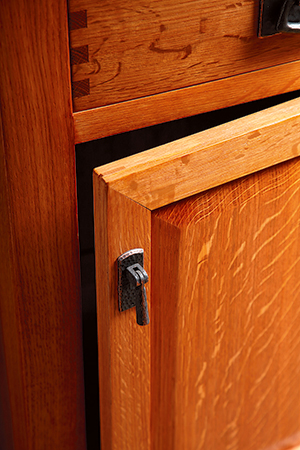
With the drawer done, the remaining assembly steps consist of attaching the top to the carcass, fitting the drawer to its opening (if necessary), hanging the door on its hinges and installing the ball catch and the Stickley drawer and door pulls.
Sanding follows those tasks…it is unavoidable. (Take the door and top off, and remove the hardware before you get busy sanding.) We sanded up to 220-grit to get a super-smooth surface. Then, we hand rubbed amber shellac onto all the surfaces, applying about six coats. Sand between coats if you feel nibs occurring or if the shellac runs. Hand-rubbed finishes minimize those problems. After your finish has cured, apply a coat of paste wax and buff it out to make the surface feel as smooth and nice as it looks.
Reassemble the pieces and you are done. As I have mentioned often, this cabinet was made entirely on the table saw — and that’s a testament to the versatility of this workshop workhorse.
Hard to Find Hardware
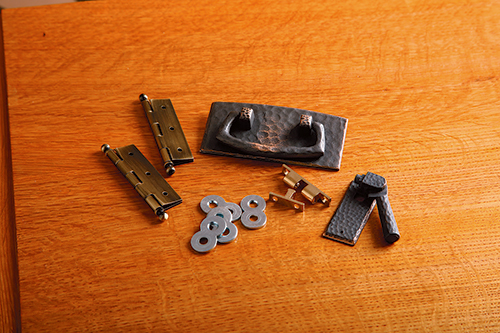
Antique Brass Ball Tip Hinges #57039
Dark Copper Stickley Pull #26815
Stickley Dark Copper Pull, Large #26740
Brass Ball Catch #28613
Desk Top Fasteners #21650
Click Here to Download the Materials Lists and Drawings for This Project.


