This article, “An Introduction to Sharpening,” is from the pages of American Woodturner and is brought to you by the America Association of Woodturners (AAW) in partnership with Woodworker’s Journal.
Dull tools steal the joy out of working with wood. New turners quickly understand that in addition to turning wood, they need to learn how to sharpen their tools. Sharpening turning tools can be broken down into two parts. The first is a potentially overwhelming range of peripheral information about grinding wheels, motor speeds, sharpening systems, grind angles, etc., and the second includes the physical hand and body movements used while sharpening. This article covers the first part, peripheral issues, with a goal of simplifying concepts.
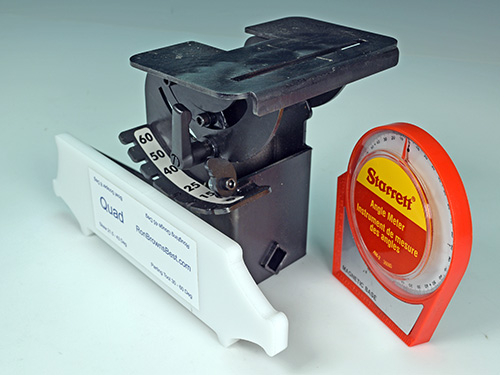
Sharpening Systems
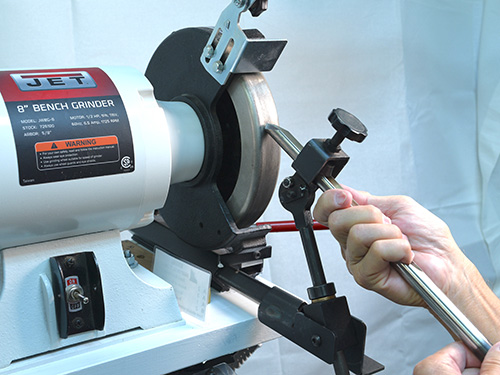
Back when a turner’s primary tool was a scraper, sharpening was done by hand, without any special jigs or fixtures. The turner steadied the tool on a platform while advancing the tool against a grinding wheel. This was okay for a scraper, but as scrapers gave way to the more complex curves of spindle and bowl gouges, sharpening by hand consistently became more difficult. The amount of practice needed to achieve success gave rise to multiple sharpening systems and jigs, which hold the tool for you and limit its movement on the grinder to just what is needed.
There are several sharpening systems available commercially, but it is beyond the scope of this article to list and compare them. The purpose here is to convey the underlying concepts. All of the sharpening systems work by removing metal from the tool by way of an abrasive. The abrasive can be mixed with a bonding agent and formed into a wheel (friable wheel), it can be a coating adhered to a metal wheel (CBN wheel), or it can be on a flexible belt. Regardless of the configuration, each approach achieves the same end: the removal of metal from a turning tool in a controlled manner, leaving the edge sharper.
When you consider purchasing a sharpening system, here are some factors to weigh:
Safety
Sharpening accidents, or catches, most frequently happen when the tool moves past the edge of the wheel. This can cause the tool edge to dig into the wheel. Catches on a sharpening wheel are much scarier than on wood, but more recent sharpening systems limit the tool’s traverse, making it impossible for the tool to go off the edge of the wheel.
Consistency of Grind/Bevel
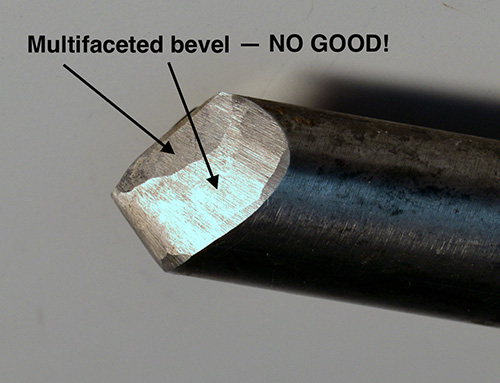
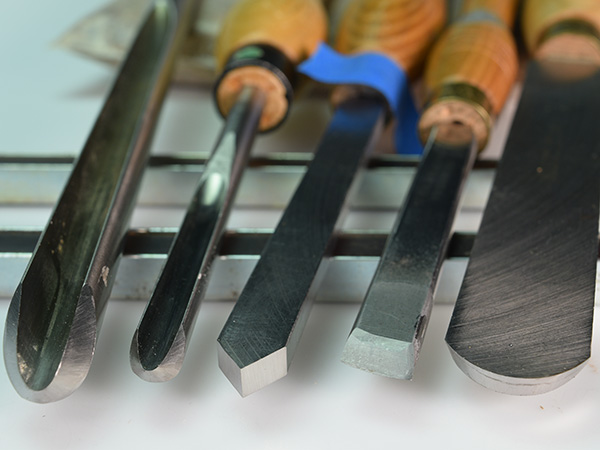
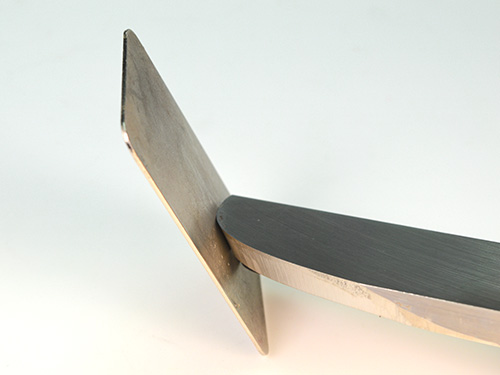
The bevel of a tool should be one continuous surface, not have multiple facets. This allows the tool to ride against the wood and the cutting edge to be advanced into the wood in a controlled fashion. Having multiple flats on a tool’s bevel makes this difficult.
The goal of sharpening is to remove as little metal as possible to achieve a sharp cutting edge with a single, continuous bevel. When a tool is placed on the wheel, or belt, at exactly the same angle every time, less metal has to be removed and sharpening happens quickly. If you change the angle of approach, even by the smallest amount, more metal has to be removed in order to get that one flat bevel. When you couple this with the fact that the diameter of friable wheels reduces as it wears away, there is a need for jigs, setup gauges, and sharpening systems that ensure consistency and repeatability.
So a key question is, will the sharpening system produce a consistent grind each time? How easily and accurately does each system return to the same angle each time it is used?
Learning Curve
New turners might feel impatient to make something. Curls flying and a form taking shape in front of our eyes is what we crave. Learning to sharpen our tools might feel like a distraction. It is necessary, but the faster you can learn how to put an edge on a tool, the better.
As you compare sharpening systems, look closely at the instructions that come with them. Are they clear and understandable? Are there supporting diagrams and videos specific to the turning tools that you normally use? Does the system seem intuitive to you? Talk with members of your turning club and see their sharpening systems in use. It is best to see a range of systems, not just one. Keep in mind that sharpening has changed in recent times and many turners are set in their ways.
Value
Evaluating sharpening systems also involves weighing their cost. The initial cost is not the total cost. Include the add ons that are sold to support the core system and the longevity of the wheel or belt.
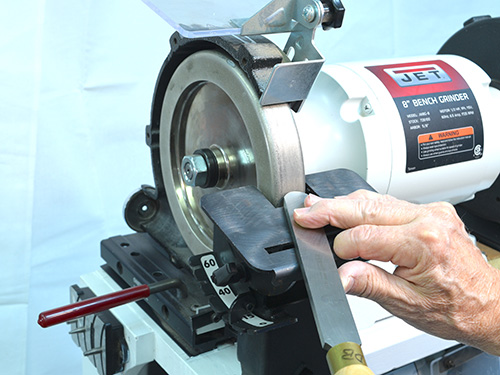
Motor Speed
A little background in metalworking helps in understanding which motor speed should be used. Often in a metal shop, the goal is to remove metal rapidly. That is achieved by using a high-speed grinder with a coarse wheel—typically 3450 rpm coupled with a 36- to 80-grit wheel. But the goal with woodturning tools is to sharpen, not to grind away a lot of metal fast. This is why many turners opt for a slow-speed grinder, sharpening at 1750 rpm, with a finer-grit wheel. This makes it easier to control the removal of metal, which means you can remove less of the expensive high-speed steel (HSS).
Belt-based sharpening systems also use a moderate speed. The measuring unit for a belt is not revolutions per minute (rpm), but lineal feet per minute (lfm). Typically, the lfm for belt systems is 1440 (440 meters per minute). To put this in context, a typical belt sander for wood at its highest setting runs at 3000 lfm.
At the other end of the spectrum are the ultra-slow, water-cooled sharpening systems, which run at 90 rpm. These systems excel at producing surgically sharp edges, while minimizing heat. They are great for carving tools and bench chisels, but are agonizingly slow when attempting to modify a grind on a turning tool.
Grinding Wheel Type
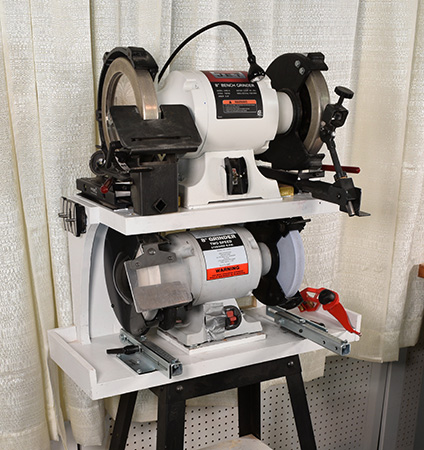
There are two main categories of grinding wheels—friable and cubic boron nitride (CBN). My sharpening station comprises both types.
Friable Wheels
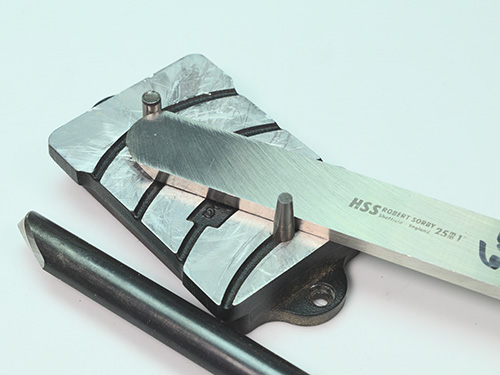
As the name suggests, friable grinding wheels are made of materials (often aluminum oxide) that wear away as tool metal is ground. These wheels have been the standard in metal shops for years. They come in a range of colors, grits, abrasive materials, and binders. There is as much to learn in the world of abrasives as there is in the world of woodturning. Grit type, grit size, wheel hardness, grain spacing, and bond type all should be considered when selecting the correct wheels for use on HSS turning tools. It can be a bit overwhelming, but the decision is important. Bill Neddow provides some excellent distinguishing information in his April 2011 AW article, “Grinder Wheels.” A practical solution is to purchase your grinder and wheels from a retailer that specializes in woodturning equipment.
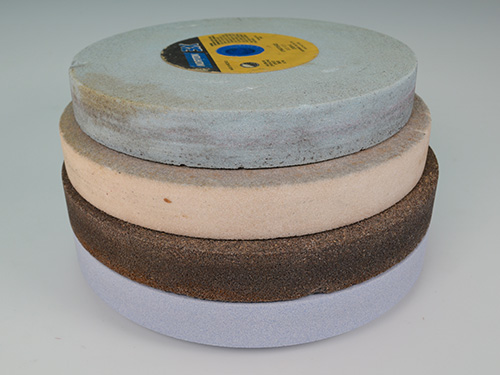
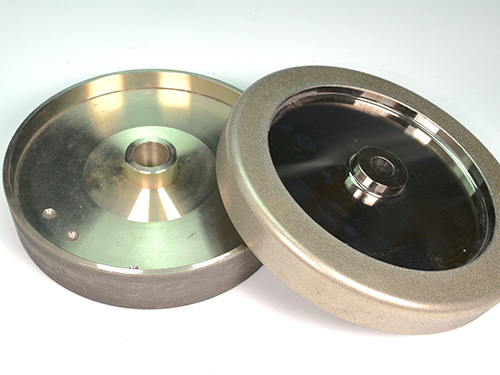
Friable wheels wear with usage. As you can see, this wear reduces the diameter of the wheel. All of the wheels pictured started with an 8″ (20cm) diameter; the one on top now measures 7″ (18cm). The fact that friable wheels wear away has driven the design of some sharpening systems that need to be flexible enough to continue producing a consistent bevel angle.
As they are used, friable wheels will develop grooves. They can also wobble side to side as they wear from density variations within the wheel. Friable wheels will also glaze over as metal loads the wheel, essentially burying the cutting grit. Supporting tools and gadgets are needed to address these issues. The primary advantage of friable wheels is their low initial cost. But when the cost of the needed supporting tools is added, most of the initial cost advantage is lost.
CBN Wheels
In recent times, CBN wheels have become common in woodturning. CBN is second only to diamonds in hardness and has high abrasion resistance. Abrasive particles are bound to either a steel or aluminum wheel. With their hardness and abrasion resistance, CBN wheels can sharpen HSS easily without wearing away or losing diameter. Plus, the metal wheels retain their factory balancing over their entire life. The constancy of CBN wheels has led to a redesign of sharpening systems; for example, workarounds are no longer needed to account for a diminishing wheel size.
CBN wheels are designed for highspeed steel and the newer metals used in turning tools. Soft metals such as carbon steel, used in older turning tools, will clog and glaze the wheel, reducing its cutting action. Do not use CBN wheels with other soft metals such as aluminum, brass, or copper. If a CBN wheel becomes loaded, it can be cleaned by hand, but it is a slow and laborious task.
While the side of a friable wheel should never be used for grinding or sharpening a tool, CBN wheels with side grit can be used for this purpose.
Belt Sharpeners
Belt-based sharpening systems are similar to belt sanders used in woodworking — they have a belt that moves across a flat platen. Specially designed jigs hold the turning tools and control tool movement across the belt to sharpen the tool. Belts come in a range of grits and materials suitable for a range of metals.
The flat platen means that the sharpened tool bevel will be flat, rather than having a slight hollow-ground curve that comes from the shape of a grinding wheel. The advantage of a belt sharpener is that grits are easily changed by removing one belt and installing another with a different grit. Belts do wear with usage and will need to be replaced.
Abrasive Grits
Turners use grinders or belts to either sharpen a tool or reshape it to a new grind. Abrasive grits above 220 remove less material and leave a sharper edge. Grits in the 60 to 180 range are a better choice when reshaping a grind. Changing the grind of a tool with a fine-grit wheel is agonizingly slow. Use coarser wheels to reshape a tool or to raise a burr on a scraper, and finer wheels to achieve a sharp edge. Having a combination of wheels—a coarse 80- to 180-grit and a fine 350- to 600-grit—is suitable for woodturners.
Which Grind for My Gouge?
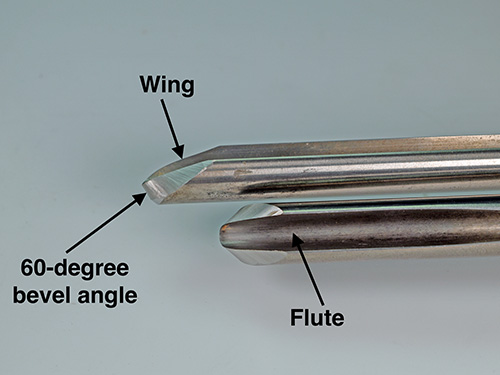
You are likely to come across many names for gouge grinds: traditional grind, fingernail grind, Irish grind, swept-back wings, Ellsworth grind, bottom-bowl grind, and the list goes on. The number of grinds and the opinions about which is best can be overwhelming and confusing. The confusion increases when you survey a group of experienced turners. Ask a dozen turners what grind they use, and you will receive fifteen answers.
The single most important thing about grinds is consistency. Once I found a grind angle that works for me, I took a picture of it for future reference at my grinding station. Your mind and body learn what a tool will accomplish when there is consistency of how the tool is sharpened. It is normal for new turners to try one tool for a given cut, then try another, and yet another until the tool is achieving what is in their minds. The correct grind makes a given cut flow easily from a tool. It takes time, experimentation, and repetition for muscle memory to learn the most efficient tool and grind to achieve a cut that flows and needs little sanding.
Over time, grinds will reflect the type of forms that a turner makes most frequently. The tools of a production turner of large bowls are different than those of someone who specializes in miniature hollow forms.
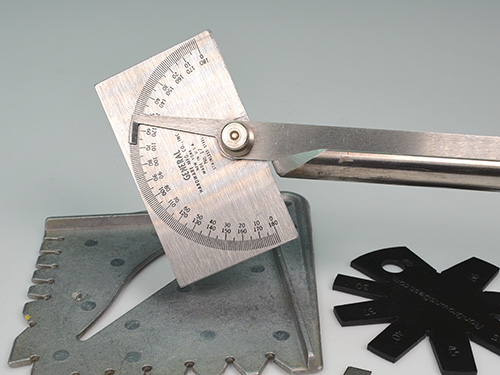
Your stance at the lathe and the bevel angle on your tool are interrelated. Picture your stance with a bowl blank mounted in a scroll chuck on a tenon. As you ride the bevel of your bowl gouge down the outside of the bowl, your body leans in and to the left further and further. You might even end up straddling the leg of the lathe trying to maintain bevel contact to the end of the cut. A blunt grind angle worsens this issue. One way to resolve it is to switch your grip to your left side and switch hand positions to complete the cut. Turning from your left side also allows you to direct the path of the shavings away from your body. It is helpful to develop some ambidexterity at the lathe. Changing to a low angle grind can also allow the cut to be completed.
While there is no “correct” or “best” bevel angle and grinds vary widely with user preference and application, below are some generally accepted ranges that will serve as a good starting point:
|
Tool |
Bevel angle |
|
Bowl Gouge |
60°-65° |
|
Bottom Bowl Gouge |
50°-55° |
|
Spindle-Roughing Gouge |
45° |
|
Spindle Gouge |
45°-55° |
|
Detail Gouge |
30°-35° |
|
Scraper |
70°-80° |
|
Parting Tool |
35°-40° |
|
Skew |
22° |
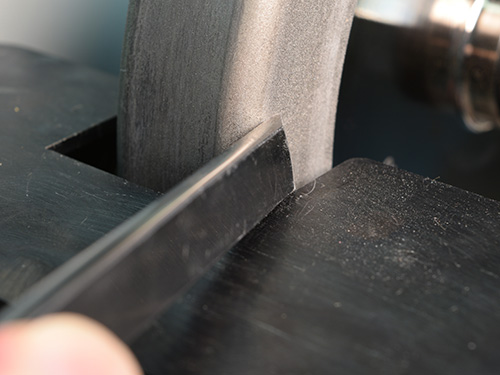
The cutting burr on scrapers of all types are formed with the use of a platform. A grit between 120 and 350 works well. Again, the consistency of the angle when presenting the scraper is critically important. Some platforms have markings that allow the platform to return to a desired position. An angle finder or jig can also be used to return the platform to a specific angle.
A Few Rules of Thumb
Here are some general rules of thumb when it comes to tool shapes, or grinds:
• Tools with a steeper grind (above 45 degrees) and a rounded nose are more friendly.
• Tools with a low angle grind (less than 30 degrees) are “grabbier” and more difficult to use.
• Rounded tool tips tool are easier to control than pointy tips.
• Tools with a low angle grind (less than 30 degrees) and a pointy tip may be useful for getting into tight places.
Sharpening without a Grinder
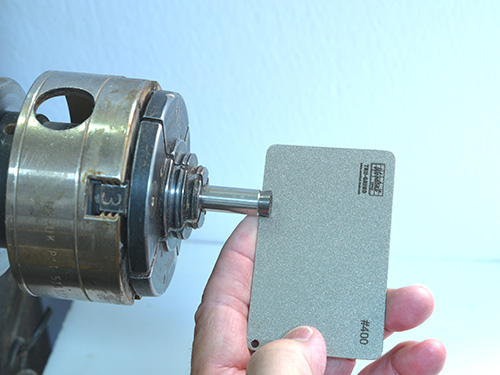
Often it is not necessary to put the tool back on the grinder to refresh the cutting edge. With a little practice, you can quickly bring an edge back to sharp by passing a diamond card or sharpening stone over it.
Skew Chisels
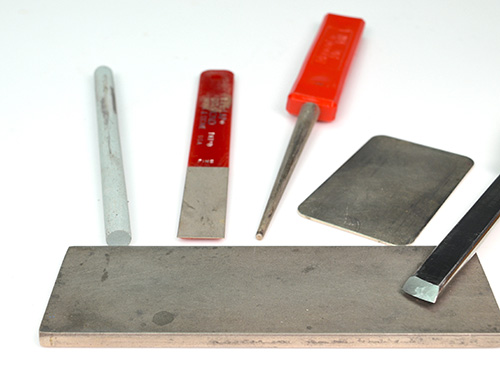
Skews can be honed to a razor-sharp edge easily with a diamond card. It has been years since my skews have touched a grinding wheel. Diamond cards also eliminate the need for special jigs when sharpening skews on a wheel. A diamond card or sharpening stone can be used wet or dry. Lubrication with water, or a lapping fluid, increases the life of the diamond card but is not necessary.
Scrapers
The cutting burr on a scraper can be refreshed with a bench stone, a diamond card, or a handheld CBN hone. Scrapers lose their cutting edge quickly in use. A few upward swipes with a stone or card raises the edge.
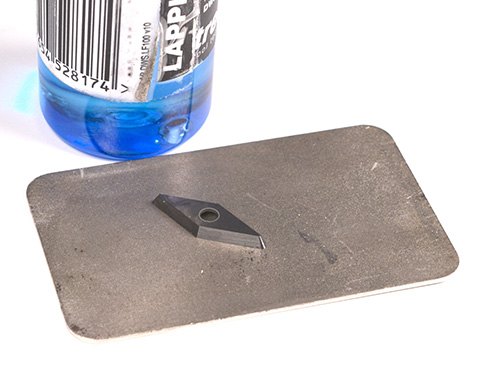
The burr on a scraper can also be raised with a burnisher. The burnisher can be as simple as the shank of a highspeed steel gouge or a hardened drill bit. High-speed steel teardrop cutters Teardrop cutters can be sharpened with either a diamond card or on a wheel.
With a diamond card, place the cutter flat on the card or stone, and move it across the surface. Lapping oil will improve the results and increase the longevity of the cutter. This simple procedure should be done with a light touch and often.
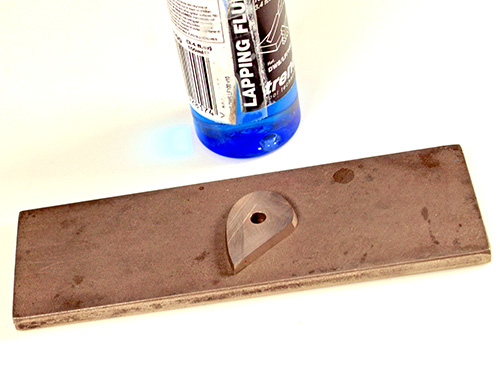
Carbide Cutters
Carbide cutters can simply be replaced when they become dull, but you can also sharpen them by hand with a diamond card. Friable wheels are too soft to cut carbide, and CBN wheels will glaze over with the carbide and be ruined. Remove the cutter from its holder and place the top of the cutter face down on a diamond card or diamond hone. With light pressure, make a series of figure eights across the diamond surface to refresh the edge.
Round carbide cutters can be dressed by mounting them on a jig held in a chuck on your lathe. Use the lowest speed setting on your lathe, align a diamond card with the plane of the cutter’s bevel, and lightly touch the diamond card to the cutter as it rotates.
Conclusion
Writing this article has been eye-opening for me. I learned how to sharpen as I learned to turn, but then I focused my attention on other aspects of the craft and never came back to sharpening. Meanwhile, things had changed. The steel in turning tools improved, grinding wheels went through several generations of advances, and manufacturers have evolved sharpening jig designs. I found that I had closed my mind to sharpening and just stuck to what I knew.
I hope this article helps new turners to understand the many aspects of sharpening. But I would also challenge experienced turners to take another look at your sharpening skills. A second motivation for updating your approach is that experienced turners are the teachers of new turners. Today’s sharpening systems are safer and more easily learned. You owe it to your students to have evaluated today’s choices.
Dennis Belcher retired from a career in the investment world to his lifelong passion of working with wood. He is a frequent contributor to American Woodturner and was a demonstrator at the 2022 Symposium in Chattanooga. Dennis is a member of the Wilmington Area Woodturners Association (North Carolina). You can visit his website at dennisbelcher.com.
Photos by Denise Freitag


