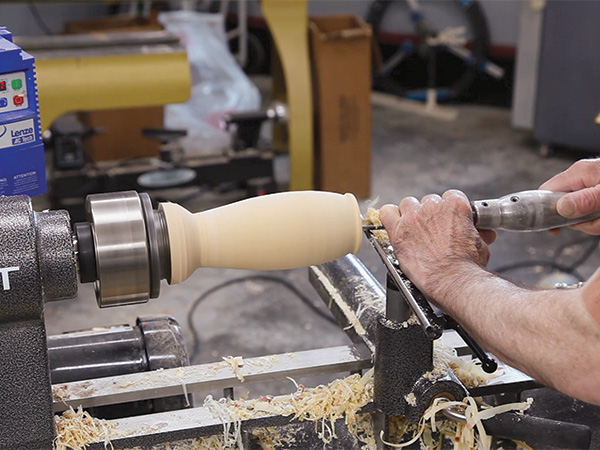
The most common wooden vessels are bowls that are faceplate turned for reasons of strength. But when the height of a vessel surpasses more than a couple of times the diameter, it becomes stronger to switch to spindle orientation instead.
Deep Hollowing Challenges
Since tall (in proportion to their diameter), slender hollow forms are generally made with a small mouth opening, the tool-rest cannot be placed inside of them. The extension of the tool from the rest ultimately will be slightly greater than the depth of the vessel. If you want to turn the inside of a hollow form deeper than about three inches, a spindle gouge becomes problematic. The shaft of the tool starts to flex, and controlling the tool becomes progressively more difficult. At some extension from the tool-rest, control becomes impossible. One solution is to go to a larger-diameter gouge, since resistance to flexing increases by a power of four as the diameter increases. Going from a 3/8″ gouge to a 1/2″ gouge would make a big difference because the latter is four times stiffer.
Boring Bars
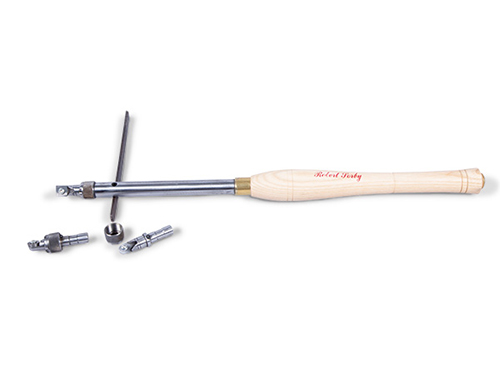
While this math is interesting, it is time to switch to a different tool — a large scraper, often called a boring bar. Boring bars are small scrapers mounted on the end of a stout bar. They are intended to work parallel to the lathe bed with the tool’s edge on the centerline at all times. They can be mounted in a handle and used conventionally or with a turner’s gate, which is a device that will ensure that the bar stays level, never rotates and that the scraper is always on the centerline of the lathe.
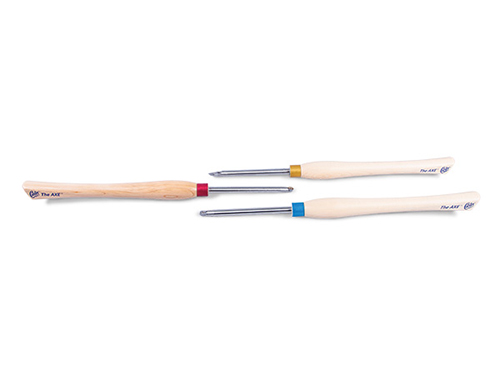
Most boring bars have a flat surface milled on the bottom to help the turner resist rotational forces that are trying to spin the tool when working without a gate.
Turner’s Gates
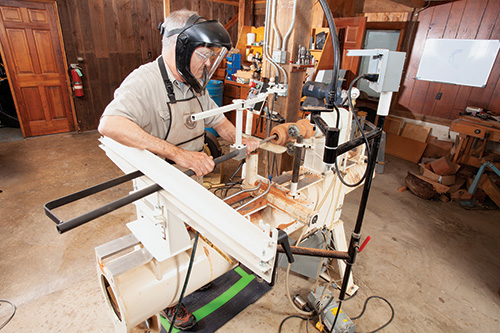
A turner’s gate is a set of parallel bars or rollers that keep a boring bar level with the cutting edge on (or very slightly above) the centerline of the lathe. The tool can be moved latterly but it cannot move up or down or rotate. The gate is clamped to the lathe bed where the tailstock would normally reside. Most gates offer a range of boring bars, often with movable tips that allow for deeper boring as well as removing material from the side wall or undercutting the mouth opening. Most manufacturers offer carbide tips for their boring bars, and some are even TiN (titanium nitride) coated. Some brands also offer tips made of high-speed steel. While TiN coating does wonders when cutting metal because chips will not stick to the tool, it is of questionable value to woodworkers other than to give the tip a pretty gold color.
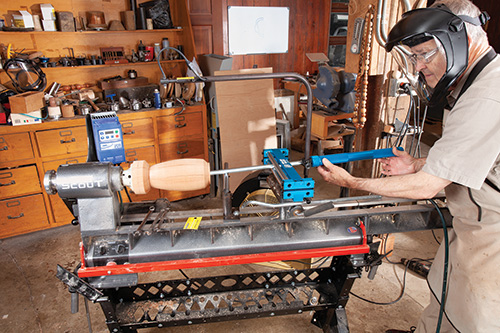
There are a number of turner’s gates on the market. The most popular is the Carter® Products Hollow Roller™ Vessel Turning System. It costs about $370 and will fit most benchtop and full-size lathes. My students find this hollowing system easy to understand and use.
Oneway offers three sizes of their Complete Laser Hollowing System. The smallest size fits benchtop and full-size lathes that have 10″ to 12″ of swing capacity. The medium size fits 13″ to 19″ lathes, and the largest model is for full-size lathes with between 20″ and 24″ of swing. This is the model I am using on my Oneway 2436 lathe throughout this article. All three options are priced at just under $600.
Laser Pointers
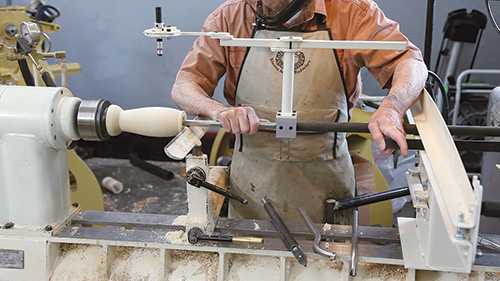
A standard feature of turner’s gates is the ability to add a laser pointer mounted on a movable arm that places it about a foot or so above the workpiece and shining downward. The pointer is adjusted to shine at a distance from the cutting edge that is the desired wall thickness.
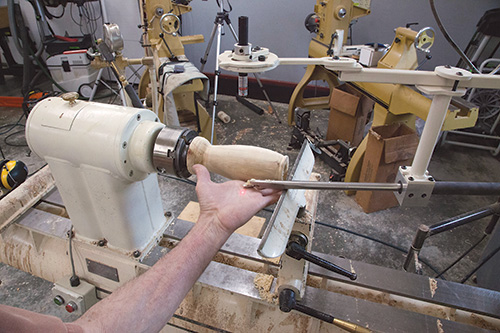
As you remove material from the inside wall, you have a constant idea of how thick the wall is. When the laser beam drops off of the workpiece, the desired thickness has been obtained. It is a splendid idea!
Hollow Forms Workflow
The order of workflow is important when hollowing a tall, slender form. Here’s a brief overview of the process: First, a suitable billet (either dry wood or green) is mounted between centers and turned round. A tenon is turned on one end for grabbing with an external hold in a four-jaw scroll chuck or for mounting in a glue block.
Once the tenon is in place, you can transfer the work to a chuck or glue block in order to turn the outside shape of the vessel.
Start the opening with a spindle gouge and/or a drill. The idea is to get a cavity large enough to get your boring bar inside. It’s also time to set the laser to the desired wall thickness from the tip, then begin to excavate the vessel’s interior.
As the work progresses, you’ll need to frequently stop the lathe to blow out accumulating chips and debris until you achieve the proper wall thickness everywhere. It is usually best to keep the base area a bit thick for several reasons. For one, the base will be stronger. Some extra mass in the bottom will also provide extra weight, given that hollow turnings otherwise often end up very light.
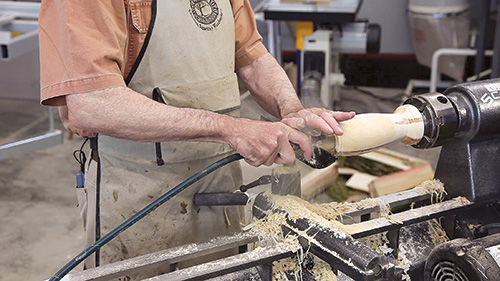
Because of the small mouth opening in most hollow forms, getting the chips and debris (swarf) out is an often-needed operation that is akin to clearing a drill. For small hollow forms, blowing through a length of plastic hose or even a soda straw works fine, but at some size this scheme fails. Most seasoned hollow form turners use a blow nozzle on an air hose to quickly remove swarf. Be sure to use an approved nozzle that has a cross hole to prevent problems if this tip is blocked.
Do this operation with the lathe stopped and always wear safety glasses with side shields and a face mask. I run the blow nozzle with my right hand and deflect the chips away from me with my left as an additional precaution.
All this said, give larger hollow forms a try! They can be great fun. You can further embellish a hollow form by cutting embroidery-like designs into the wall with a rotary tool or through pyrography (wood burning).


