This article, “A Look at Gouge Geometry,” is from the pages of American Woodturner and is brought to you by the America Association of Woodturners (AAW) in partnership with Woodworker’s Journal.
Beginners understandably struggle when learning to sharpen their tools. I hear students say that even when they can get a sharp edge on a gouge, it won’t cut or it digs into the wood with a catch. The edge feels and looks sharp, so why am I having trouble with it? This is where gouge geometry comes in. Bevel shape, wing shape, and bevel angle all play important roles in how a gouge will perform. In this article, I will describe these factors and explain some of the benefits of certain shapes and the pitfalls of others.
Bevel Shapes
Concave, or Hollow-ground, Bevel
 |
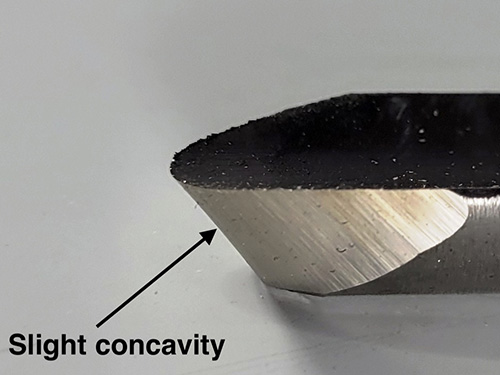 |
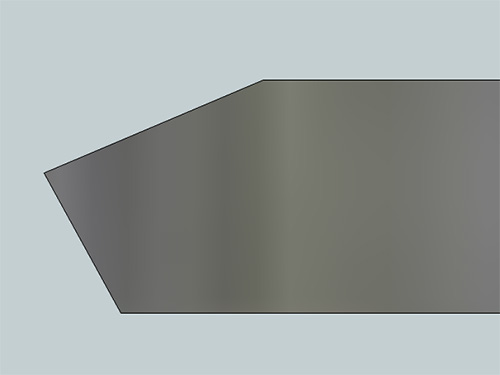
This drawing exaggerates a convex bevel, or hollow grind. How does this happen? In practice, an 8″- (20cm-) diameter grinding wheel naturally creates a hollow grind, but on such a short bevel, you have to look closely to see it. A gouge with a hollow-ground bevel will cut easily since the cutting edge is the most prominent point.
Flat Bevel
 |
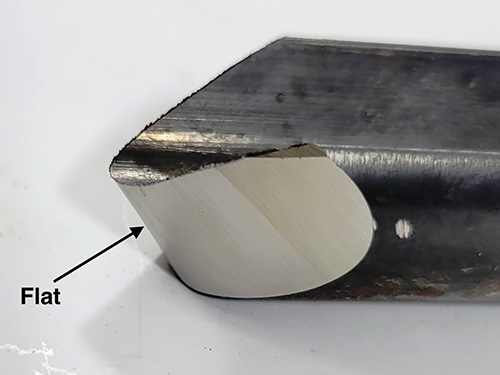 |
A truly flat bevel is the natural result of sharpening with a belt system, which has a dead flat platen supporting the tool. A flat bevel works just as well as a hollow-ground bevel because both shapes provide the proper clearance under the cutting edge.
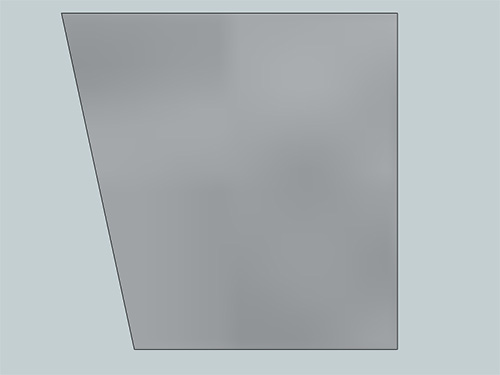
Convex Bevel
 |
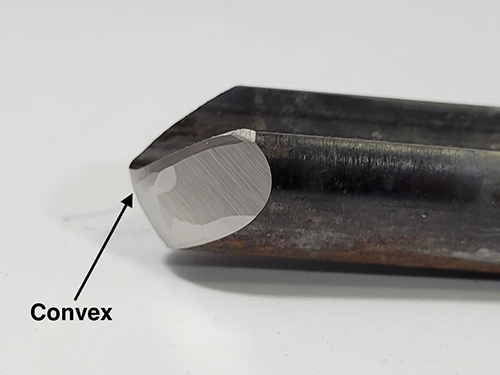 |
A convex bevel can result from sharpening by hand – i.e., without a jig or system to guide the tool accurately. Sharpening jigs keep the gouge’s bevel on one plane. A convex bevel is problematic. For a sharp edge to cut, it has to be the proudest (most prominent) point of contact. A convex roll, or bulge, will contact the wood first, preventing the cutting edge from even engaging the wood. A good way to understand this dynamic is to intentionally sharpen a skew with a convex bevel; it will take some of the aggressiveness out of the skew cut.
Try a Micro Bevel
 |
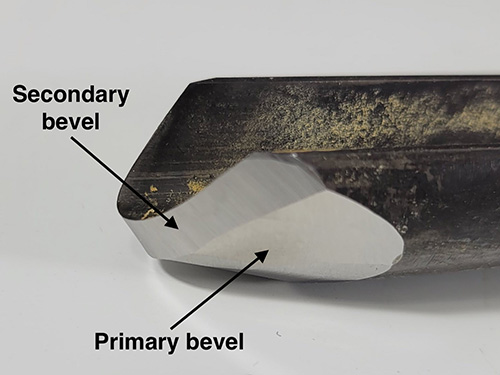 |
Rather than having just one continuous bevel, a micro bevel is a smaller, secondary plane on the tool’s bevel leading up to the cutting edge. You can add a micro bevel by adjusting certain factors/angles on your sharpening system.
A micro bevel is helpful for the turner because it reduces the “bounce” caused by out-of-round wood or other irregularities. With a single long bevel, when the heel bounces, it causes the cutting edge to also bounce. Another advantage of the micro bevel is that it makes it much easier to go around a tight (short/small) radius.
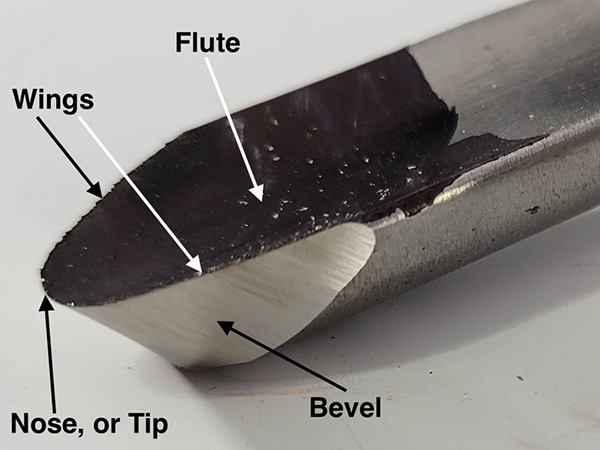
Wing Shapes
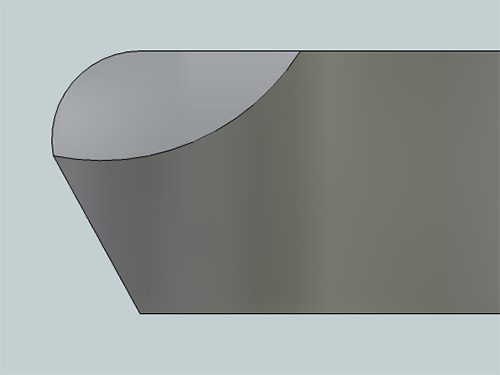
Straight Wing
 |
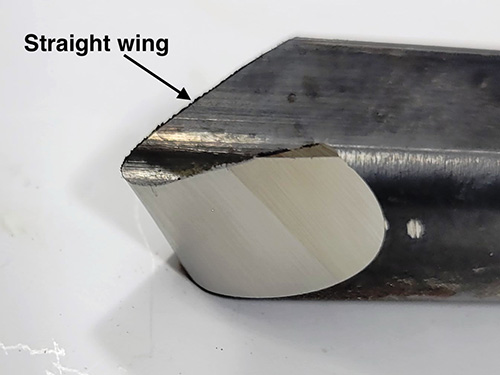 |
A flat, or straight, wing is my preferred wing shape.
Convex Wing
 |
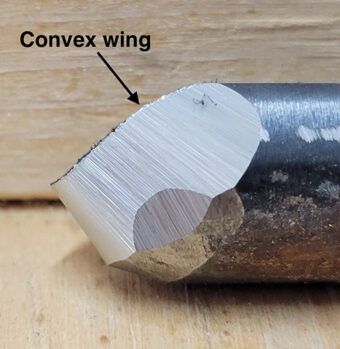 |
A wing with a slight convex shape works fine also.
Bump Near Nose
 |
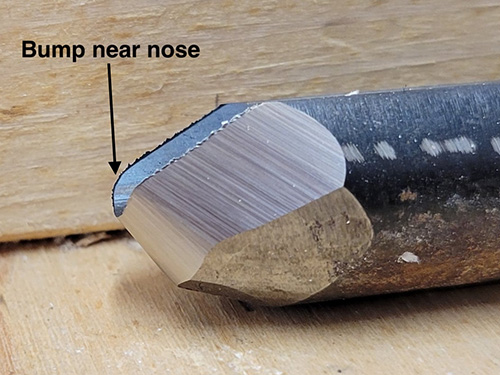 |
A pronounced bulge on the gouge’s wing close to the nose tends to contact the wood first, causing a catch. That part of the tool is off-axis of the centerline of the tool and will “lever” it over, causing a dig-in.
Concave Wing
 |
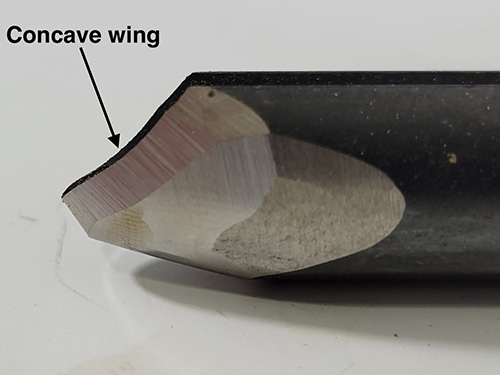 |
A concave wing is problematic. The rear tip of the wing, being the highest point, can catch the wood, causing the cutting edge to lever over and dig in.
Rolled-over Wing
Sharpening systems provide accurate, repeatable grinds. But it is all too easy to roll the gouge too far to the sides, causing the bevel to round over near the top of the wings.
This is a problem similar to having a convex bevel; even if the edge at the wing is sharp, it won’t be the first point of contact and won’t engage the wood. Don’t be tempted to roll the gouge all the way over to sharpen the wings.

Instead, grind away the metal lower down from the cutting edge, on the side of the wing.
What About Bevel Angles?

The angle of the bevel on your tool is an important choice. But turners do not easily agree on what the ideal angle is. In many cases, it depends on the job at hand. Generally, the blunter the angle, the less it tends to cut, or slice, whereas the more acute an angle is, the more aggressively it cuts. A simple comparison is the difference between a butcher knife and a fillet knife. The butcher knife, designed for chopping, has a blunt bevel angle, whereas the fillet knife, better for slicing, has a slim body with an acute angle. For a lumberjack, the similar comparison is between a splitting maul and an axe.
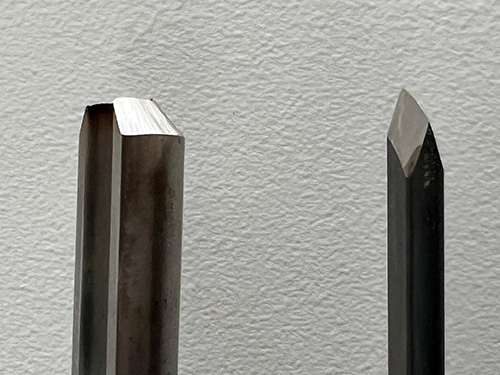
With turning tools, compare the angles on a spindle-roughing gouge (l) and a skew (r) in the photo above. The roughing gouge, with its a blunt angle, plows through a square spindle blank to bring it to round. The skew, with an acute angle, is ideal for slicing wood fibers to achieve a very smooth surface off the tool.
Lyndal Anthony worked as a machinist before becoming a high school industrial/technology education teacher. Already well versed in metalworking, he learned woodturning so he could teach his students to use the one wood lathe in the school’s shop. After taking a one-day course on turning a wooden bowl, he was hooked and has since evolved his skills with the help of world-class woodturners and mentors. Visit his website, midwestwoodart.com.


