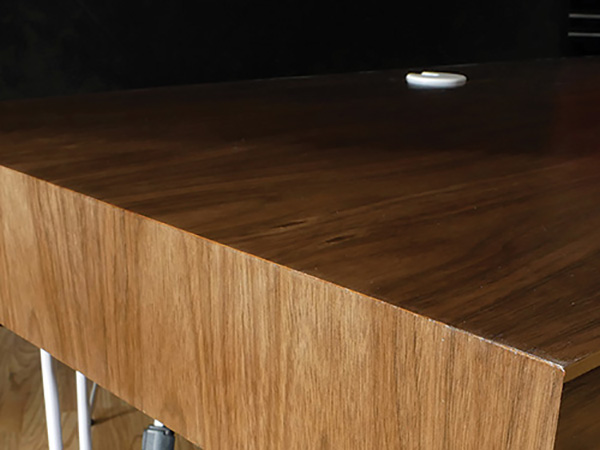
Any miter joint with continuous grain looks awesome in a project, but the appearance is especially striking when the grain runs over the long edges of a table with a “waterfall” effect. These continuous-grain miter joints are easy to cut at the table saw on smaller workpieces but not so straightforward with large tabletops for the simple fact that, as with cutting big slabs, you have to wrangle a very large workpiece on top of a saw.
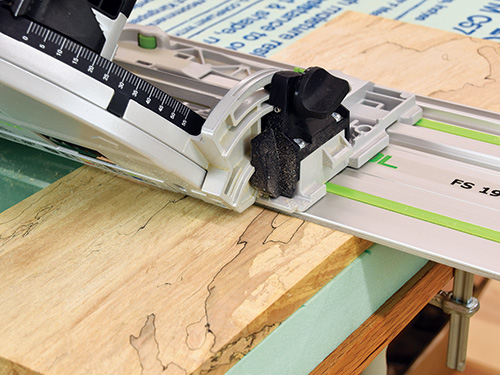
Once again, it’s easier to take the saw to the work, and while you could cut 45-degree joints with a circular saw, the accuracy of a track saw makes it the perfect tool for the job. We’ll demonstrate the process with a smaller workpiece here, but the same process works with almost any length workpiece.
Measure and mark the workpiece where you want the joint edge, and line up the track. As with all narrow track cuts, clamping the track is a good idea. Tilt the blade to make a 45-degree cut and cut across the workpiece on your marks.
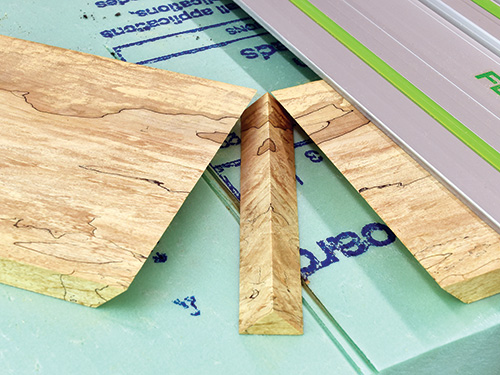
Remove the workpiece from under the track and set it aside. Then, take the new offcut piece you just created, flip it around and arrange the track exactly along the angled edge you just cut. There was a thin, unavoidable kerf created by the first cut, but with the track lined up carefully against the angle of the original cut, the kerf at the joint isn’t enlarged, allowing for the closest grain match possible. You can see in the bottom left photo how the spalted grain continues from one piece to the other.
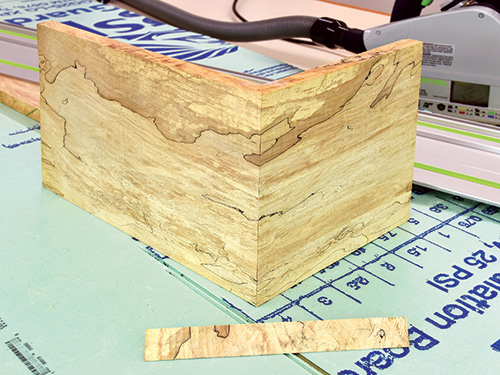
Once the two mitered pieces are mated, the waterfall effect can be stunning.


