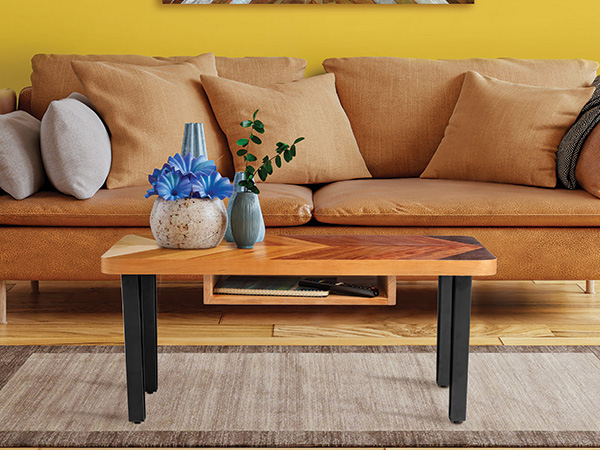
A few years ago, I had a rule about using multiple species of wood on a single project: Don’t.
But recently I have had a change of heart when it comes to mixing species, especially when those various pieces create an interesting geometric design. I think this table is a good example of exactly that. The chevron (not herringbone!) design is interesting to look at but not overpowering. I used six different wood species, but of course that is a completely subjective decision; you could go with more or less.
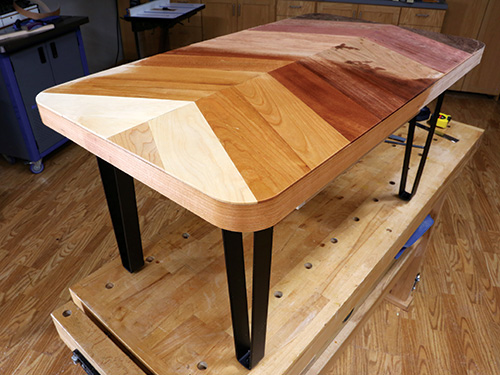
The table is easy to build and quite sturdy. As a dad with little kids, sturdy is very important to me. This table will need to withstand some rough-and-tumble times!
Starting Out
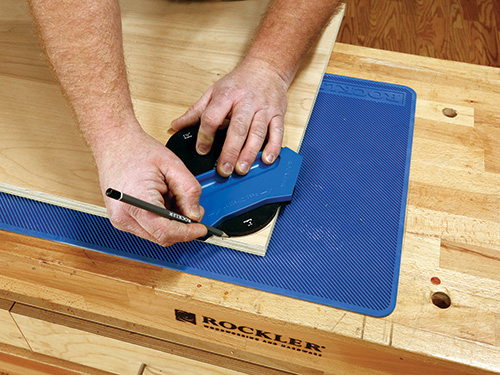
The core of the tabletop is two pieces of 3/4″ plywood. Cut the pieces to size, as shown in the Material List. You’ll notice that one of the pieces is 1/2″ longer than the other — that’s intentional. With the two pieces cut, form the radius on the corners of Top #1, the shorter piece.
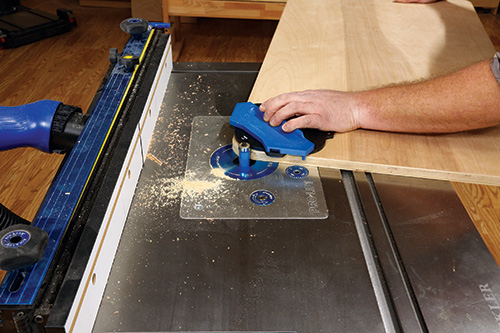
I’ve found that getting exactly symmetrical radii on corners is very easy to do with a corner radius routing template. I use the template to mark the shape, rough-cut it with a jigsaw or band saw and then step over to the router table. Using a flush-trim bit with the bearing at the top end of the flutes, I completed the shapes of all four corners. Keep the bit in the router table — you’ll use it again shortly.
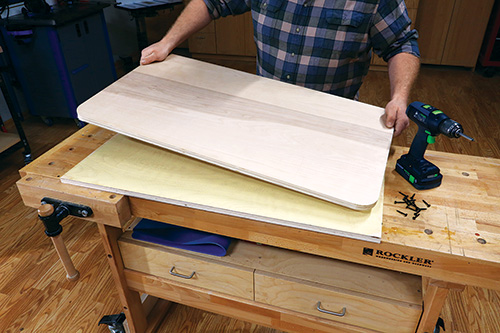
Go ahead and grab the second top and gather up a glue bottle, a couple of clamps and some #8 x 1-1/4″ screws. Apply a generous coating of glue to the surface of the top you just shaped, then place it on top of the second top. Position it so there is a 1/4″ of plywood extending on each end of the glue-up. You’ll notice that the tops will easily move around as the upper panel is “floating” on the glue layer. Once the panels are correctly aligned, clamp them together to hold them in place. Now screw the panels together and allow the glue to tack-up solidly. Roughcut the corners of the second top at the band saw. The final step on the tabletop for now is going back to the router table and flush-trimming Top #2 to match its mate. Sand the routed edges smooth, and set the top aside.
Resawing
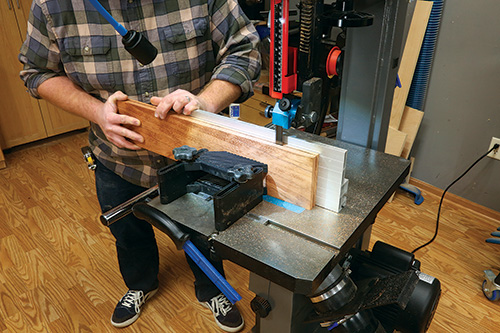
We purchased our chevron lumber already sized at 1/8″ thick. Another option is to resaw your pieces. Planing those pieces smooth and to a uniform thickness can be done, but that requires a sacrificial surface in your planer and a bit of caution
Prepping the Other Stock
While the tabletop has a plywood core, the cubby is solid lumber. That means you need to glue up its bottom panel before you make the cubby. Take the time to prep your stock and glue up a panel that’s slightly larger than the finished dimensions found in the Material List.
The choice of the cubby material is up to you. I chose cherry to match the lighter woods on the finished tabletop.
Next up is to machine the 24 chevron pieces. I sourced my stock for the chevrons from Rockler. Not only do they have 1/8″-thick stock for sale, but they have it in a very wide selection of species. For this table, I used maple, cherry, mahogany, bubinga, ebiara and wenge. (Yeah, I had never heard of ebiara either …)
There is absolutely no reason that you could not make your own 1/8″-thick pieces by resawing them from thicker stock. One advantage to doing so is that the matching pieces will be more uniform in color and figure. However,
a challenge will be how you get identical thicknesses and two smooth faces. Planing thin stock is possible on home-shop planers, but you usually need to add a smooth sacrificial platten to the planer, and then take very shallow passes. Even so, the thin pieces may get pulled up into the cutterhead and shatter. You’ll have to sort out your planing process if you do your own stock milling for these parts.
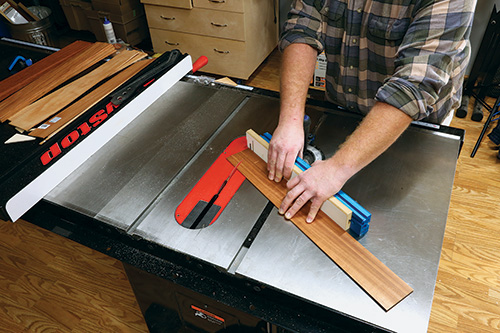
The most critical detail in this project is to make the chevrons exactly the same width and to form the angles precisely the same on each piece. I chose the table saw for this task and made sure I had a sharp blade in the machine. My chevrons were exactly 31⁄8″ wide, and I determined their angle to be 30 degrees. I cut them all at the same time and set them aside for a moment. I left the length of the chevrons overly long, as I would trim them after they were all glued in place on the tabletop. I grabbed the table core and moved it to my workbench, then drew a line down the center of its length. To assist with aligning the chevrons, I clamped a straightedge on that line.
Installing the Chevrons
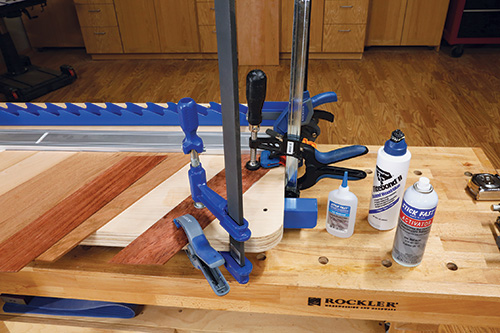
It’s finally time to mount the first chevron. I used an unusual method to secure the first piece. First, I spread a coating of PVA wood glue in the center of the chevron, then squeezed a thick bead of CA glue around its perimeter. Next, I carefully placed the corner of the chevron at the end of the table core with its angled edge up against the straightedge. Pressing it down into place, I sprayed CA accelerator around the piece which locked it down. Then I added a clamp to further secure it to the core. I used this technique to speed up gluing and placing the remaining chevrons.
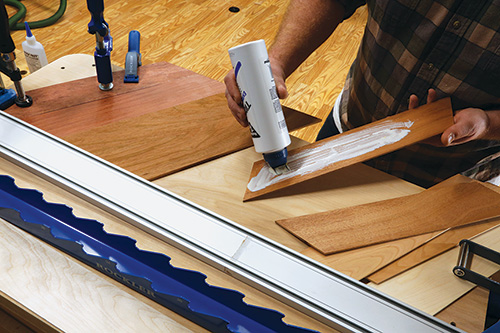
While I didn’t mention it earlier, I had already determined the order of the various species of wood on the top. Now I took one of each species and placed them next to the table core in the order in which they were to be mounted. I put a thick coat of glue on the table core, using a glue roller to spread it evenly. Then I placed each chevron on the top, sliding it gently back and forth to help the glue get tacky. I worked my way down one side of the tabletop layout line, installing half the chevron pattern.
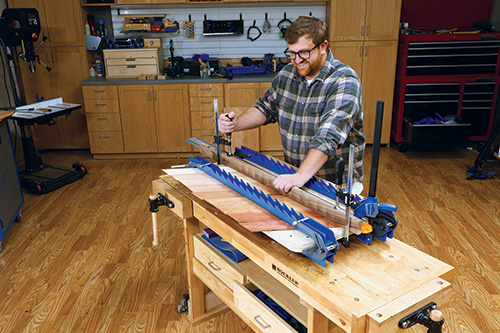
To further secure the chevrons, I put a panel clamp down their middle. If you don’t have a panel clamp, you’ll need to make clamping cauls (the stiff ness of 2x material works well). The cauls should have a very slight crown along the length of them to apply pressure in the middle of the glue-up. Add another panel clamp next to the straightedge in the center of the panel. Check the end of each chevron to be certain that they are making good contact with the table core. If not, add clamps to solve that problem. If I noticed that a chevron was lifting in the middle, I used a heavy weight to push it down. Allow a couple of hours for the glue to cure.
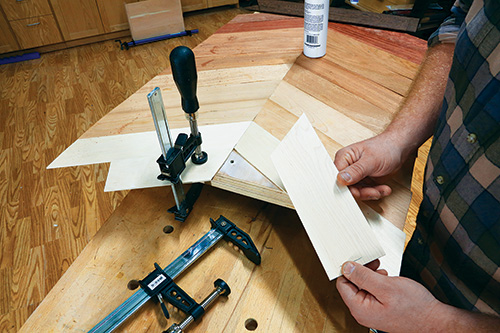
When you are confident that the glue has set, use the same basic techniques to glue the remaining chevrons in place on the other side of the core’s layout line. Follow that up by adding four more pieces to the top. There will be two rather wide pieces that go on one end of the core — the end you started the chevrons on — and two smaller piece at the other end of the table. You’ll need to fit the small pieces in place. Glue and clamp them, and allow the glue to cure.
Tip-top Details
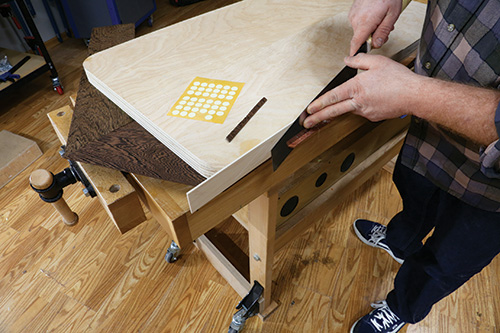
With all the chevron pieces now installed, scrape any glue squeeze-out off the surface, then turn the tabletop over and put it down on the workbench. At this point, I made a 1/4″-thick spacer to use as I trimmed the chevrons back a bit. I attached the spacer to the edge of the tabletop with self-adhesive sticky dots and used a hand saw to trim away the excess length of the chevrons. I did this on all four sides of the tabletop. The reason I left the small “ledge” is to make the next task much easier: wrapping the table core’s edges with edge banding. Before I attached the edge banding, I removed any glue blobs or irregularities on the edge of the core.
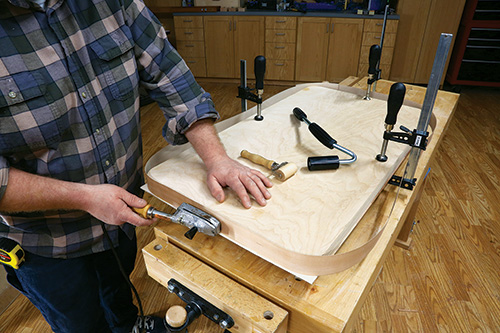
If you’ve ever attached long pieces of thin edge banding, you’ll know that one of the challenges it presents is that it can flop around and cause trouble. I solved that problem by putting a couple of clamps on the core that loosely kept the edge banding from moving around. I looped an overly long piece around the top and then began ironing it in place on one of the narrow ends. The small “ledge” formed by the overhanging chevrons helped me to align the edge banding perfectly as I worked around the end and down both sides. When I got to the far end, I overlapped the edge banding and sliced both pieces at once, creating a perfect fit. After the final bits were ironed in place, I was pleased with how well the operation had gone. The edge banding was a bit wider than the table core, so I trimmed off the excess and then used a file to put a slight bevel on the edge to prevent it from being pulled out easily or splintering.
With that done, it was time to flip the tabletop over and do some sanding on the chevrons. (You didn’t think you’d get away without sanding did you?) Despite my best effort, the chevrons were not perfectly level to one another. So I grabbed the biggest rotary sander that I own, put some 40-grit paper on it and leveled the top. Then I worked up through the grits to 320.
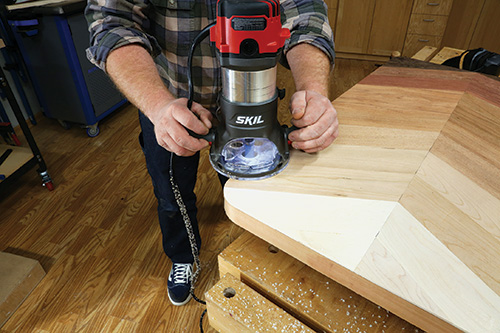
The smooth top was a benefit for the next step. Setting up a handheld router with a flush-trim bit, I removed the last bit of the chevron’s overhang. I took my time, feeding the router around the tabletop smoothly and steadily. When I was done, I hand-sanded the freshly routed edges, gently breaking their top corner and smoothing away any bit marks.
A Chubby Cubby
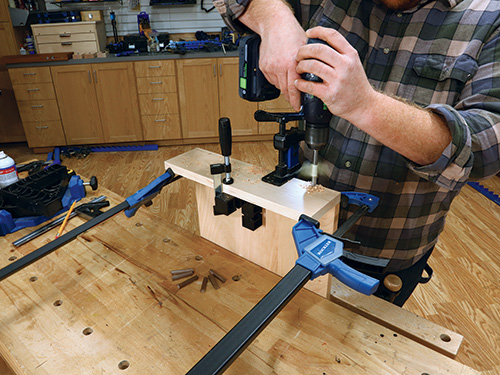
You are really making progress now! The cubby is a very basic bit of woodworking, as it is constructed with butt joints and dowels. Grab the panel you glued up earlier and sand it smooth, top and bottom.
At the table saw, cut it to the dimensions found in the Material List. Then cut two sides for the cubby, and you’re ready to put it together.
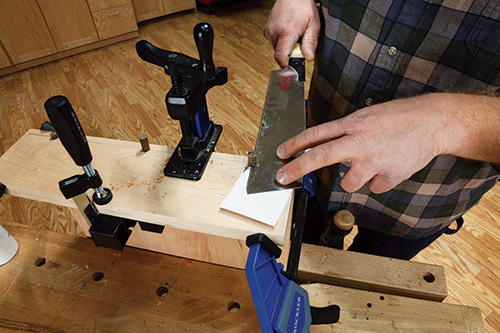
handsaw, using a piece of paper as a shield to prevent saw marks.
I had some 3/8″ walnut dowel left over from another project and thought it would add an interesting detail. When I clamped the sides to the cubby bottom, I drilled holes through the sides and, with a small bit of glue, drove the dowels through the sides into the ends of the bottom panel. I left it alone for the glue to cure. Once the joints were dry, I trimmed the dowels flush and then gave the cubby a complete sanding up through the grits.
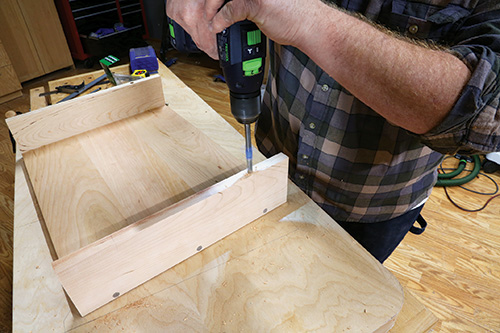
To attach the cubby to the underside of the tabletop, I used long screws driven up through the width of the sides. The Screw Mounting Detail drawing shows a narrow hole bored into the edge of the side, and then two larger diameter holes on the top and bottom edges of the side.
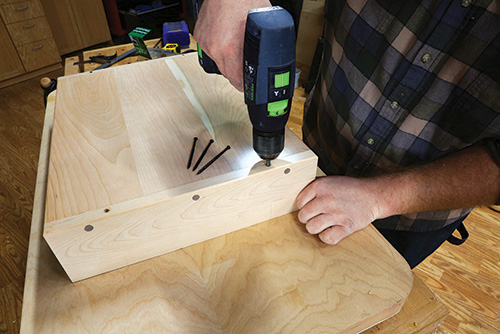
The screws (#6 x 3″ trimheads) seat at the bottom of the 1/4″ opening and are driven up into the bottom face of the tabletop. You can also glue the cubby’s edges to the tabletop if you so desire, but I felt that the screws were more than strong enough.
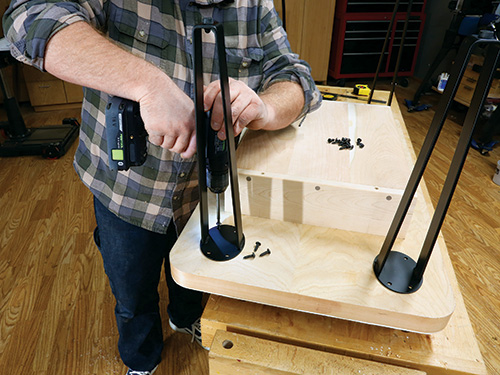
I chose black steel legs from Rockler for this table. They screw onto the bottom of the tabletop and are very sturdy when installed. Drill pilot holes for the screws and install them with a drill/driver. Again, my choice of leg style is subjective. There are many different types of legs that would work with this tabletop. Should they be steel or wood, or even if you made the legs in your shop, that’s your choice and another way to customize this unique project.
I then applied a clear finish to this table. With all the different species of wood, it seemed a shame to change their natural color with stain. I applied a coat of sanding sealer, sanded it with fine grit paper and then finished with two top coats of polyurethane.
This project was fun to build, and I’ve found that it fits right into our home — kids and all.
Click Here to Download the Drawings and Materials List.
Hard-to-Find Hardware:
2″ x 25′ Pre-Glued Edge Banding, Cherry (1) #57121
16″ I-Semble Bent Flat Steel Legs with Adjustable Feet (1) #85560


