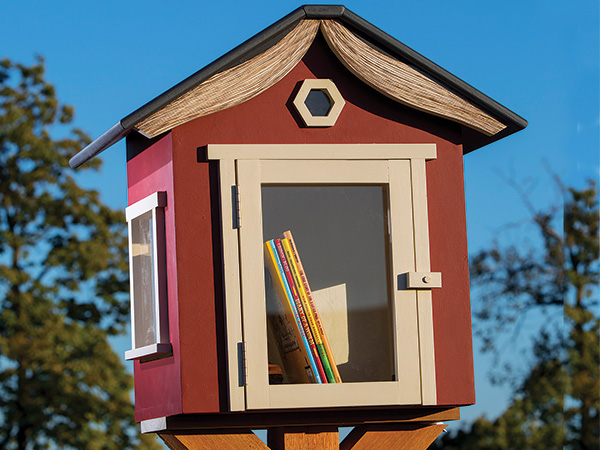
Libraries are cool — both big and small! The little lending library trend in neighborhoods, and the access they provide to free books, has continued to grow over the years. I’ve had several opportunities to design and build different lending libraries. My favorite is a large sculptural design located in White River State Park in Indianapolis. Others include a live roof design for the Little Free Library nonprofit organization: my college sculpture students started with a base design and went wild with the concepts. For another one, the kids of a local elementary school helped me build a medium-sized lending library for their outdoor classroom. All of those designs required quite a bit of experience and a significant amount of tools. However, the design for the project you see here, with an inverted “book” serving as its roof, requires the least amount of tools, and I’ve kept it very simple without compromising quality. It’s a project you should be able to build in a long weekend and then put up in your neighborhood the very next week!
Here’s a great opportunity to have a friend come over and help out, or maybe invite a Scout group to your shop to have a make-and-take meeting! (Our cutting diagram will show you how to yield two of these projects from one 4×8 sheet of 3/4″ plywood, if you’re so inclined.) Feel free to redesign the window shapes and sizes to your liking. Personalize the title of the book, too. Be creative, and most of all, have fun!
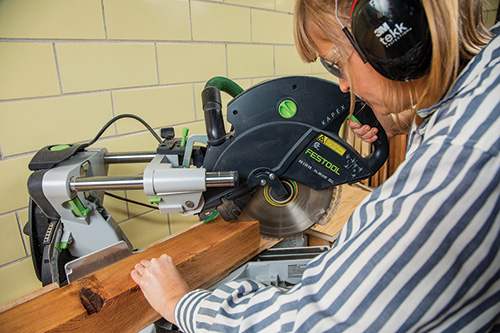
Cutting the Pieces to Shape
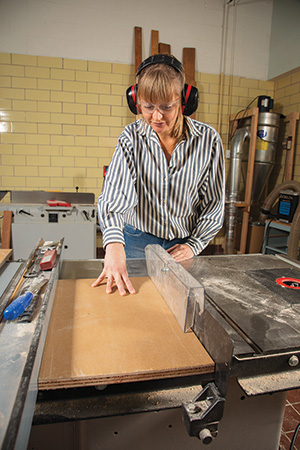
Cut blanks for the plywood pieces (roof panels, front, back, sides and floor) on your table saw. Prepare a 3/4″-thick blank of wood or plywood for the roof’s “book spine,” too. If you look closely, I used medium-density overlay (MDO) plywood for these main parts; it has a laminated wood core but a smooth, weatherproof resin facing that takes paint really well. Signmakers love it. You can use ordinary exterior-rated plywood instead if you can’t get a sheet of MDO.
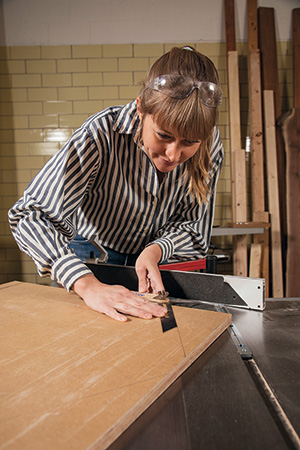
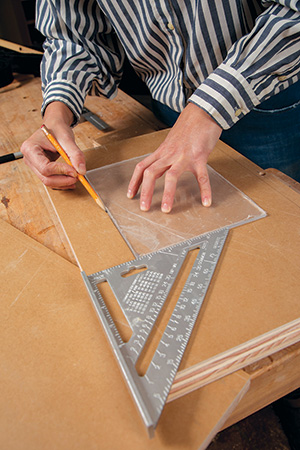
Now, lay out the 32° roof angles on the front and back pieces. Then use a sliding bevel gauge, set to this angle, to adjust your miter gauge for cutting the roof angles to shape on the table saw.
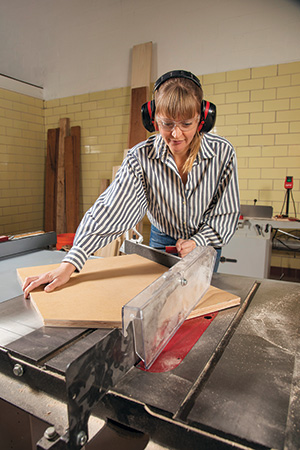
Grab one of these roof cutoff pieces to use as a guide for tilting your table saw blade to bevel the top ends of the side pieces; they need to fit flush with the roof panels when those are installed.
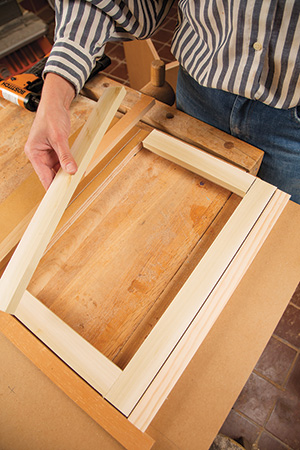
While the table saw blade is still tilted to this angle, it’s also the angle you need for the edges of the roof peak/book spine. So, bevel rip one of its edges. Then, with the front and back pieces standing up, hold one roof panel and the spine in place to check their fit. Mark the spine to width, and bevel rip its second edge. Take your time and creep up on the final size to form tight roof joints.
Next, cut a piece of 1/2″-thick lumber to the right widths and lengths to make the various window and door trim parts With this done, I switched blades and cut three pieces of 1/8″-thick acrylic for the larger two windows and the door pane at my table saw. Use a triple-chip tooth blade, if you have one, that will cut it safely. Or, you can buy a simple tool at hardware stores and home centers to score and snap the pieces to shape. I cut out the little round acrylic window using a coping saw with a fine-tooth blade.
Forming the Window Openings
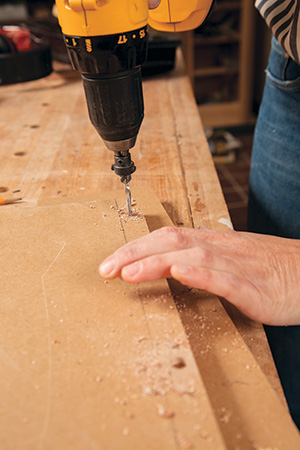
Pre-drill counterbored pilot holes for #8 screws where the sides will attach to the front and back and where all four of these panels will attach to the bottom. Using a stop collar on your bit will ensure that all the counterbores will end up being the same depth.

The acrylic window panels can now become templates for tracing their openings on the side and front panels. Use a speed or combination square to help get each window aligned properly and parallel to the bottom edges of the parts.

Next, go ahead and cut out the window openings. Drill a hole large enough for your jigsaw blade in at least one corner of each opening for making these interior cutouts. When those are done, lay out the larger 11″ x 15″ shape for the door’s “core” piece, and remove that as well — do this carefully, because this piece will be re-used. Cut out the 2-1/22″-round window opening with a jigsaw, Forstner bit or a hole saw.
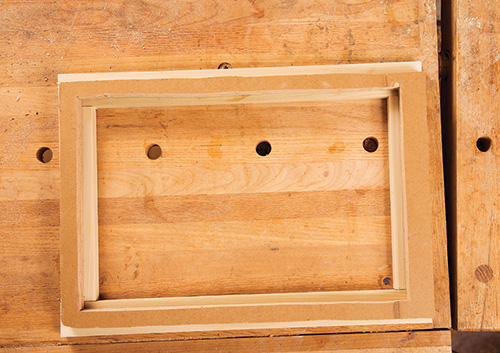
Now glue and nail the top, bottom and side pieces of the door frame to the core piece. The goal here is to center the core on these wider frame sections so the inside edges of the frame form a rabbet for installing the acrylic pane.
The outer rabbet of the door frame will overlap the door opening and create a weather seal there. When that’s done, set the door in place on the front panel, and glue and nail the trim pieces around the door opening, adjusting them so the door fits with a little gap all around.
Assembling the Building
Let’s assemble the big parts! Attach the front and back panels to the sides with glue and 1-1/2″ screws. Drive more screws along the bottom edges of all four panels into the bottom to secure it. Fill the screw counterbores with wood plugs, and trim them flush.
Next, we can cover up the sawn edges of the openings in the library by attaching the window and door trim. Miter cut the little trim pieces for the round window’s hexagonal frame (60° angles for each cut) and glue it together. A rubber band can make a handy clamp to hold these little pieces in place. While that frame dries, position the four parts of each window’s trim so it overlaps the cutouts and provides surfaces along the back edges to install the windows. Pin nails and glue provide enough holding power for this trim.
Once that’s done, go ahead and attach the window and door panes to the trim and door framework with beads of clear silicone caulk spread along the rabbets.
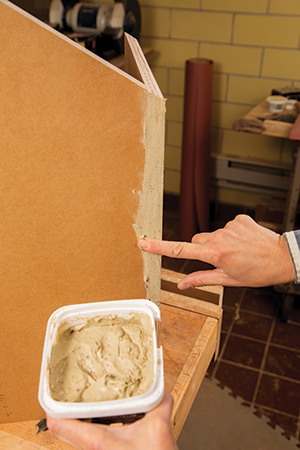
Those corner joints on the building need to have their exposed plywood edges covered so the plys and little voids don’t show up under paint. I covered the edges with exterior wood putty. Sand the dried putty smooth.
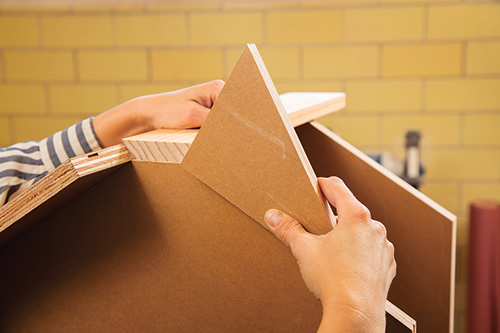
Creating the Book Roof
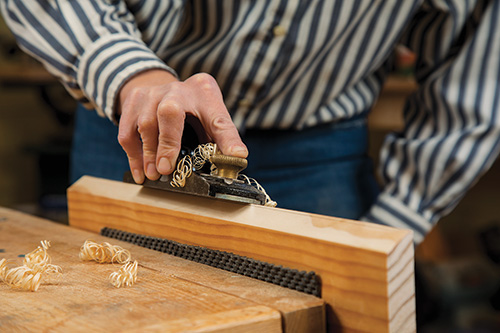
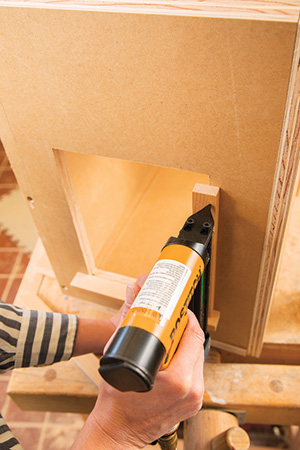
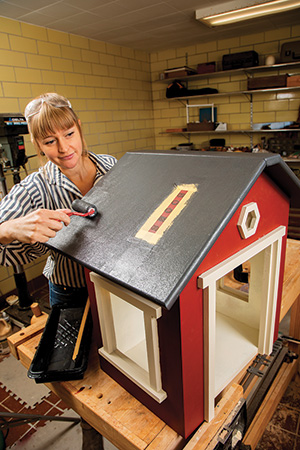
At this point, we can close up the building by installing the upside-down book roof. Start by rounding over the top edges and what will be the bottom corners of the roof panels with a router, hand plane or sander to make them look more like book covers. Mark the roof pieces with centerlines where they’ll overlap the front, back and sides of the building. Soften the top edges of the roof peak with a hand plane or sanding block to simulate a book spine; make sure these curves stop where the peak will intersect the roof panels. Use 1-1/2″ brad nails and glue to install the roof panels and peak on the building.
Complete the look of the book by laying out and cutting four pieces of curved fretwork that will form the edges of its open pages. Use the gridded drawing as a guide, then cut these pieces to shape with a band saw or jigsaw.
Time to Paint!
Putty and sand any remaining nail holes or defects, and you’re ready to paint your library before doing the last bits of final assembly.
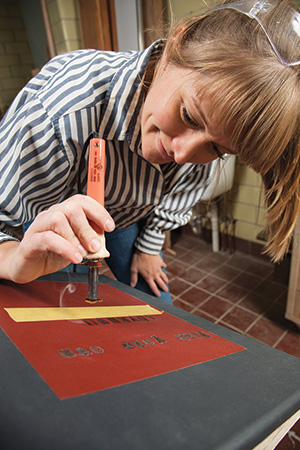
I chose red for the main structure, and when that paint dried, I masked off and painted the trimwork white as well as the library’s interior. Paint the book covers and spine a darker color. But, before you do that, think about whether you want to put a title on the front and back covers of the book. I decided to paint the title sections of the book red to contrast with the roof color, then I used HotStamp letters in my woodburning tool to burn the words into the cover. I also titled the library with HotStamps. (If you aren’t familiar with these stamps, they’re made of brass and thread onto a woodburning tool. Just heat them up to “brand” one letter at a time.) When that’s done, touch up the paint around your lettering or masked-off areas as needed.
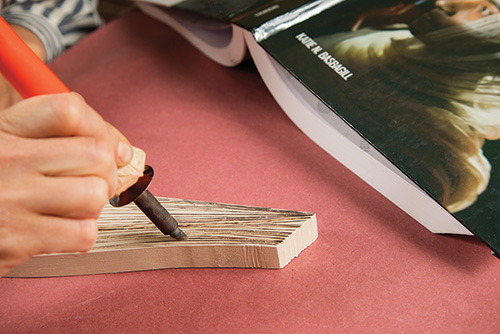
I painted the fretwork pieces white, then used my woodburner again to add a series of thin lines to them that look like page edges. A permanent marker would work well for this detailing, too. Attach the fretwork by boring pairs of countersunk screw holes through them and fastening them to the bottom faces of the roof panels. Inset the fretwork back 1/2″ or so from the front and back edges of the roof to add more realism.
Final Assembly Details
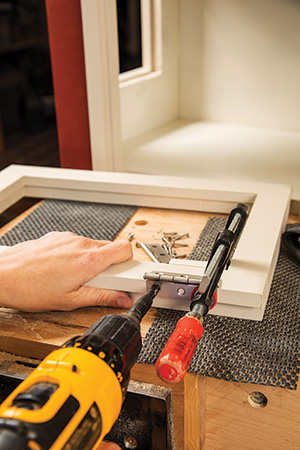
All that’s left to do on the library itself is to hang the door. I did that with a pair of 2-1/2″ utility hinges. Pre-drill pilot holes for the hinge screws in the edges of the door frame and the surrounding door trim to prevent splitting the wood. I used a self-centering bit to position these holes accurately. Make sure to mount the hinges straight so the door won’t bind when it swings.
Add a magnetic catch behind the door. Make a little latch out of an off-cut piece and attach it to the door trim with a screw that’s just loose enough in its mounting hole so the latch can swivel around to make sure the library door stays closed when visitors aren’t browsing!
Mounting the Post and Project
The post for the lending library is very easy to make! Use either a table saw or a miter saw to cut two 10-1/2″-long pieces of a cedar or treated 4×4 to form two braces. Miter cut their ends to 45°. I used a 5-ft. length of 4×4 for a center post. Attach the braces to the post with long, countersunk deck screws so their top angles are flush with the top of the post. Then glue and screw a 5″-wide, 20″-long piece of 3/4″ stock to the tops of the post and braces to create a mounting platform for the library.
Dig a hole in the ground where you’ll locate your library. Depending on the length of your post, make the hole deep enough so the top of the platform will be about 3 ft. high. At this height, readers both tall and small will be able to reach the books. Set the post and backfill around it with dirt. Firmly tamp and pack down the backfill.
Install the building on the post by driving 1-1/4″-long screws through the bottom and into the post and braces. Then stand back and admire: your Little Lending Library is open for business!


