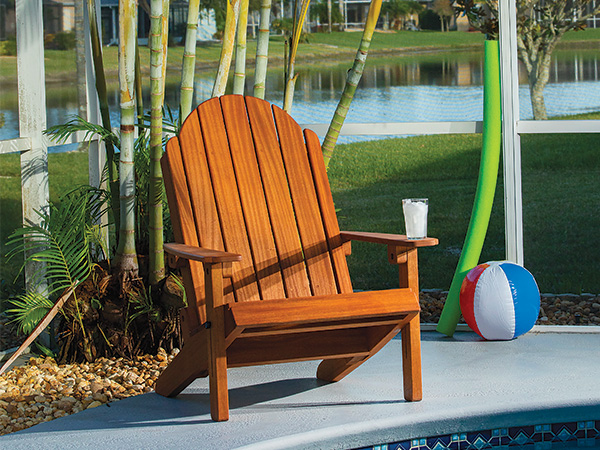
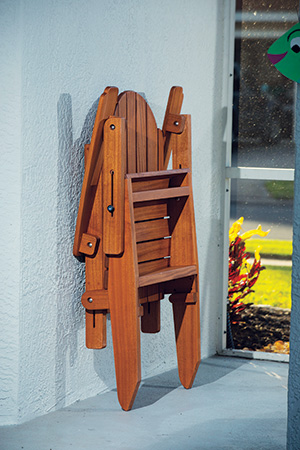
This classic outdoor chair is easy to build from any suitable 3/4″ and 1-1/2″ exterior project wood. I made mine from some beautiful mahogany sourced from Steve Wall Lumber. But, what sets mine apart from countless other Adirondack chair designs is that, by loosening four knobs, you can fold it flat for transport or convenient off-season storage! Rockler sells a complete Folding Adirondack Chair kit that includes all the hardware and templates for the shaped parts.
When I originally designed a working prototype for this chair — a must in order to figure out the many details that make it both comfortable and articulating correctly — I had the benefit of being able to simply trace the shaped parts from the prototype onto my final workpieces. There is a hardware kit that includes all the screws, bolts, nuts and knobs you’ll need to make one chair. While the plan and templates will be convenient, you can also make the chair by reproducing the shaped parts using our gridded drawings and buying the hardware locally instead.
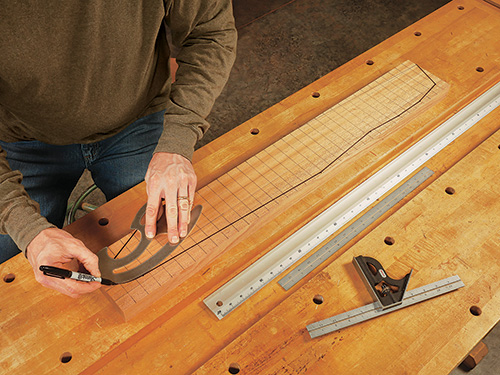
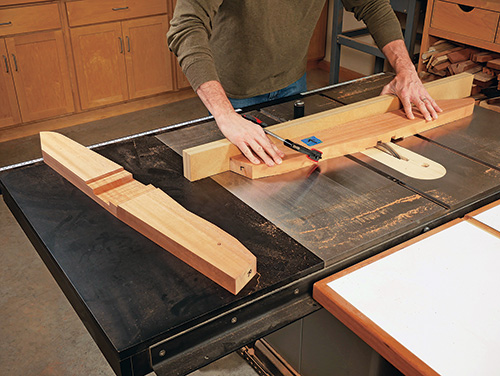
We’ll start the building process with the seat assembly, so cut two 5″ x 36″ blanks for the back legs from 1-1/2″-thick stock. Draw a grid of 1″ squares on one of the leg blanks, then follow the gridded drawing to plot points for the back leg shape. Connect the points to draw the first leg.

Follow your layout line to carefully cut out the leg on a band saw or with a jigsaw, and sand the cut edges flat and smooth. Now trace the first leg onto the second leg blank and cut it to rough shape, just outside of your layout line. Then, attach the two legs together, face to face, with double-sided carpet tape. Trim the second leg to match the first leg using a long bearing-guided flush-trim bit in your handheld router or on a router table.
Mark both back legs for the bolts that will attach the front legs and allow these parts to pivot. The 5/16″-dia. bolt holes are located 4-1/4″ back from the bottom front corner of the legs and 2-1/4″ up from the bottom edge. If you have access to a drill press, go that route for drilling these through holes at each location to ensure that they’re square to the leg faces.
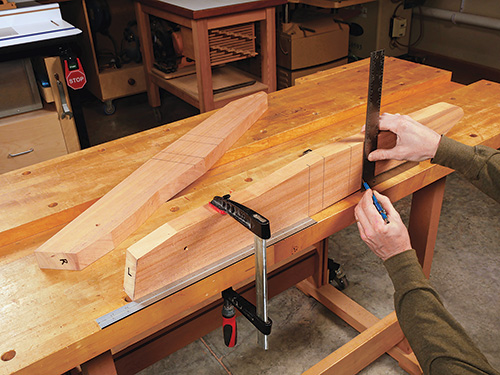
Each back leg has a 6″-wide area on its inside face that must be dadoed to accept a rear seat stretcher, backrest pivot and backrest stop. Choose which leg will be the left and right, and label them. Mark the dadoed areas on the legs, starting 15-3/8″ back from the front bottom corner. (Note: All three leg dadoes are square to the front bottom edge of the “seat” portion of the legs — not the angled rear “leg” portion.) I found it helpful to mark the seat portion with a piece of colored tape and an arrow to remind me of which edge to clamp against the miter gauge fence during the next cutting step.
Install a wide dado blade in your table saw and a long, stiff scrap fence to your saw’s miter gauge. Raise the blade to 1/4″, and plow across the entire 6″-wide dadoed area on the legs. Hold or clamp the leg blank securely against the miter gauge fence for each dadoing pass. This 1/4″ depth will complete the shallower dadoes for the rear seat stretcher and the backrest stop.
Now raise the dado blade to 3/4″ and plow the deeper 3″-wide dado for the backrest pivot, centering it between the two shallower 1-1/2″-wide dadoes. File or sand the sharp back corners of the legs round, and finish-sand them to 180-grit.
Building the Seat Base
Rip and crosscut front and rear seat stretchers from 1-1/2″-thick stock, and sand them smooth. Install the front seat stretcher 2-1/4″ back from the front bottom corners of the back legs and so the bottom edges of the workpieces are flush. Be sure the front seat stretcher is also square to the bottom edges of the legs. Fasten the parts with pairs of 3″ counterbored exterior screws driven through the legs, so you can hide the screw locations with wood plugs, later. Position the rear seat stretcher into its dadoes, and fasten it the same way.
Next, cut two blanks for the backrest pivots, then study the Drawings for these parts. You’ll see that the pivots have a 4-1/2″-wide lapped area milled 3/4″ deep into their outside faces. When these laps fit into the leg dadoes, it enables the pivots to install flush with the faces of the legs. Cut these laps with a wide dado blade, a straight bit in the router table or on a band saw, backing them up against a miter gauge.
Now cut the top ends of the pivots into 1-1/2″ radii at the band saw and smooth the curves. Then bore a 7/8″-dia. counterbore, 3/8″ deep, into the outside face of each pivot at the centerpoint of the curves you just cut. Bore a 5/16″ bolt hole through the pivots, centering them in the counterbores.
Finish-sand the pivots, and attach them to the legs with waterproof wood glue and four #8 x 1-1/4″ countersunk exterior screws.
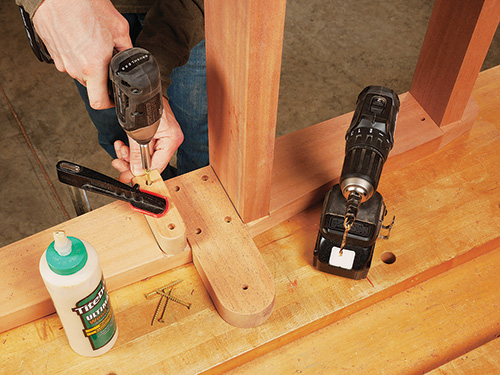
The backrest stops are the final components needed to fill the leg dadoes. Cut two 4-1/2″-long blanks for them from 1-1/2″ stock, and cut their top ends round with 3/4″ radii. After sanding, install them on the legs with glue and two countersunk #8 x 2″ screws per stop. When you do this, align the rounded top ends so they’re flush with the top edges of the legs.
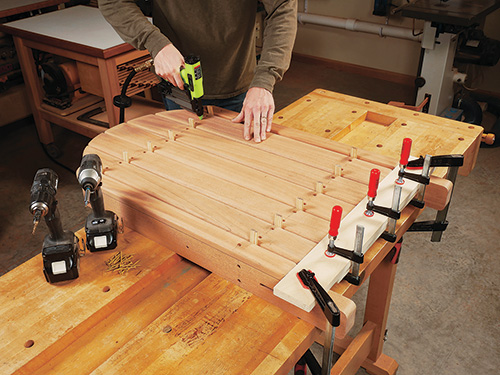
Wrap up work on the seat base by installing the seat slats. Cut the slats to width and length, knock off their sharp corners with a file or sanding block, and ease the top ends and edges with a 1/4″ roundover bit in your router or router table to prevent splinters. Sand the slats smooth. Now drill pairs of pilot holes for screws 3/4″ in from the ends of the slats. Counterbore these holes so the screw heads can be covered by wood plugs, later.
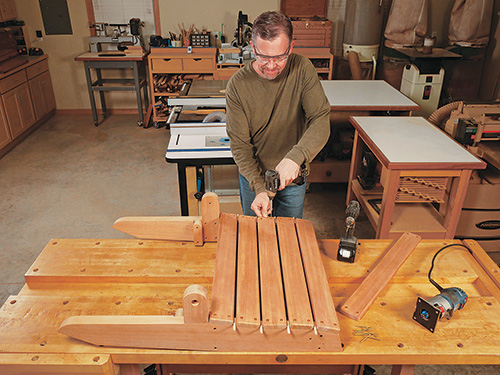
To install them, set the slats in place on the seat base, with the rearmost slat butted against the backrest pivots. Space the slats about 5/16″ apart — some 5/16″-dia. dowels or wood scraps will make this easy to do. Extend the screw pilot holes from the slats into the legs, then fasten the seat slats to the legs with 2″ exterior screws. The bottom edge of the front slat should be flush with the bottom edge of the legs.
Constructing the Backrest
That takes care of the seat portion of this chair, so now we can move on to the fold-down backrest. Prepare two 3″-wide backrest supports from 1-1/2″-thick stock. Notice in the Drawings that the backrest supports are slotted near their bottom ends so the back of the chair can slide up or down along the pivots when setting it up or folding it down. Mark the locations of these 4-3/4″-long slots on the supports, starting 3-1/4″ up from their bottom ends and centering them on the part widths.
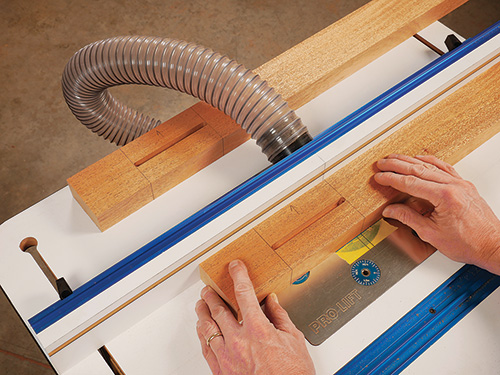
Install a long, 5/16″-dia. straight bit in your router table, and lock the fence to center the bit on the backrest slots. Mark the bit’s location on your router table so you’ll know where to start and stop the slot cuts. Cut the slots through the supports in a series of deepening passes. If you flip the leg end-for-end, keeping its same edge against the router table fence, you can cut the slots in from both faces at each bit height setting to speed the process along. Rout both slots.
This is also a good time to drill a 5/16″ through hole in each support for attaching the back ends of the arms, later. Locate these holes 16-3/8″ up from the bottom ends of the supports, and center them side to side.
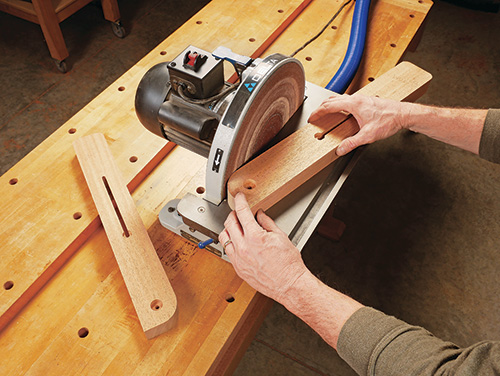
Complete the supports by rounding their bottom corners with 5/8″ radii to make the pivoting process easier. Sand the supports smooth.
The backrest also requires two 20″-long crosspieces, so cut those to size. Find the curved shape in the Drawings. These curves make the chair back more comfortable to lean against. Cut one curve at your band saw, and fair it by sanding. Rough-cut and template-rout the second crosspiece to match the first. Then sand the faces and back edges of these components smooth.
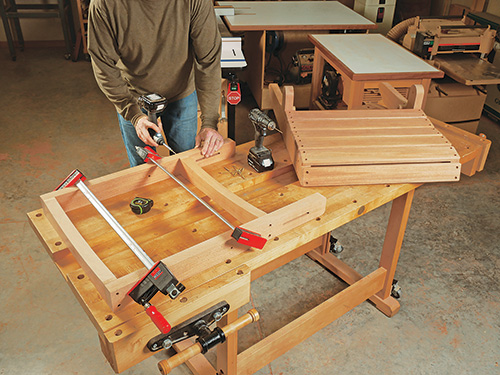
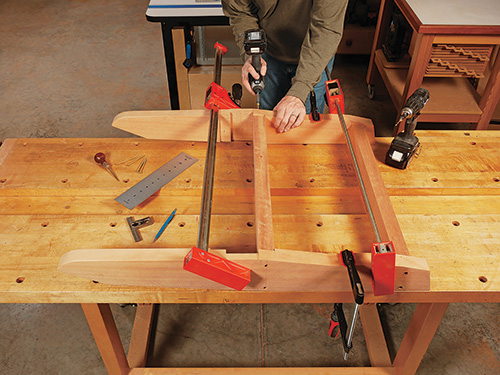
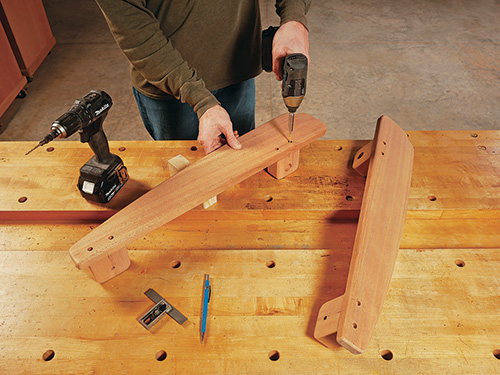
Dry assemble the backrest framework with clamps to check its fit on the seat assembly. The top crosspiece is flush with the top ends of the supports Locate the bottom crosspiece 9-1/2″ up from the bottom ends of the supports. Ideally, the framework should slip in between the leg pivots without binding. If it’s too tight, trim the crosspieces 1/16″ shorter, dry assemble and test the fit again. When the framework is sized correctly, fasten the crosspieces between the supports with 3″-long countersunk exterior screws.
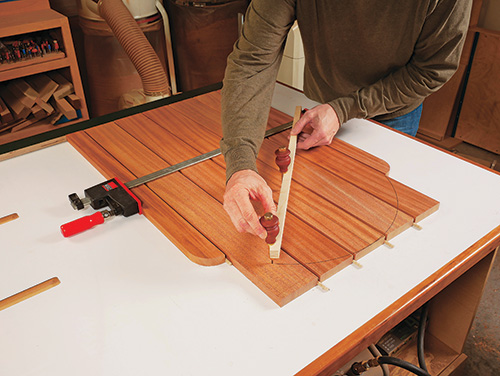
Set the assembly aside for now so you can prepare blanks for the two narrow and five wide back slats from 3/4″ stock. The narrow slats have a 2″-radius curve at their top ends. Mark these curves, and cut them to shape. The five wide slats share a 10″-radius curve. To lay out this curve, clamp the slats together with 1/4″ dowel spacers in between each slat. Make sure the bottom ends of the slats are flush. Draw a centered line down the middle slat, and mark a pivot point 10″ in from the top end. Now, set trammel points or a large compass for 10″ and, with the point of the tool at the pivot point, draw the curve onto the slat assembly. Cut the slat curves at the band saw, then sand the cut edges smooth. Wrap up work on the slats by easing their front ends and edges with a 1/4″ roundover bit to prevent splinters, and sanding them smooth.
Lay all seven slats together again in order and so their bottom ends are flush. Draw a light layout line across the slats, 26-3/8″ up from their bottom ends. This line marks where the slats align with the top face of the top crosspiece. Draw another darker line parallel to this one, 3/4″ down from it; here’s where you’ll drive a top row of screws to attach the wide slats to the top crosspiece. Draw a third layout line across the slats 4-5/8″ up from their bottom ends to locate another line of attachment screws for the wide slats. (Note: You’ll need to position the attachment screws for the narrow slats up or down from these two darker screw layout lines in order to avoid the screws that already fasten the crosspieces to the backrest supports.)
Attach the back slats to the backrest assembly with counterbored, 2″ exterior screws at the layout locations. Space the slats 1/4″ apart with dowels, and position them so the outer edges of the narrow slats are flush with the edges of the backrest. Attach the outer slats first; one screw per location is sufficient. Then use two screws per joint to secure the wide slats. Here’s a tip: I found that keeping the slats aligned during installation is easier if you have a 23-gauge pin nailer: a single 2″ pin driven into each joint location can tack the slats in place before driving the attachment screws.
Making the Front Legs
In the Drawings for the front legs, you’ll see that there’s a centered through slot, similar to the backrest supports, to facilitate setting up or folding down the chair. Cut blanks for the legs, and follow the same process as you did for the backrest slots to rout 5/16″-wide, 7″-long slots through the front legs. Start the slots 5-3/4″ up from the bottom ends.
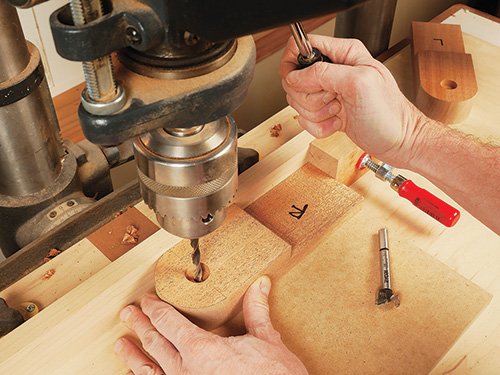
At the top end of each slot, drill a 3/4″-dia. counterbore 1/4″ deep at the drill press, centering the counterbore on the radius of the slot’s top curve. These counterbored recesses enable the knobs that secure the legs in the “upright” position to lock into place.
While you’re at the drill press, switch to a 7/8″ Forstner bit and drill a 5/8″-deep counterbore 1-1/2″ down from the tops of the legs, centered on their width. Locate these counterbores in the same faces of the legs you counterbored for the knobs. Drill 5/16″ through holes for bolts at the centerpoints of these counterbores.
The counterbored faces of the front legs are also their outside faces when installed on the chair. At this point, the front legs become “left” and “right” specific, because the top back corners of each leg now must be cut into 1-1/2″-radius curves. These curves allow the legs to pivot backward from their “standing” position into the chair’s “folded” position. Mark the curve on what will be the back edge of the right and left leg, and cut the curves on the band saw. File or sand the bottom corners of the legs round, to help prevent splintering or chipping when the chair is dragged around on rough surfaces. Sand the curves smooth, too.
Ease the edges and bottom ends of the legs with roundovers, and finish-sand their remaining rough surfaces to complete them.
Forming the Arm Assemblies
The arms have a decorative shape shown in the Drawings. Cut two 3/4″-thick arm blanks to size, lay out the details onto one of them and cut it to shape at the band saw. Sand the sawn edges smooth. Trace the second arm to shape from the first arm, and cut it out just outside the layout lines. Then template-rout the second arm to match the first, just as you did for duplicating the back legs.
The arms require two pivot blocks apiece to attach them to the chair and allow for rotation. Cut the blocks 3″ wide and 2-1/2″ long from 1-1/2″ stock. Drill a 7/8″-dia. counterbore, 3/8″ deep, into one face of each pivot block, 1-1/2″ down from the top end and centered, side to side. Drill a 5/16″ hole through the counterbore for a bolt. Cut the bottom corners into 5/8″ radii, and sand the four pivot blocks smooth.
Both pivot blocks for each arm are located flush with the arm’s inside flat edge, but their counterbores face in opposite directions (see the Drawings). The rear pivot block’s counterbore should face the outer, curved edge of the arm. The front pivot block’s counterbore is oriented toward the flat, inside edge of the arm. Position the back edge of the rear pivot block 3/4″ in from the back end of the arm. Locate the front pivot block’s front edge 4-3/8″ back from the front end of the arm. Attach the arms to the pivot blocks with pairs of 2″ counterbored exterior screws.
Putting It All Together
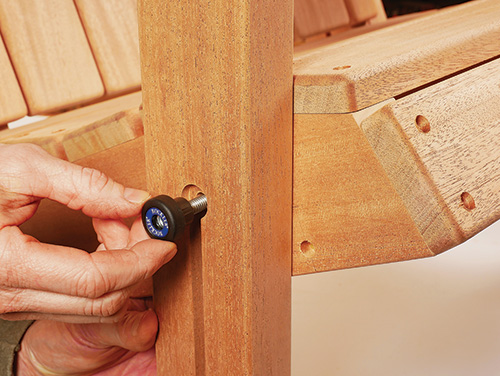
That takes care of the lion’s share of the building process! Now you’re left with some simple assembly to turn this jumble of parts into a proper chair. Install the backrest in the seat assembly with 5/16″ x 3-1/2″ stainless steel carriage bolts driven through the backrest pivots and supports. Secure the bolts with stainless fender washers and lock knobs. Orient the hardware so the knobs hide behind the backrest, and only tighten them enough to secure the parts without binding the pivoting action. (Note: Snug up all the bolts on this chair the same way, so the parts aren’t loose but still can pivot past one another easily.)
Attach the arms to the front legs by driving 5/16″ x 2-1/2″ carriage bolts through the pivots and legs. Install a washer and nylon locknut in the leg counterbores. Now tap a 5/16″ x 3-1/2″ carriage bolt through the front holes under the seat and into the front leg slots. Secure it with a lock knob. Lift the seat assembly so these bolts rise to the top of the front leg slats, and tighten the knobs down into the slot’s top “locking” recess on each leg.
Lift the back ends of the arms up until the rear pivot bolt holes line up with the holes in the backrest. Tap a 5/16″ x 3-1/2″ carriage bolt through the pivot and backrest, and secure it with a washer and nylon locknut.
Here’s how to check the folding action of the chair. First loosen the four lock knobs and back the knobs on the legs out until they clear their locking recesses. Pull the backrest up to the bottom ends of its slots and rotate the seat’s back forward and down slowly to collapse the chair. Setting it up is the reverse of the process; be sure to tighten all four lock knobs securely, with the leg knobs seated in their recesses.
The last detail is to cut a bunch of tapered wood plugs from scrap leftover from the project. Install a plug into each screw counterbore with waterproof glue. Trim and sand the plugs flush.
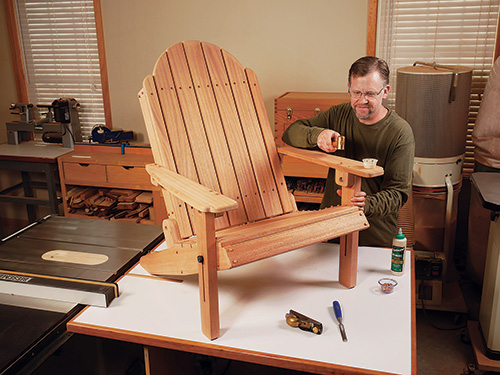
Complete your folding Adirondack chair with an exterior clear finish, stain or paint of your choice. Unbolt the major components — seat and back assemblies, arms and front legs — before you begin so you can apply the finish evenly to all part surfaces. Reassemble when the finish dries, and your chair is ready for its first season of lounging.
Click Here to Download the Drawings and Materials List.
Hard-to-Find Hardware:
Rockler Easy-to-Grip 1″ Round Knobs (4) #52227
Folding Adirondack Chair Hardware (1) #68447


