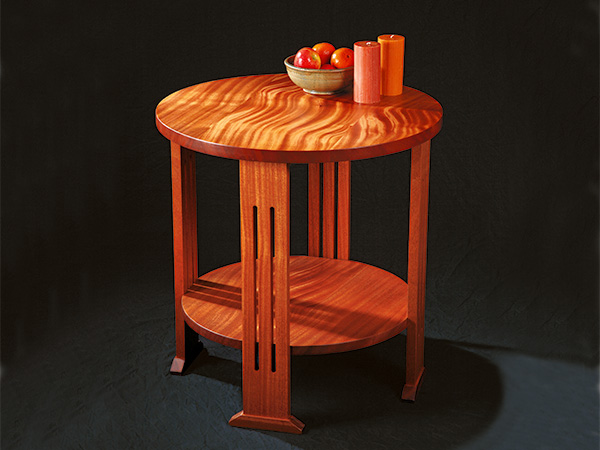
Every woodworker knows the story: You’re at the lumberyard and suddenly there it is, the most beautiful plank of wood you’ve ever seen (until the next beautiful plank comes along — we’re a fickle lot). Like a child with a stray cat, you just have to bring it home.
That’s what happened when I saw this plank of ribbon stripe African mahogany. My trip home from the lumberyard was spent rehearsing an answer for the inevitable question: “You spent how much on that board?!” Fortunately for me, we were in need of a Stickley-style hall table, and this plank was the perfect choice for it.
As you’ll see in the Drawings, I put the table together with pocket screws so there’s no tricky joinery to fuss with. Pocket screws make construction go quickly, and they allow you to sand and prefinish the individual parts before final assembly. The disassembled table can also be knocked down and shipped flat, and it can be assembled at its destination with only a screwdriver.
While I used mahogany, it would be entirely consistent with Stickley furniture if you decided to use another species, such as quartersawn red or white oak. Even flatsawn material is fine. Don’t feel like you need to search for the same lumber as I used … unless of course you’re hankering for a good reason to head to the lumberyard anyway.
Harvesting the Parts
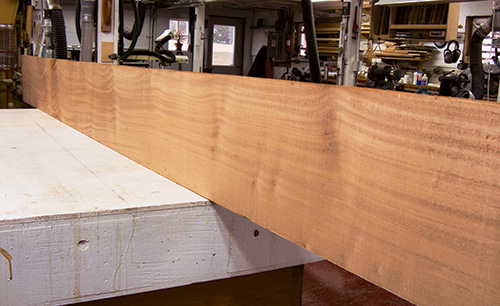
My first step on this project was to let my precious plank acclimate to the shop. Be sure to give your stock a week or two in your shop as well — it needs to reach a level of moisture equilibrium so that any potential distortion will become apparent before you start working it. I set my plank on edge so that both faces were exposed to the ambient air.
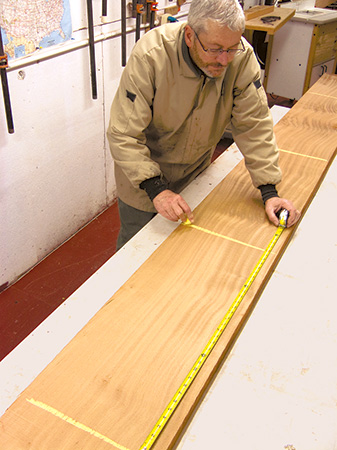
The next order of business was to plan my cuts. Mistakes in wood like this are costly, and I didn’t want any regrets. I used chalk to lay out your cuts with a pleasing grain pattern in mind. Prioritize those pieces that will become the tabletop and shelf — they’re the most visible.
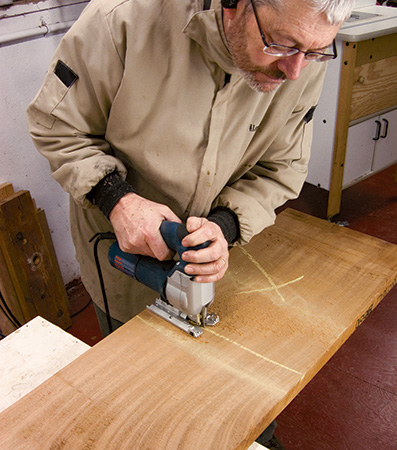
Rough-cut the stock into the necessary pieces, leaving each slightly oversized. I like to use a jigsaw because it’s safe to manage when sizing down large planks like this one and square cuts are not important at this point.
Preparing Top, Shelf Blanks
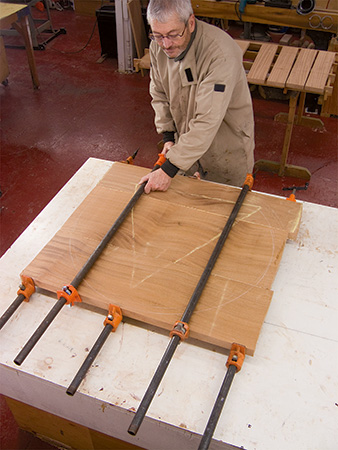
Take some time to consider the orientation of the stock you’ll use for the tabletop and shelf, once you’ve surfaced it flat, smooth and to thickness. The goal, as always, is to make those glue lines as invisible as possible and to get a pleasing grain pattern. Mark the parts to keep their arrangement clear, then glue up your blanks for the top and bottom shelf. Be sure your joints are well aligned to minimize sanding later.
Once the glue cures, pull the clamps off of your panels and use abrasives to flatten them, rather than a hand plane. Ribbon stripe mahogany can be tricky to machine because the grain flows in opposing directions. I’ve found in the past that it’s almost impossible to plane without tearout. If you have a lot of sanding to do to flatten the seams between the board edges, start with a belt sander, then switch to a random-orbit sander until the blank is flat and smooth.
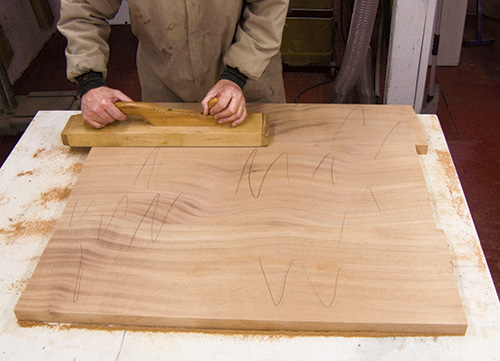
Even slight imperfections will show up on a finished tabletop, so my method for creating a dead-flat top involves a pencil as well as a sanding block. I cover the blank with pencil swirls, then start sanding. The low spots show up pretty quickly as the pencil marks that remain when the high spots are gone. Keep sanding until all the pencil marks are erased, and your top will be perfectly flat.
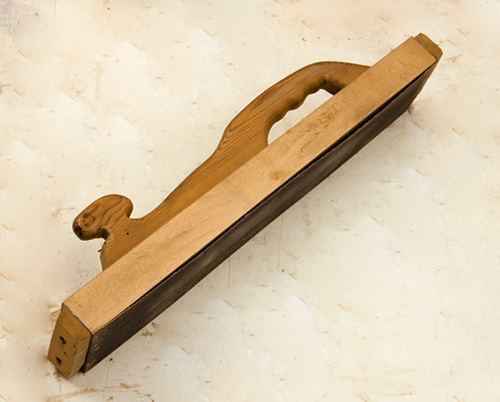
You might be wondering what that apparatus is that I’m using to sand my tabletop here. It’s nothing more than a block of solid maple that’s been jointed flat and sized to fit a 4 x 24-in. sanding belt. Cut the belt at the seam and attach it to the ends of the maple with small wood blocks and screws. A handle fashioned from a 2 x 4 completes what I affectionately call my “hand abrasive planer.” Its broad base serves the same flattening function as a jointer plane — very effective. Sand up through the grits, smoothing your panels to 180-grit.
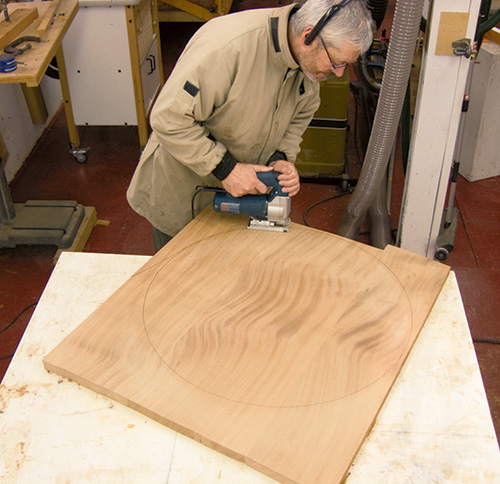
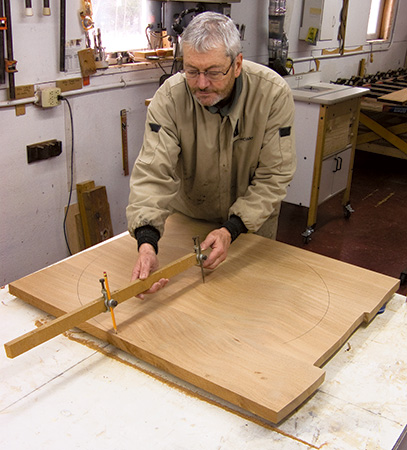
With the panels flat and smooth, set the bottom shelf aside for now. Draw the circle for the tabletop on its blank. I used trammel points clamped to a long piece of scrap to serve as an oversized compass…sooner or later, every woodworker should own a pair of these handy devices. Now rough-cut the top to shape with a jigsaw. Be sure to save the off-cut corners to make the feet later; your blank should be large enough to accommodate them.
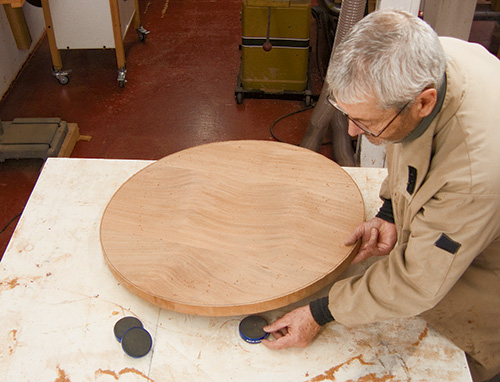
There are a number of ways to cut a large round top. A band saw works well, but I don’t like sanding out all the blade marks. I prefer to use a plunge router mounted on a trammel to cut tops to finished size. With a sharp spiral or shear-cutting straight bit, a router leaves a smooth, perfectly round edge that requires very little cleanup sanding.
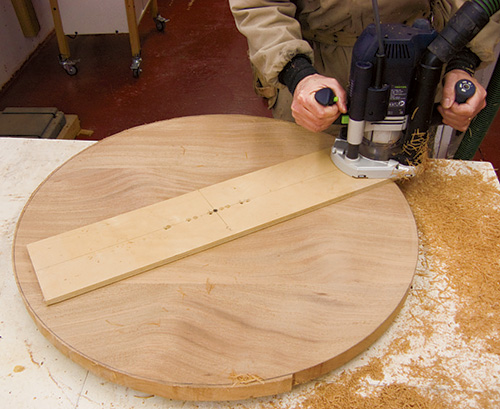
You can make a router trammel from a piece of 1/2″ plywood wide enough to easily mount to your router’s base. It needs to be about a foot or more longer than the circle’s radius. Cut a hole through one end of the trammel for the router bit to pass through, and mount the base to the board with screws. Drill a pivot point on the trammel equal to the table radius when measured from the inside cutting edge of the bit. Use a finish nail, dowel or screw as the trammel’s pivot point. Mount the trammel to the underside of the tabletop with the pivot driven into a shallow hole.
Now, elevate the panel so the bit will clear your bench and the router can swing in one continuous motion. Bench Cookies® are ideal as they keep the top from shifting when the cut is made, but other spacer blocks could work also.
Turn the router on, plunge the bit down to cut through the blank, and swing the trammel all the way around the circle. I fed my router counterclockwise.
Crossbraces and Legs
In the Drawings, you’ll see that the tabletop fastens to the legs by means of a pair of crossbraces that intersect in a half-lap joint. They’re next up on your list to make. Surface some stock for the two crossbraces, then rip and crosscut them to final size. Install a wide dado blade in your table saw, and raise it to cut exactly halfway through the thickness of the crossbraces. Mark the position of each half-lap joint on the bracing, and make a series of side-by-side passes over the blade to hog away the waste. If you work carefully, the braces should slip together snugly so their faces are flush when they’re interlocked.
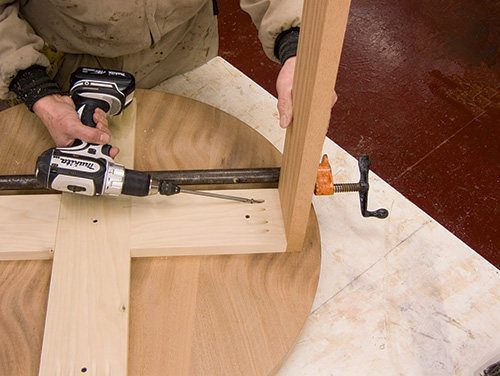
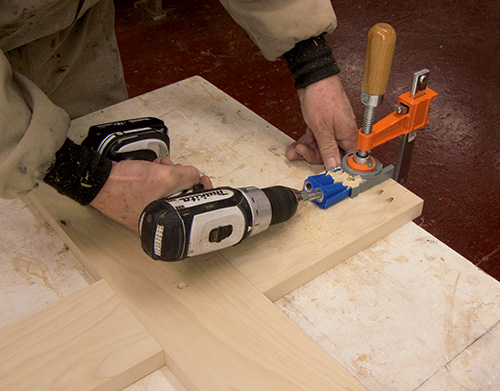
Time for some drilling to prepare the crossbraces for final assembly. Plan to mount the crossbraces to the tabletop with five screws: one at the centerpoint and one in the middle of each crossmember about two inches from their ends.
Drill these countersunk holes now. Find your pocket-hole jig and stepped bit so you can bore four angled pilot holes at each brace end for pocket screws that will attach each of the four table legs.
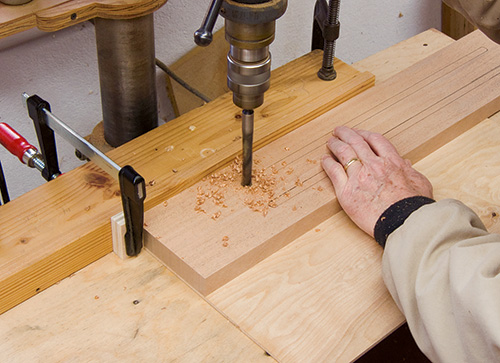
Speaking of table legs, head to your jointer and planer to prepare some 1x stock for them. Cut the legs to final size, and take a breather to study the Drawings for the pairs of leg slots you’ll need to mill next. I could have laid these 8-1/2″-long slots out and cut them on my scroll saw, but I wanted to make them arrow straight and avoid having to sand out saw marks on their inside edges.
It didn’t take long to conclude that my router table would solve both issues easily, but I still needed to consider the best procedure to follow. While a 1/2″ straight or spiral cutter could cut the slots in one pass, I knew that even a new bit would likely leave chatter, and I would be back to a tedious sanding job. Instead, I split the job between the drill press and the router table. First, I drilled two 1/2″-diameter holes through the end points of each slot, to ensure perfectly rounded slot ends. Then I chucked a 3/8″ upcut spiral bit so I could pass it through the starter hole easily and begin each router pass safely. The undersized diameter of my router bit meant that each slot would take three passes to complete (I’ll explain how and why shortly), but the ultra-smooth edge along the walls of the slots would be worth the extra cuts.
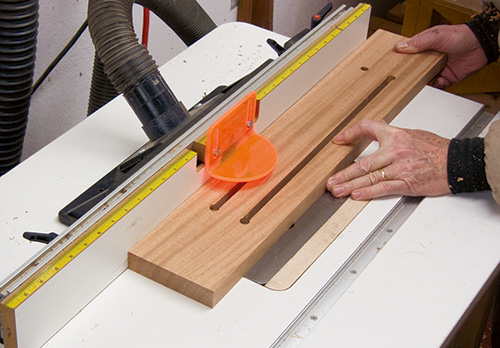
On your router table, install the bit and raise it high enough to pass through the leg workpieces. Position and lock the router table fence to center the bit inside one of the 1/2″ slot holes; this setup removes the majority of the waste in the first pass. Turn the router on and slowly feed each leg from right to left to hog out the center portion of the eight slots. As you complete each pass, turn the router off and let the bit stop before lifting the leg off. No need to change your fence setting to switch from one slot to the other on each leg. Just flip it over to rout the centered cut for the second slot.
Once all eight “first cuts” are done, it’s time to shift the fence for the second routing pass. Unlock and reposition the fence so the bit aligns with the outside edge of the 1/2″ hole on one of the slots. This setting will widen the slots and form the outside wall in the same maneuver. To start these cuts, shift the leg so the bit is centered in the slot again and can spin freely. Turn on the router, push the leg against the fence to engage the bit and feed from right to left. Flip the board over to cut the outside wall of the opposite slot. Repeat for all four legs.
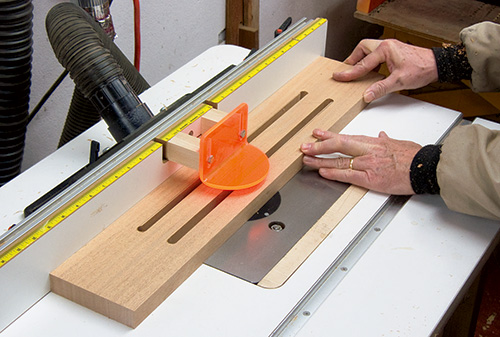
Use the same process for milling the third and final slot cuts. Reset and lock the fence to define the inside walls of the slots as well as to bring the slots to final width.
When the dust settles from all of this routing, go ahead and fasten the crossbraces to the legs temporarily with two of the four pocket screws at each leg joint to create the table framework.
Machining the Lower Shelf
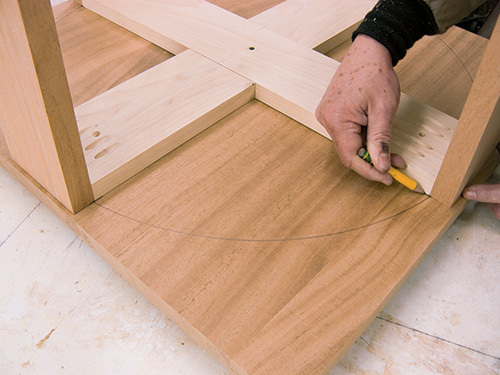
It’s time to retrieve that second blank you reserved for the shelf. If you haven’t done so already, sand it smooth and flat. Now reset your trammel point compass and draw the shelf diameter of 25-1/4″ on the blank. Center the crossbrace assembly on your shelf outline and check to be sure the outside ends of the braces just intersect the perimeter of the circle. If the circle size is correct, mark the positions of the crossbraces and legs where they touch the circle to serve as reference points.
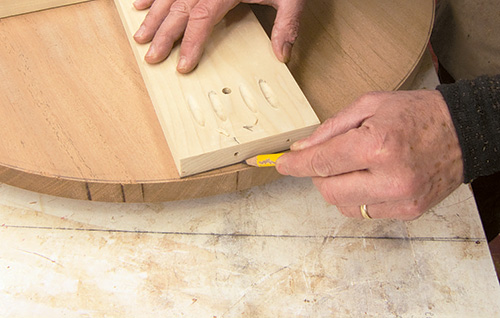
Now unscrew the legs and, holding the crossbraces carefully so they’re aligned with their reference points on the shelf, trace a line across their ends to create four “flats” where the round shelf will attach to the flat leg faces. Grab your jigsaw and rough-cut the shelf blank to shape, steering the blade wide of your circle layout lines.
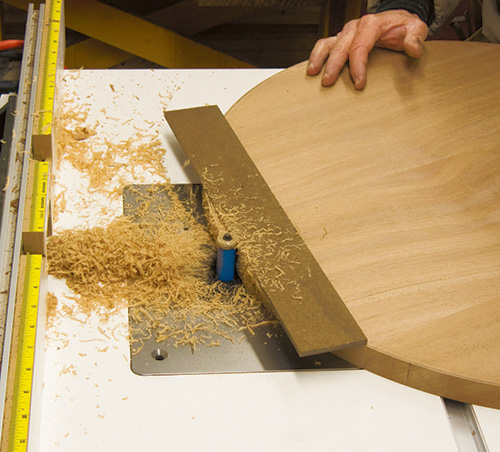
Use the router trammel jig, with its pivot point reset to match the shelf radius, to finish-cut this workpiece round just as you did for the tabletop. Now, as to those flat areas that remain to be cut, here’s my simple solution: I attached a long scrap of hardboard inside the circle to serve as a straightedge.
Align it flush with each of the lines you drew for the flats. I tacked mine down to the shelf with a couple of short brads (if you want to avoid their puncture holes, use doublestick tape or dabs of hot-melt glue instead of brads), then zipped off the waste with a piloted flush-trim bit in my router table . Guide the bit’s bearing along the straightedge and feed the workpiece from right to left — easy and spot-on.
Final Assembly and Finishing
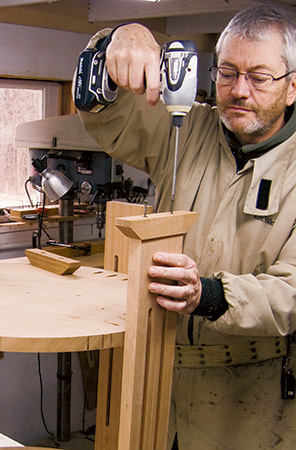
Let’s bring this hall table together! Attach the crossbraces to the underside of the tabletop with five screws. Be sure to widen the two screw holes on the ends of the brace that runs across the grain of the top to accommodate the top’s seasonal expansion and contraction. Fasten the legs back onto the crossbraces, this time driving pocket screws into every mounting hole.
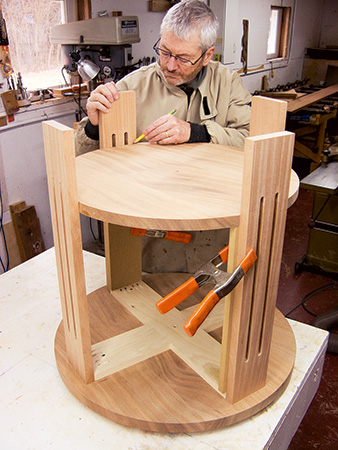
You still need to position the shelf on the leg framework. I did this by attaching a couple of 19″-long spacer boards to two of the legs with spring clamps. Rest the lower shelf on these spacers, and swivel the shelf so its grain direction matches the pattern of the tabletop. Mark four pocket screw locations for each of the legs on the shelf bottom, and bore these holes. Drive screws to install the shelf on the legs.
Round up those offcuts you saved for the table’s feet. Rip them to width on the table saw, and cut them to length. Notice in the Drawings that the top corners are clipped off with a pair of bevels. Create these at the band saw or on a miter saw. Drive a pair of 3″ countersunk flathead wood screws through each foot to attach them to the bottoms of the legs.
Give your table a final sanding to break any sharp edges and then disassemble it for finishing. You can topcoat your table however you like. After the finish cures for a week or so, polish off your table with a coat of wax and find a likely hall location for it to live.
Click Here to Download the Drawings and Materials List.
– Dave Munkittrick is a cabinetmaker and furniture builder who works out of an old pig barn in River Falls, Wisconsin.


