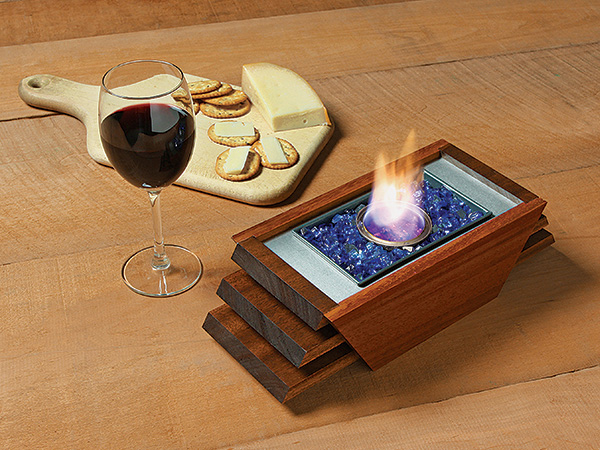
There’s nothing quite like a fire pit in the yard to bring people together for some quality time. But, we don’t all have the acreage, zoning permission or desire to make one. Well, this little tabletop fire pit can bring a bit of that smoldering, campfire ambiance to any deck or patio. Made of mahogany and metal, our version is easy to build in a couple of afternoons, and it will also give you a chance to try your hand at working with aluminum.
Routing Aluminum
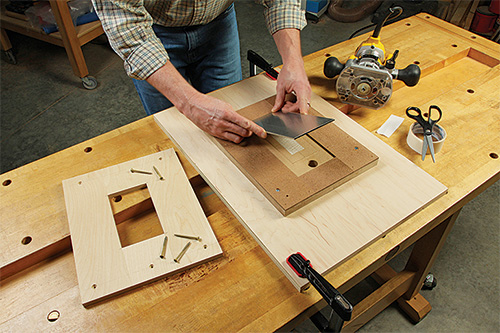
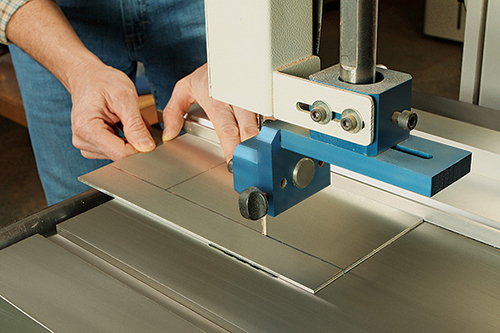
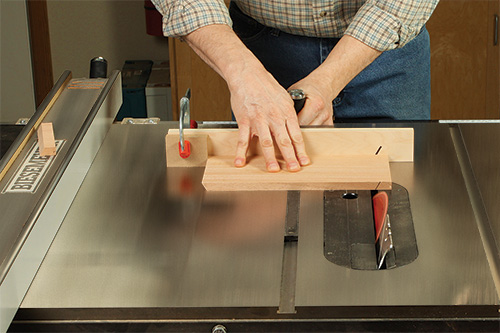
And that’s what I used to rout a 3-3/16″-wide, 5-3/4″-long opening for the bread pan. It captures the pan just under its rim. I built a three-layered jig to assist in the task: a 1/2″ plywood top template has a cutout that matches the pan’s top outer dimension: 3-3/8″ x 5-15/16″.
The jig’s midsection is a built-up layer of 1/2″ MDF topped off with 1/8″ hardboard to hold the aluminum blank securely during routing. Its base is just a big piece of scrap plywood that provided clamping points for my workbench. A 7/16″ O.D. guide collar in the router provides the right offset for the bit — 3/32″ — to create the opening in the metal.
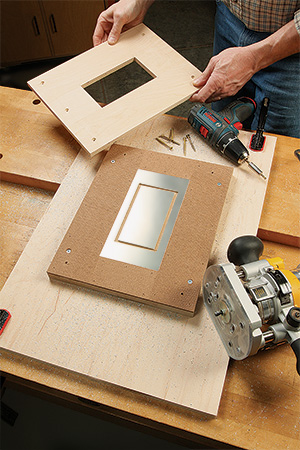
I routed down through the plate in four passes, increasing the depth of cut by 1/32″ each time. The result: clean, straight cuts that look like they were made by a CNC machine. And the bit is still sharp and ready for use in wood again when duty calls.
Milling the Aluminum Plate
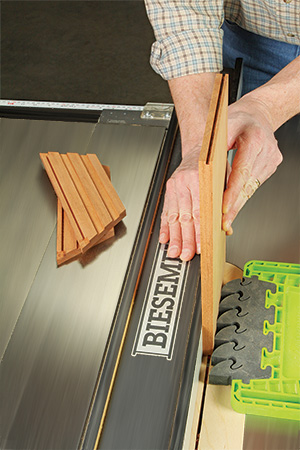
We’ll begin this project by machining the 1/8″-thick aluminum plate. While you could certainly use a jigsaw and metal-cutting blade or a hacksaw, I cut the plate to size with a 6-tpi skip tooth woodcutting blade that was nearing the end of its woodworking life (repeated use on aluminum will dull the blade). The metal is so soft that a band saw and an ordinary blade cuts it easily, and I could use my rip fence and miter gauge to ensure flat edges and square corners.
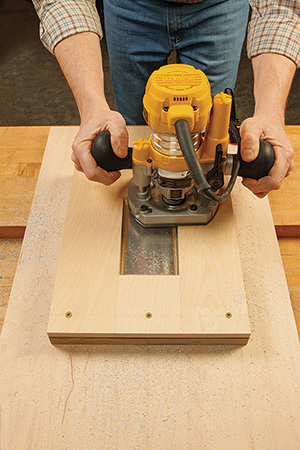
Here’s the second machining step that worked well for me: I milled the bread pan cutout in the plate by template-routing the opening with a shop-made jig and a trim router (as outlined above).
Making the Sides
Any outdoor-suitable wood will work here, and whatever you choose, a piece of 6″-wide stock, 5 ft. long, will provide ample material to build it. Joint and plane the board down to exactly 1/2″ thick, and finish-sand it up to 180 grit.
Crosscut a 20″ length to make the two side panel workpieces, and rip this blank to 3-1/4″ wide. Save the long offcut — we’ll use that for making the lid cleats, later.
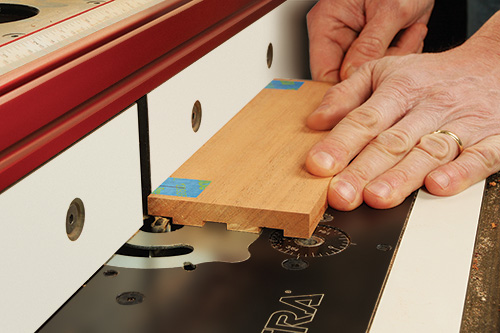
You’ll see in the Drawings that the project’s three layers of beveled fins fit into grooves cut in the sides. We’ll mill those now. Chuck a 1/2″ straight or spiral bit in your router table, and set the fence 1/2″ away from the bit. Raise the bit to 1/8″, and rout a groove into the face of the workpiece along the full length. This groove will house the bottom fins. Then reset the fence 1-5/8″ away from the bit and rout another continuous groove for the middle fins.
Now crosscut the blank into two 9-1/2″-long pieces — one for each side. Return to the router table with your side workpieces so you can complete a pair of short, stopped grooves for the top fins. This time, reset the fence so the bit protrudes its full 1/2″ diameter out from the fence opening, but no more than that. Cut the stopped grooves 5/8″ long along the top edge of the side workpieces. Mark your router fence so you’ll know where the bit’s limits are.
Next, miter cut the ends of the side panels to 30°. Be careful not to shorten them in the process, and set up the cuts so the groove for the bottom fins will end up closer to the shorter (bottom) edge of these parts. Then square up the back, rounded ends of the top fin grooves with a chisel.
Plowing the Plate Grooves
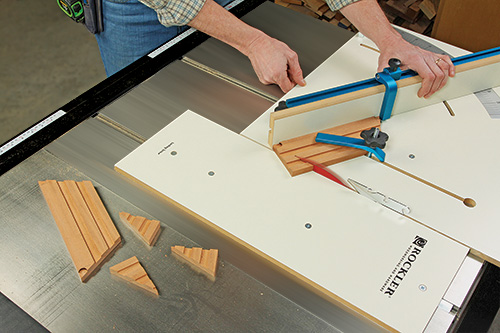
Both side panels and the inner ends of the top fins have 1/8″-wide grooves to hold the aluminum plate. We’ll cut those next. But first, crosscut a 12″-long piece of your project stock: we’ll use it for both the top and middle fins.
I cut the plate grooves with a 1/8″-kerf ripping blade on the table saw (in order to make square-bottomed grooves), and set my rip fence 1/4″ away from the blade. Raise the blade to 1/8″, and plow the plate grooves into the inside face of the side pieces, with the longer top edges against the rip fence. Then cut a groove across both ends of the combined fin workpiece, keeping the same face of the workpiece against the rip fence when making these two kerf cuts.
Creating the Fins
Crosscut a 10″-long piece off of your project board and set it aside for the lid panel. Then rip the top/middle fin workpiece (that just received the aluminum plate grooves) and the remaining portion of the project board to 4-1/4″ wide.
To complete the two short top fins, all you need to do is crosscut the grooved ends off of the combined top/middle fin workpiece, with your saw blade tilted to 30°. Mark these two cuts so the bottom faces of the top fins are 15/16″ long.
And be careful that the grooves for the aluminum plate are closer to the longer bottom faces of these fins than their shorter top faces, so they’ll line up with the plate grooves in the side panels.
Take what’s left of the blank from the top fins and mark a crosscut line 2-1/2″ in from each of the bevel points on its ends. Crosscut the blank at these lines with the blade tilted to 30° and so the bevels on the ends of these parts are parallel. Repeat the bevel-cutting process on your other 4-1/4″-wide workpiece to form two 3-5/8″-long bottom fins.
Assembling the Base
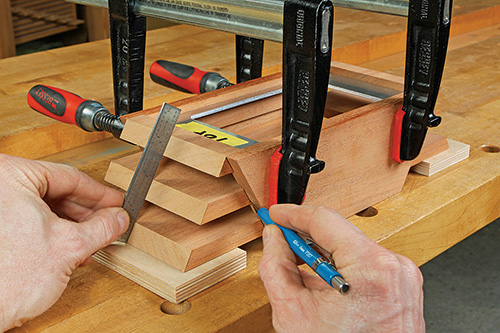
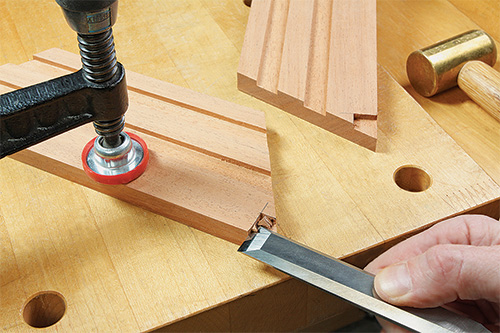
Carry out a dry assembly of the aluminum plate and fins in the side panels to make sure that the parts fit their grooves well. Adjust the fins so their beveled ends slope away from the top in a straight line. Once you have them aligned, reach down inside the bread pan opening and mark the positions of the back ends of the fins on the side panels, and do the same thing where the edges of the fins meet the side panels on the outside. These markings will help you realign the fins at glue-up.
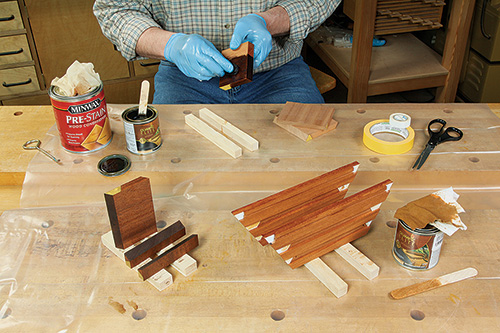
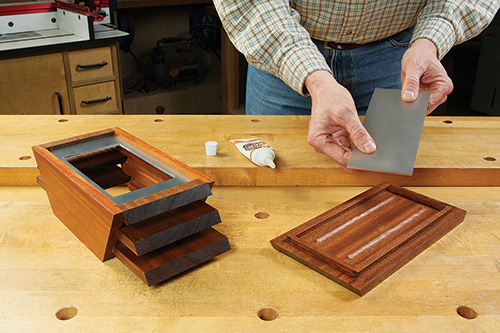
At this point, I used dark- and light-brown exterior stains to color the parts. Since it was oil-based, I covered the glue joint areas with painter’s tape so the glue would stick properly, later. Topcoat the project parts with an exterior finish, like spar varnish, if you wish. When the finish cures, assemble the base with exterior-rated wood glue.
Preparing For Use
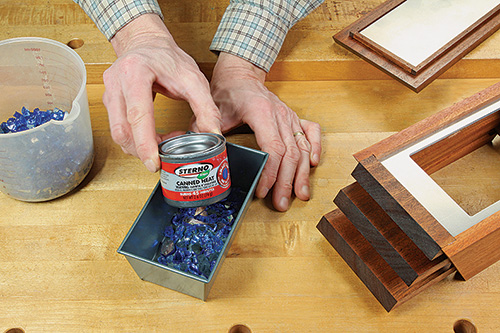
Gel-based Sterno® Canned Heat in the 2.6 oz. size fits inside the bread pan to provide the fire for this pit. You can find it online, in kitchen supply stores and at camping outlets. To prepare the pan for use, pour a single layer of the decorative tempered glass into the bottom of the pan to bring the can up to level with the rim.
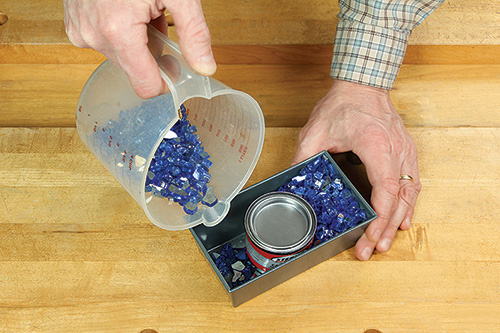
Set the can down inside, and fill in around it with more glass. Pry off the lid, and the fuel lights easily with a long match. It burns for around 45 minutes, but you can snuff it out sooner using the project lid (lined with aluminum) or the can’s lid. The unburned gel that remains can be lit again another time.
Completing the Lid
The lid is the last component to build. Besides just making the project look neater, putting a lid on the fire pit also serves to keep the rain out of the interior.
Start by ripping your lid blank to match the width of the base, and bevel-cut its ends at 30° so the bottom face of the lid is 9-1/2″ long. (Its bevels should line up with the top fin bevels when the lid is installed on the base.) Now take the narrow offcut you set aside first when making the side panels, and plane it down to 1/4″ thick. Rip several 1/4″-wide strips from it at your band saw or table saw, and crosscut four lid cleats from them. When fitted together, this cleat framework should sit inside the base between the top fins and the side panels. I tacked the cleats together with dots of CA glue, and stuck this framework to the lid with little pieces of double-sided tape. Adjust the position of the cleats on the lid until the lid fits over the base properly. Then mark their position, remove the tape, and glue the cleats to the lid. I used 5/8″-long, 23-gauge pin nails to hold them in place while the glue dried.
Apply stain and finish to the lid. If you have some extra aluminum as I did, you can turn the lid into a handy flame snuffer by installing a piece inside the cleat area. Then follow the sidebar, below, for preparing the fire pit for use. I hope this little project helps bring a glow to your table for those special outdoor evening meals this summer.


