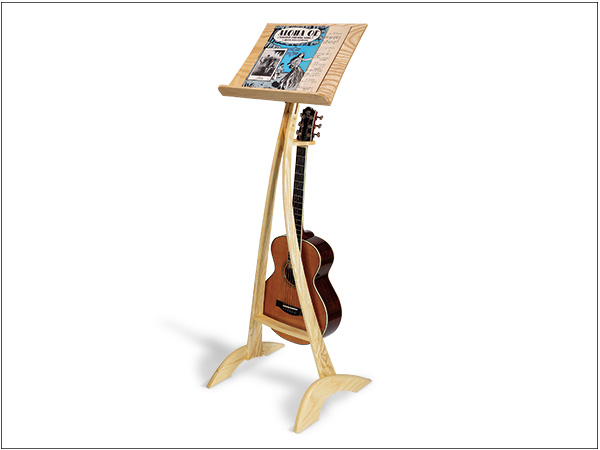
I’ve been playing guitar since I was 12 years old, but I’ve never had a music stand that I really liked. The fold-up ones were too flimsy, and the big metal ones were heavy and kind of ugly. So I decided to build my own sleek music stand from wood. I wanted it to be stable and functional, yet appear more modern and curvy than traditional music stands. Hence, my design here features compound-curved legs that are both sawn and steam bent. I made the stand’s music holder strong enough to support a large music book and wide enough to hold two pages of sheet music side by side. Thanks to quick-action cam clamp hardware, the holder also tilts and adjusts up and down over a small range, which should suit the majority of musicians who play while standing or sitting on a stool.
As an added bonus, I incorporated a guitar hanger — a feature I’ve never seen on any other music stand. The hanger accommodates all but the largest guitars as well as ukuleles and banjos. It can also be altered to hold violins, violas, mandolins and other instruments (it may also be omitted). I built my stand from ash, which makes it very light in weight: less than 7 lbs.! However, you can use any wood that steam bends well: white or red oak, cherry, walnut, beech, etc.
Cutting Out the Parts
Once you’ve selected the wood for your music stand, the first step before cutting begins is to use the parts diagrams to make full-sized paper patterns. You can do this by either scanning and printing them using a computer, or drawing them full-size by hand using the grid of squares shown on each diagram as a guide (you only need one paper pattern for each part). The patterns for the smaller parts —- the stretcher, guitar hanger, bracket arm and top spacer — can be applied directly to the stock; just be sure to plane the stock to final thickness first, following the parts list. Apply a light coat of spray adhesive, such as 3M Super 77, to the back of each pattern, then press it onto the wood. As the stand’s pairs of legs and feet will be pattern routed, glue their paper patterns onto 1/4″ hardboard or MDF template stock instead.
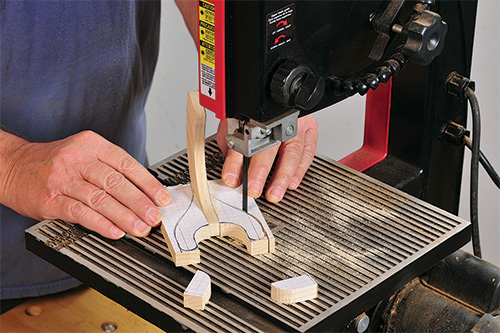
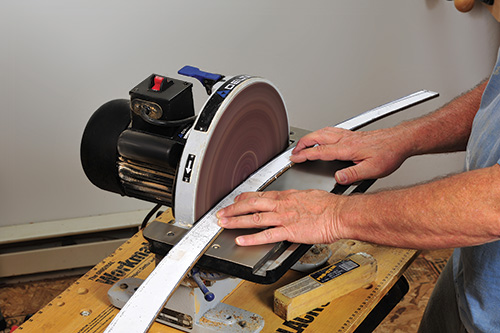
Saw out all the smaller parts as well as the leg and foot templates using a band saw or jigsaw, cutting just outside the marked lines (glue the pattern to the stretcher, but don’t cut it out just yet). Carefully trim the excess back to the pattern lines using a stationary disc or belt sander for the convex edges, and a drum or oscillating spindle sander for the concave edges. When cutting out the parts for the guitar hanger, it’s best to cut out and sand the upright first, glue on the two hanger prongs as rectangular blanks, then saw them to shape.
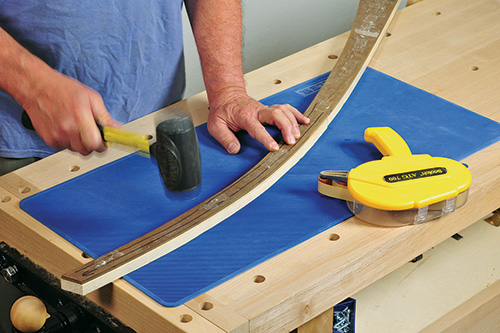
To finish the leg and foot templates, sight down each long curved edge to make sure that it’s smooth and flowing, and sand out any irregularities as necessary (it’s not important for the curves to perfectly match the pattern lines; close is close enough).
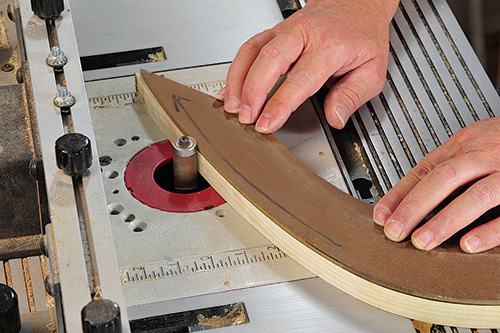
When choosing stock for the legs, the boards with the straightest grain will give the best results when steam bending. Use the templates to mark out the legs and feet on the stock with a soft pencil; make two pairs of parts that are mirror symmetrical. Saw the legs out, cutting just shy of your pencil lines as before. Attach the templates atop the rough cut blanks using either double-stick tape or adhesive transfer tape.
In preparation for pattern routing, chuck a flush-trim bit into your router table. You’ll get the cleanest cut with a 1/2″ shank piloted bit that’s at least 3/4″ in diameter with shear angle cutters (rather than straight ones) such as the Rockler Double Bearing Shear Flush Trim Router Bit. Set the height of the bit so that the top bearing firmly contacts the template.
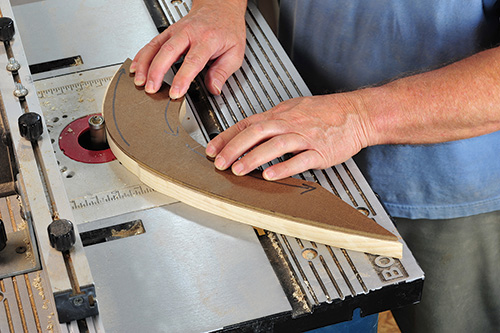
Before switching on the router, it’s important to check to see how the grain of the wood runs relative to the template. For best results, only rout the sections of leg or foot where the bit is cutting with the grain. Cutting against it is likely to result in severe grain tearout. After those sections have been routed, the way you trim the unrouted sections depends on the type of bit you’re using: For a double-bearing bit (with bearings both above and below the cutter), simply flip the part over, reset the bit’s height so the bearing rides against the template and finish trimming. If your bit has a single top-mounted bearing, pry the template off and attach it to the opposite side of the part, carefully aligning the sections which have already been trimmed with the template. Leave the bit at the same height and finish trimming the unrouted sections. Repeat this process for both legs and both feet.
Machining the Legs
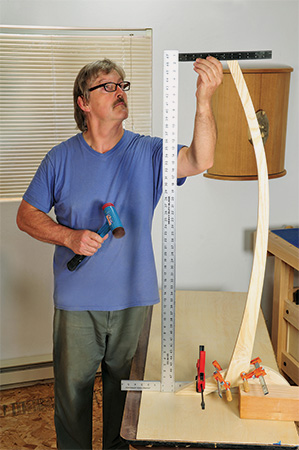
Before the stand’s legs are ready for steam bending, you need to rout the lap joint that attaches the legs to the feet as well as the slot that the music holder mounts to. Start by temporarily clamping one of the legs to the inside surface of its corresponding foot, positioning it as shown in the Drawing. Prop this assembly atop a flat workbench and position a long rule (or a straight stick) square to the benchtop with one edge flush with the rear end of the foot.
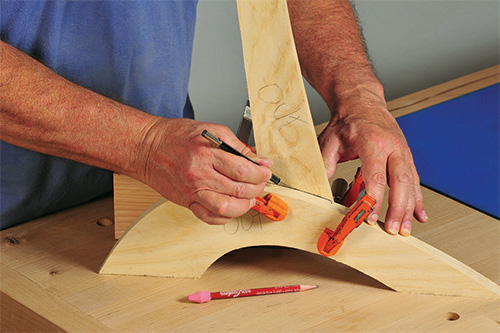
The distance between the rule/stick and the top of the leg should be 6-1/4″. If it’s not, shift the end of the leg back or forth as necessary. Using first a pencil, then a sharp knife, scribe a line onto the leg where it overlaps the foot. Use a router fitted with a straight bit to rout away the lapping section of the leg to a depth of 1/4″, working from the bottom end towards the scribed line. Rout as close to the line as you dare, then finish trimming with a sharp chisel or a gouge with a low sweep number (#2 or #3). The trimmed edge should be nice and square relative to the face of the leg.
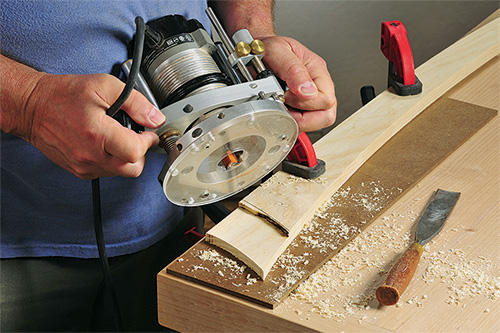
To assure that the music holder mounting slots are properly aligned on both legs, you’ll first rout a slot into the leg template that will be used to guide a router fitted with a guide bushing and straight bit to rout the actual leg slots. To rout the template slot, clamp two straight-edged pieces of 1/2″ plywood atop the leg template, setting them exactly 1/2″ apart and parallel to each other. Then use a plunge router fitted with a 1/2″ O.D. guide bushing and a 3/8″ straight bit to rout a slot that’s centered, widthwise: it’s 5-3/8″ long and begins 1-11/16″ from the top end of the template.
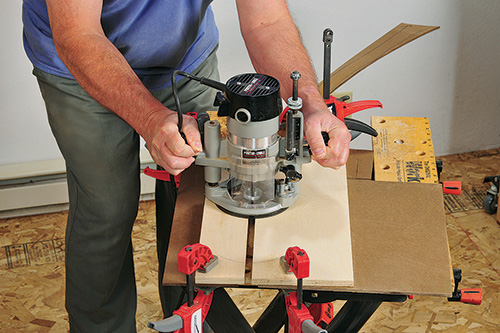
Then, attach the template to the leg (using double-stick or adhesive transfer tape) and rout a through slot with a 1/4″ straight bit (preferably with fluted cutters) and a 3/8″ O.D. guide bushing mounted to the router’s subbase. It’s best to rout the slot in several passes, increasing the bit’s cutting depth each time. Scrap boards clamped on either side of the template/leg assembly will help to keep the router steady as you work.
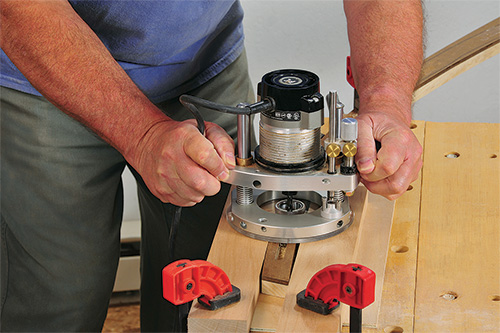
The final machining step is to round just the front-facing edges of both legs using a 1/4″ radius piloted roundover bit. When routing the inner-facing edge of each leg, stop the cut about 9-3/4″ short of the top. Now is also a good time to round the upper, outer-facing edge of both feet, using a 1/2″ radius roundover bit.
Steam Bending the Legs
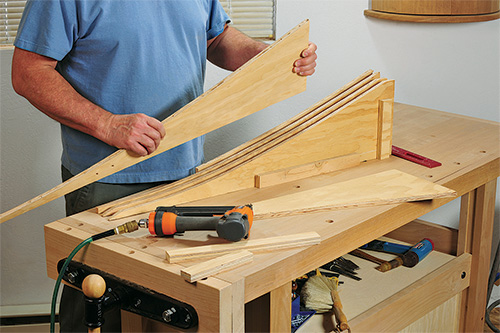
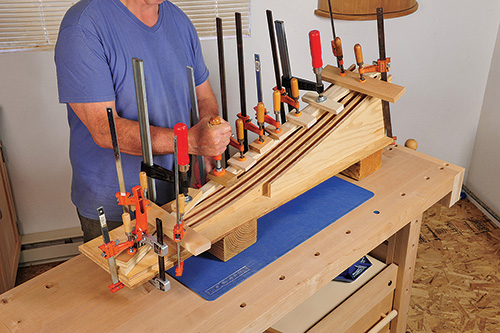
Bending the stand’s legs in their flat dimension gives them their sinuous shape, which curves in two dimensions. In preparation for bending, build the form onto which the heated legs are clamped after steaming, so that they’ll retain their shape as they cool. You can make this form out of just about any 1/2″ or 3/4″ scrap plywood or MDF you have lying around. You’ll need at least six form segments, cut to the shape shown in the Drawing (if you run low on stock, the outer two can be shorter on the skinny end).
Nail or screw the segments together with a couple of 3/4″-thick spacer strips between until the form is at least 6-1/2″ wide. (A form this wide is needed since the legs are wide in their non-bent direction, and one leg must be clamped in one direction on the form, the other in the opposite direction.) Nail/screw the assembled form to a 1/2″ ply baseplate, with a piece of 1/2″ ply screwed on top, flush to the skinny end of the form segments.
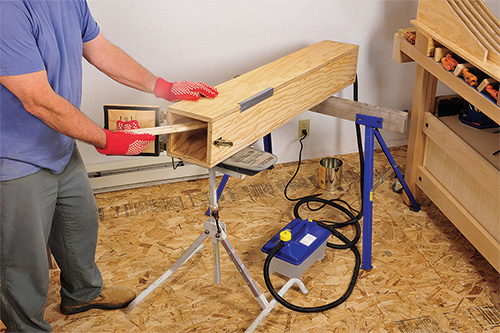
To perform the actual steam bending, you’ll need a source of steam, a sealable steam box big enough to accommodate the legs and a hose to connect them together. Rockler sells a kit that includes all the essential equipment, save the steam box, which you build yourself. A thermometer, like the kind used for checking meat while cooking, is also needed (you can watch my entire steam bending process in my More on the Web video for this article).
Joining the Stretcher
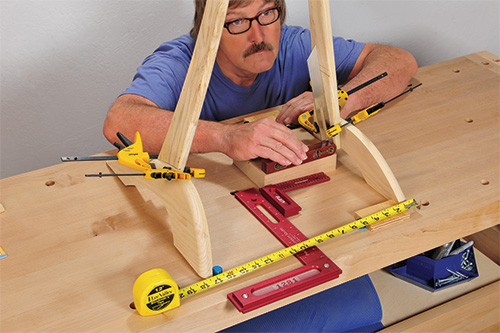
The next step is to trim and shape the music stand’s curved stretcher, then join it to the legs. First, clamp the legs to their respective feet, then clamp the top of the legs together with the guitar hanger and top spacer set in place, but not glued. Set the assembly atop a flat, level workbench, spread the feet so that they’re 18″ apart (outside measurement) and parallel, then clamp them down onto the benchtop. Using a sliding bevel set on a spacer block, check the angle of the inside of one of the legs at 9-1/2″ above the benchtop (the bottom surface of the stretcher). Use the bevel to set the tilt of the blade on your table saw (or miter saw) and trim one end of the stretcher. Measure the angle of the other leg and reset the saw blade tilt, then measure the distance between the two legs at the stretcher height. Trim the other end of the stretcher, cutting it to its final length. Now you can saw out the stretcher’s curved shape, following the pattern you glued on earlier. Round all long edges with a 1/4″-radius roundover bit, and sand the stretcher smooth.
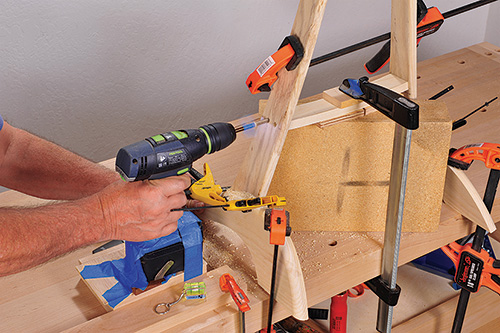
Use a cordless drill to bore holes for the four 5/16″-dia. dowels that join the stretcher to the legs. To prepare for this operation, chuck up a 5/16″ brad point bit, set the drill on the bench and use a small level to see if the bit is parallel to the benchtop. If it’s not, tape a wedge to the underside of the drill’s battery. Now use as many spacers (scraps of plywood, Masonite, cardboard, etc.) as it takes to elevate the drill until the center of the bit is 913/16″ high. Clamp the stretcher in position between the legs atop a sturdy box or blocks and clamp it to the benchtop. Working slowly and carefully, drill two 1-1/2″-deep holes through the legs, into each end of the stretcher. Drive a couple of dowels (sanded to be slightly undersized) into these holes to keep the stretcher in place, but don’t glue them in just yet.
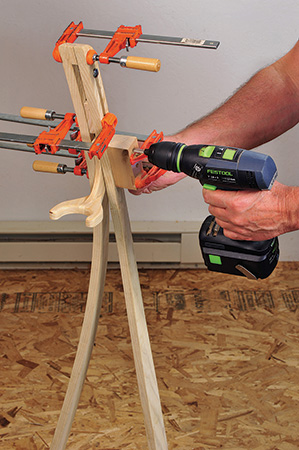
Next, you’ll drill a pair of holes for the 5/16″ dowel holes that join the guitar hanger to the legs. Unclamp only the stretcher and feet from the benchtop then set the stand on the floor. At the drill press, make a drilling guide out of a 1-1/2″ x 1-1/2″ x 3″ scrap wood block by boring a pair of 5/16″ holes spaced 1″ apart. After confirming that the guitar hanger is in exactly the right position, clamp the drill guide to the leg with the holes positioned as shown on the drawing. Clamp a scrap block to the leg opposite the holes (to prevent tearout from the emerging bit), then bore through both legs and the hanger.
Making the Music Holder
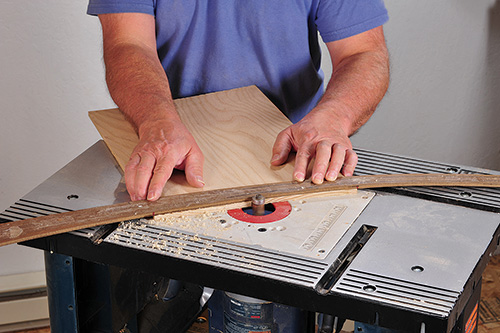
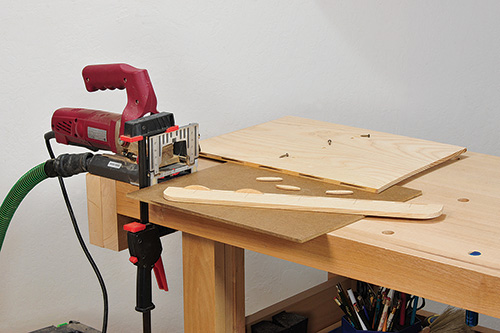
The music holder, ledge and bracket sides are all made from stock that’s been resawn and/or planed down to 5/16″ thickness. Unless you have some really wide stock, glue up enough stock to make the 12-1/2″-wide music holder. Rough cut the ends of the holder to shape, then use a section of the leg template (adhered as before) to pattern-rout the curves. Next, cut the ledge to size, then saw a 1-1/4″-radius curve into both outer-facing ends. Sand the holder and ledge smooth. To form a strong joint between these parts, plunge-cut five evenly spaced slots for #0 biscuits into both parts, and glue them together. Drill three countersunk holes for #6 screws through the face of the music holder, positioned as shown in the Drawing, for the screws that attach the music holder to the bracket.
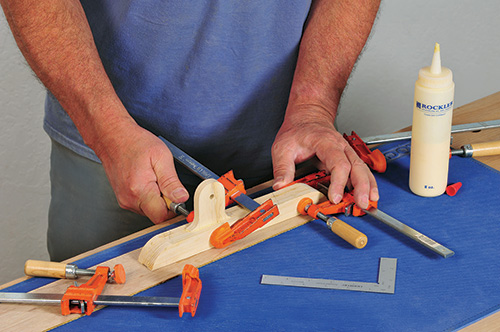
To make the music holder bracket, first put a 1″-radius roundover on the outer ends of the bracket sides and spacers. Glue them together with the bracket arm, then rout the outer edges with a 1/4″-radius roundover bit (don’t rout the bracket arm).
Final Assembly
Before gluing the stand together, make sure that all parts are sanded smooth. Bevel the bottom edges of both feet by running them over a jointer with its fence set at a 105˚ angle — just make sure to keep the non-rounded-edge side of each foot against the fence. Now glue the legs to the feet at the lap joints, making sure to keep the legs properly positioned during clamping. Once these joints are dry, scrape off the excess glue. Glue the top spacer in place on only one of the legs and let it dry. Working atop your bench again, dry clamp the legs together as before, with the guitar hanger in place, but not glued. Position the stretcher and glue in 1-1/2″-long, 5/16″- dia. dowels into all four holes. Apply a clamp, if necessary, to make sure the joint is snug. Once dry, trim the protruding ends of the dowels and sand these areas smooth.
With the music stand on the floor, remove all clamps from the top of the legs and apply glue to the top spacer and guitar hanger upright. Clamp the legs together again, making sure that everything is properly aligned. Glue in the two 2-1/4″-long 5/16″ dowels that secure the guitar hanger, and clamp everything tight. Do one final check by setting a try square horizontally against the back edges of the legs, to make sure they’re square to one another, before leaving the assembly to dry. Trim and sand both ends of the hanger dowels, then sand the tops of the legs and spacer so that they’re all flush and smooth. Using a rasp or rifflers and sandpaper, round the top of the inner curve on the guitar holder’s prongs so that they cradle the headstock of your instrument and prevent it from accidentally sliding off.
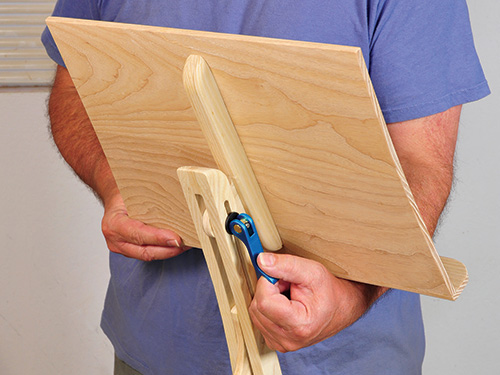
Press the music holder bracket into its slot and check the fit; if it’s too tight, plane or sand it until it slides smoothly. If it’s too loose (or the holder won’t stay locked), stick a disc cut from 180 PSA sandpaper to the bracket arm centered on the bolt hole. Fit the 2-1/2″ x 1/4″-20 bolt and cam clamp that lock the bracket into position, then center the music holder on the bracket and clamp them together. Check to make sure the holder’s ledge is level and tweak its angle slightly, if necessary. Then, drill pilot holes through the countersunk holes you drilled earlier and drive three #6 x 1″ screws to secure the holder to its bracket.
You can finish the music stand with whatever finish you prefer; I applied a Danish oil to mine, which made the ash I built it from look darker and richer. Best of all, my finished music stand harmonizes beautifully with the décor of my music room; now that’s something to sing about.
Hard to Find Hardware
Double Bearing Shear Flush Trim Router Bit #27867
Steam Bending Kit #42826
1/4”-20 Cam Clamp #32545


