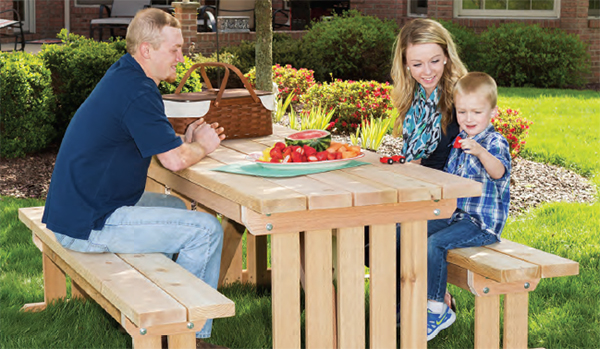
If Yogi Bear had spent more time building picnic tables instead of robbing from them, I suspect Ranger Smith’s job would have been less stressful. Not sure what Yogi’s furniture tastes were (he was probably more concerned with what was in the pic-a-nic baskets), but chances are good that his table would have been the typical attached bench, A-frame style picnic table found in every park. Yawn.
When I thought about the design for this picnic table, it occurred to me that most are boringly utilitarian. You rarely see one in a distinct furniture style. With that in mind, I couldn’t see any reason why a picnic table couldn’t be just as sturdy and serviceable with a Mission flavor. (Who doesn’t love Arts & Crafts?) With its complementary horizontal and vertical lines along with the side slats, typical of the Mission style, you can bring flavor to your outdoor dining in more ways than one.
Wood Considerations
The first thought for any outdoor furniture is making it to withstand the elements. Regular pine dimensional lumber is inexpensive but should be painted or stained regularly if you want it to last. Treated construction lumber is also commonly used, although it’s very heavy and sometimes oddly colored.
Although more expensive, the best choices are woods that naturally resist both weather extremes and insect damage. Almost any lumber suitable for decks works great, with redwood, Western red cedar and even white oak being favorites. For the perfect balance between durability and weight, I’ve chosen Western red cedar.

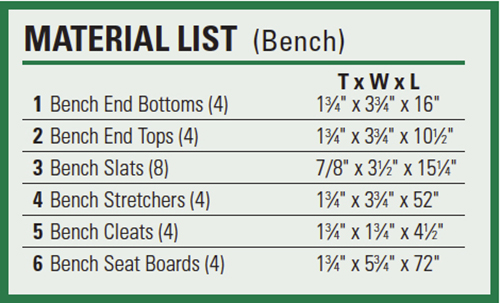
Keep in mind that cedar typically comes with one or more sides left rough, which can slightly alter the dimensions from what you’re used to working with. It’s important when using cedar dimensional lumber to carefully measure your workpieces, and adjust component sizes accordingly. For example, typical pine 2x4s (smooth on all four sides) measure 1-1/2″ x 3-1/2″, but a cedar 2×4 (rough on all four sides) measures 1-3/4″ x 3-3/4″. The Material Lists list the actual sizes of the cedar used for this project.
Rough, but Ready: Working with Cedar
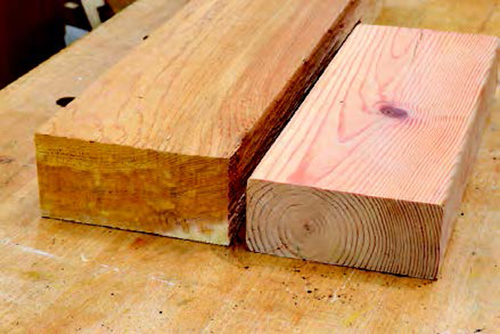
Western red cedar is a delightful wood. It’s great for outdoor products, it takes screws and nails readily, and your shop smells wonderful when cutting it. (And for days afterward!) But there are a couple of odd things about it you should know.
• Cedar typically comes with rough, unplaned faces; 1x dimensional cedar lumber usually has one rough face, while 2x stock is rough on all four faces. This roughness adds both thickness and width wherever it occurs. A dimensional pine 2×4 measures 1-1/2” x 3-1/2”, but a cedar 2×4 is 1-3/4” x 3-3/4”. This extra thickness may vary from board to board — or even within the same board — but count on an additional 1/8” for each rough face. Always measure your stock, and adjust workpiece size and nail/screw length to account for any variance.
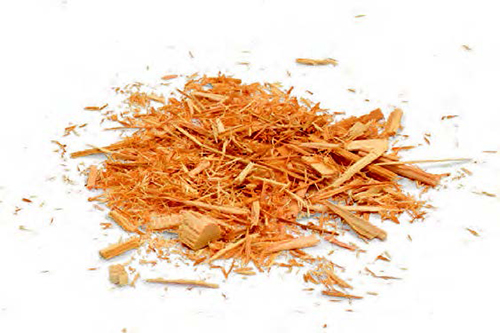
• Cedar is splintery, really splintery, so handle it with care. Knock splinters off edges and corners with a plane or sanding block whenever possible. Take extra precautions when cutting cedar, particularly with a router or a dado cutter on the table saw, as splinters and knots — some of them surprisingly large — can fly in all directions even when using dust collection.
Getting Started
Cut your workpieces to size per the Material Lists. Keep in mind the actual dimensions of the cedar you get when cutting.
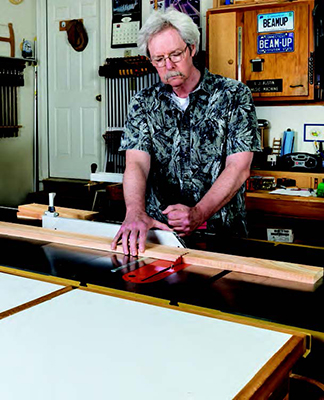
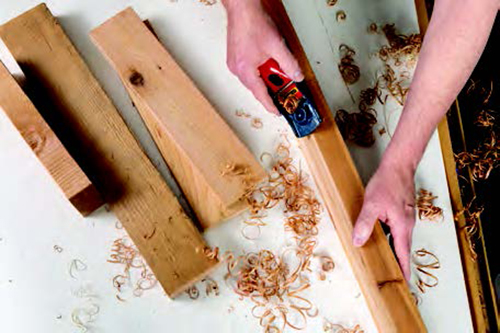
Rough cedar has a surface that can be quite splintery, especially on the corners of all straight edges. To make the stock easier to work with — and lower your chances of getting splinters — chamfer or bevel the edges a bit. A small block plane does great, as seen in the photo at right, but a sanding block with coarse paper also works fine. If you’re feeling ambitious, a small roundover bit in your router is another option.
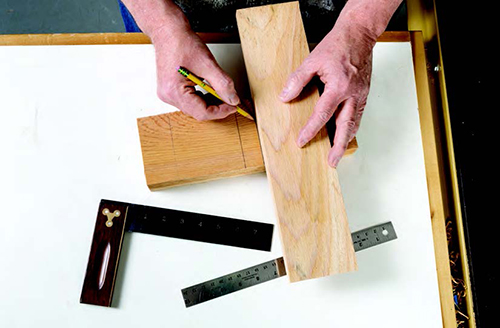
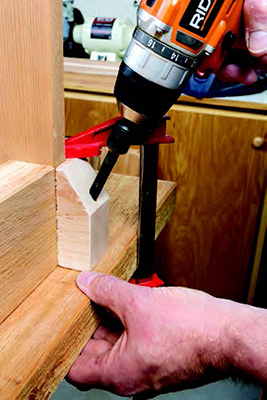
I started the construction process with the benches, so that’s what you’ll see in most of the photos, but the procedure for building the ends of the main table and the benches is nearly identical: your construction can go in pretty much any order. However, you might find it more efficient to cut all your mortises for the side slats on both table and benches at the same time. For this task, I’ve installed a 3/4″ dado set in my table saw, but you could also make the notches with a circular saw and bench chisels, as seen in my video.
Lay out the notches by first measuring the thickness of the 1×4 side slats and setting the height of the dado cutter to match. (Remember, it’s probably slightly more than the typical 3/4″.) Starting in the center, carefully measure the spacing of each notch using a rule and square for accuracy. Since some of your marks are pretty close together, it’s a good idea to mark the waste areas.
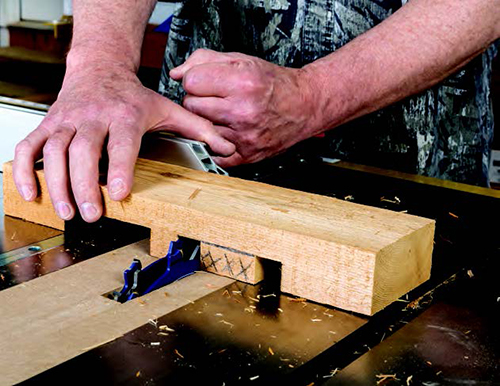
With all the notches marked, start each with a pass over the dado cutter on your marks to define the width of the notch, and then just remove the waste in the center. Between the table and the two benches, you’ll have a total of 36 of these notches to cut, so pace yourself accordingly.
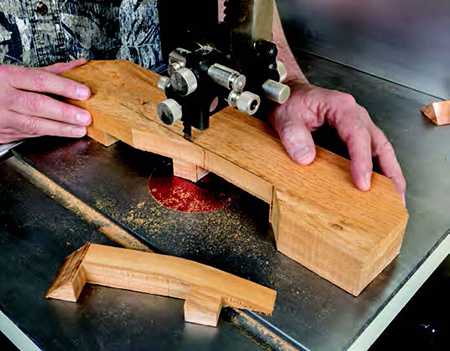
Finish the preparation of the end pieces by mitering the corners for both the top and bottom, and cutting the relief on the underside of the bottom pieces. The band saw is perfect for this, but a jigsaw or handsaw works just fine, too.
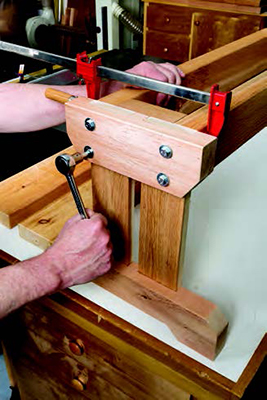
Assembling the Ends
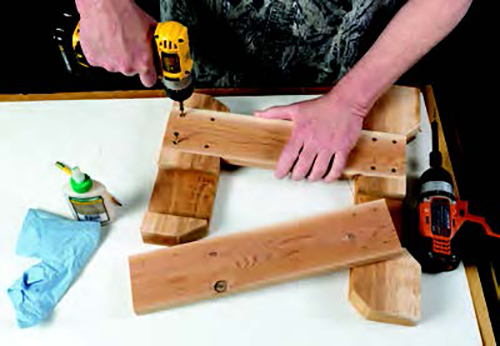
Line up the top and bottom end pieces, making sure to orient the corner notches toward the middle. Be aware that 1x dimensional cedar is typically rough only on one side, so orient the slats with the smooth side facing inside the benches and table to give a uniform appearance on the outside.
Apply weatherproof glue into each notch and bridge the top and bottom pieces by dropping the slats into place. Drill countersunk pilot holes, then drive four exterior screws into each joint. With regular pine dimensional lumber 1-1⁄4″ screws are best to avoid piercing the other side, but with the typically thicker cedar, you should be able to use screws a full 1-1/2″ in length. Be sure to measure first.
Speaking of screws, you’re going to need a bunch: With 36 of these joints to secure, you’ll need 144 of them.
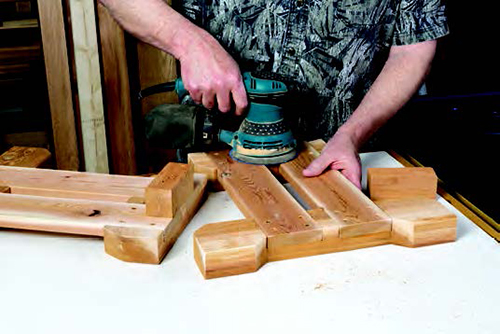
The boards for the tabletop and bench seats are secured via cleats from the underside. However, before attaching the cleats, give the inner top of each end piece a quick sanding to ensure that it’s flush across the slats. Due to the nature of cedar lumber, there may be a slight variance in thickness at the end from one slat to another. The difference probably won’t be much, if any, but you want to be sure it’s flush for the cleat to attach securely.
The cleats themselves are 1-3/4″ x 1-3/4″ strips that I ripped from a 2×4. After making the cut, one side will be smooth from the saw blade, so use this side for the mating surface, and attach with glue and screws. For the thicker cedar, use 3″ screws, but slightly shorter screws if using regular dimensional lumber.
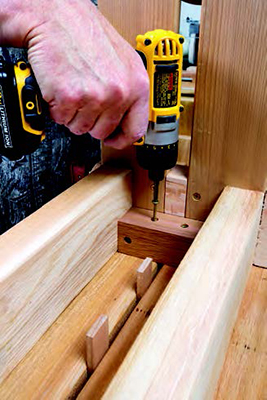
Making the Frames
For rigidity, the bench and table frames are joined with 2×4 stretchers underneath the top boards, while the table gets some additional bracing.
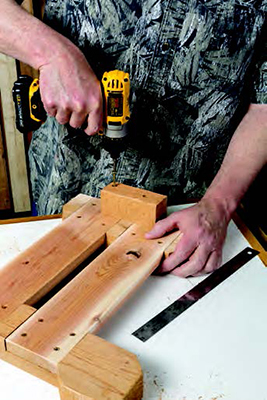
Cut the stretchers to length — the bench stretchers are sized smaller to allow the bottoms of the benches to fit between the ends of the table for comfortable seating. Clamp the stretchers to the ends of the mounting cleats, making sure that everything is flush along the top. Now, drill 1/4″ pilot holes for four evenly spaced 5/16″ x 4-1/2″ lag bolts through the bench and table ends, then drive the bolts in with washers.
Topping It Off
Lay the top boards on your workbench or assembly table, orienting the boards so their presentation sides are face down, and then upend and center the frames on your boards. The benches are pretty easy to handle, but you may want to enlist a helper for the table frame.
With the frame in place, drive a pair of exterior screws through the cleat and up into the undersides of each board. Note in the photo that I’m using some small pieces of 1/4″-thick scrap to act as spacers to get the boards uniformly spaced along their length. As before, 3″ screws work well with thicker 2x cedar, but adjust screw length accordingly for regular dimensional 2x lumber.
The cleats don’t extend past the stretchers, so, for the last attachment screws, countersink a diagonal pilot hole through each of the end pieces. Drive in a 3-1/2″ screw at each point to secure the edges of the outer boards.
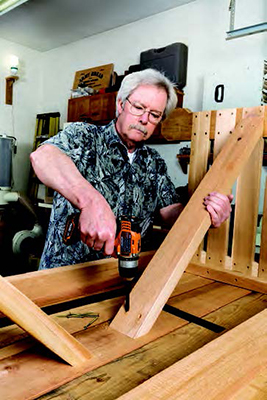
Construction of the benches is complete, but the table needs one last component. Because of their low height, the stretchers in the benches are sufficient to make them solid, but the table requires a bit more bracing. Accomplish this with a pair of 36-1/2″ braces, mitered 45 degrees on each end. Locate the lower ends at the center of the table bottoms, allowing the tops to rest naturally where they fall on the underside of the table’s center board. Attach the lower ends to the table sides with a pair of countersunk 3″ screws driven from the inside. Check the table ends for square, then anchor the upper ends on the underside of the table the same way.
Finishing Up
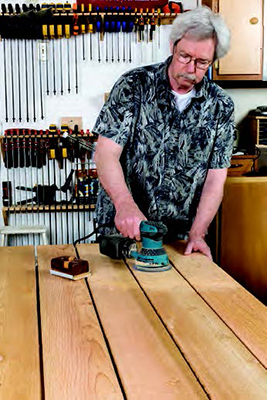
By now you’ve certainly realized that cedar can be splinter-prone. (You probably got several while building; I know I did.) To keep from getting small splinters while dining at your new table, give the tabletop and the tops of the benches a good sanding to remove the roughness. A first pass with 100-grit paper knocks down the roughness quickly, while a followup with 150-grit gives a nice, smooth surface. While you’re at it, it’s a good idea to lightly sand the edges of both the tabletop and bench seat boards, as well. Another benefit of sanding the top of the table is that removing the roughness makes it easier to clean after your picnic.
Because cedar is naturally resistant to both weather and insects, no finish is really necessary. The table will last for many years as the color of the wood darkens to a silver-gray patina. If you’d like, however, an application of a sealer can extend the natural color a bit longer, and make it even easier to clean after picnicking. And if you like a darker appearance, you’re in luck: almost any sealer for outdoor wood darkens it. Any product for decks or other outside wood furniture, such as Thompson’s® Water-Seal®, does a good job.
The unique styling of this Mission-influenced picnic table will make your backyard the envy of the neighborhood. Ranger Smith would certainly approve.
Click Here to download a PDF of the related drawings.


