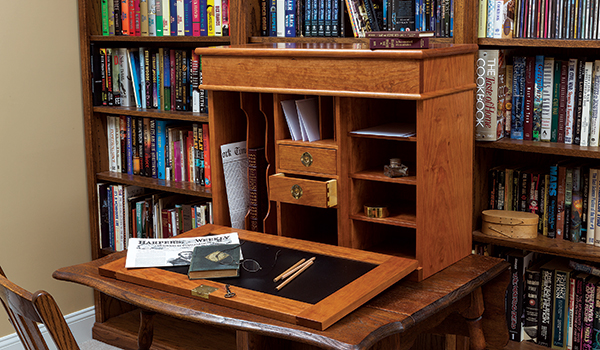
Today, a desk is a large work surface with drawers and storage underneath. If not used as a desk, it really doesn’t have much other purpose. In the 19th century, however, furniture often did double duty. A desk in those days was typically a portable cabinet with a drop-down door that could be used anywhere. Set it on a table and you have an office; move it out of the way, and you’ve got your table back.
Their compact size and portability appealed to Civil War officers, who frequently took them into the field when they went off to war. So popular were they, in fact, that they quickly picked up the name “field desk,” a moniker that stuck. A Google search for “field desk” turns up hundreds of these from all time periods, whether they were actually used in the field or not.
These desks are just as versatile in the modern home. The one presented here isn’t a reproduction of any single desk, but I’ve borrowed details from a few historical examples — the carcass trim and lidded top are similar to Gen. Thomas “Stonewall” Jackson’s desk, while the tall dividers are patterned after those in a desk belonging to Capt. Edwin Stivers of Illinois. And although the design is 100% authentic to 19th century samples, I’ve updated it some with 21st century hardware and material conveniences. Don’t worry, though, I’ll include suggestions for a “period-correct” desk, too.
Getting Started
I’ve chosen cherry for this project, but feel free to use your favorite hardwood. Likewise, these desks came in an unbelievable range of sizes, so alter dimensions any way you like.
Mill your stock to the appropriate thicknesses per the Material List, then cut all the individual workpieces to rough size. There are a lot of parts here, so label or mark them to keep everything straight. Also, some parts move — door, drawers, shelves, etc. — and need a bit of clearance to move freely. With that in mind, note that I’ve sized everything on the Material List to match the openings into which they fit, but you may need to shave a tiny bit of stock off one edge or another for smooth operation. For example, the door stiles are sized at 15-1⁄2″ high on the Material List to match the 15-1⁄2″ door opening; however, you’ll want to ease that fit to allow a tiny gap at top and bottom to accommodate hinges and free movement.
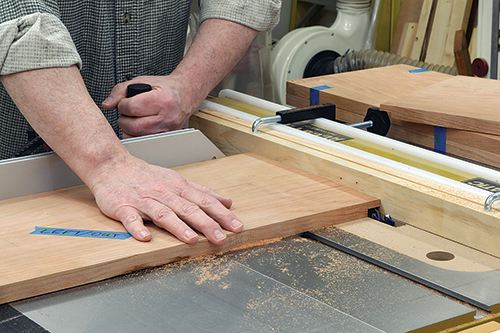
Begin construction of the main carcass by cutting the necessary joinery. The desk sides receive 3/8″-deep by 3/4″-wide rabbets on the inside bottom edges for the desk bottom, which I cut with a dado blade on the table saw. Now, leave the blade set where it is and cut a 3/8″-deep by 3/4″-wide dado across the inner face of the two sides at 3″ down from the top. When assembled, the open area will be 16″ high.
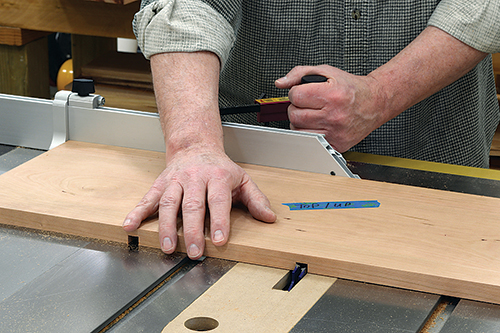
Now change to a 1/2″ cutter and make a pair of 3/8″-deep dadoes on the inner faces of the desk top and bottom for the center drawer module. The center module accommodates drawers measuring 7″ wide, so once cut, the open space on either side is 8-1⁄4″ wide.
Finally, cut a 3/8″-wide x 1/4″-deep rabbet along the inside back edge of the desk sides for a 1/4″ plywood back.
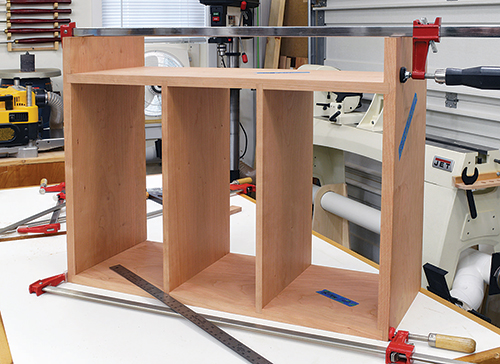
Dry-assemble the carcass and check the joinery. Note how the 1/4″-narrower desk bottom and top meet flush with those rabbets you just cut on the sides. If everything checks out, dismantle the carcass and set it aside for now.
Making the Drawers
Most desks like these had at least one drawer, while others were filled with them; still others had none at all. I’ve done two drawers, but feel free to delete one or add another as you wish — and it is fine to use stock that is not cherry for your drawer sides and backs.
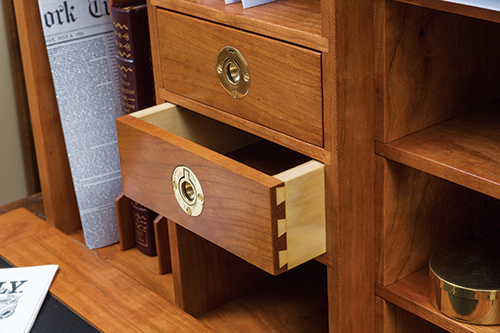
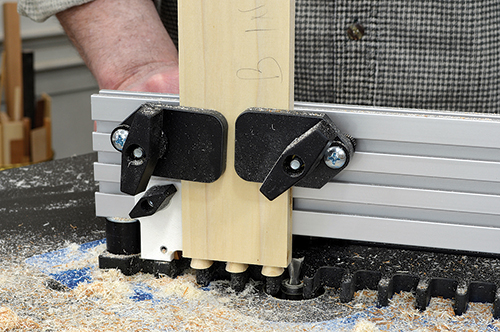
You can use any joinery you wish on the drawers, but I went with half-blind dovetails cut with a router table dovetail jig.
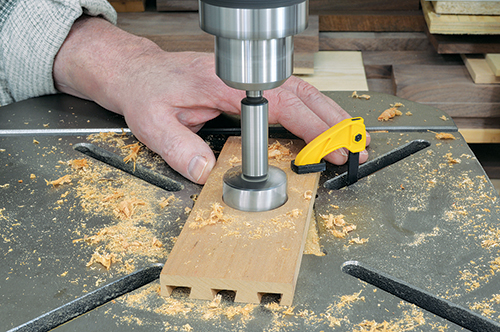
Drawer pulls can be as simple as a small hole drilled into the drawer front, but I love the look of brass and opted for brass flush pulls. You’ll need to do a bit of “layered” mortising for these, but this is pretty straightforward with a drill press. Here’s how to do it for the pulls I use: Set the depth stop to the thickness of the outer portion of the pull, and use a Forstner bit to drill the first mortise. A 1-1⁄2″-dia. Forstner bit is perfect.
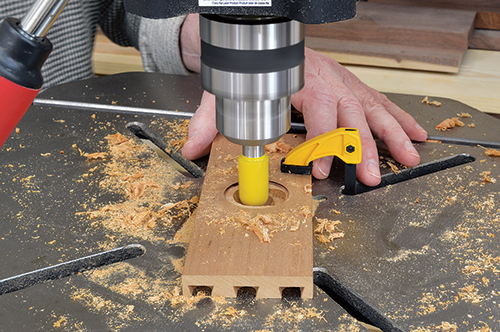
Follow this up with a smaller Forstner bit to mortise a relief for the pull’s pivot. Finally, make room in the center for the curved back of the pull. For this, I chucked up a bullnose router bit into the drill press to excavate a relief area. It worked like a charm.
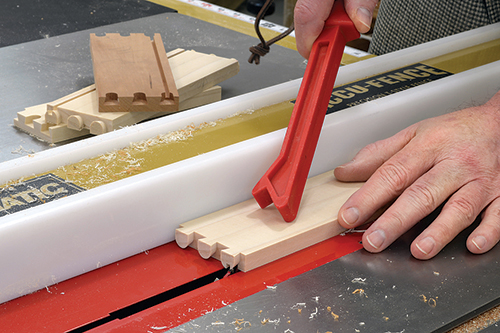
On the table saw, cut a shallow 1/8″-wide groove for the plywood drawer bottom, locating the groove so that it falls within the bottommost dovetail. This groove won’t be visible once the drawer is assembled.
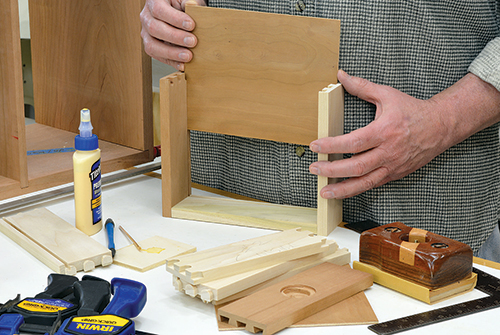
I mentioned earlier I’d point out period-correct ways to do a few things, and the drawer bottom is one of them. Modern drawers typically “capture” the bottom, so for these you’d cut a groove in all four sides, partially assemble the drawer, slide in the bottom and then attach the final side. In the 19th century and earlier, drawers were often fully assembled first. The drawer front and both sides had a groove, but the drawer back was cut off right where the groove would go and the bottom was inserted later. The drawer bottom is slightly longer, and simply nailed or tacked into place at the back after assembly.
Dadoes and More Dadoes
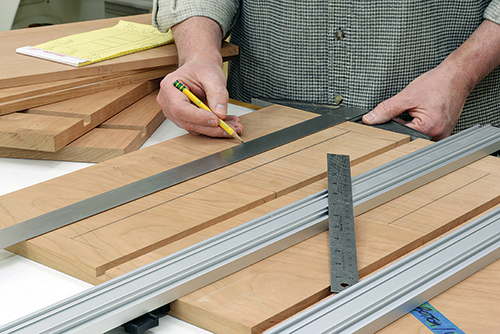
We’ve already cut the dadoes in the desk bottom and top for the center module, but there are plenty more inside the desk. These are easier to do by clamping up component pairs, then measuring, marking and cutting them as a unit.
The dividers slide into stopped dadoes from the back. For the tall ones, clamp the desk bottom and top together, back edge-to-back edge, and mark the stopped dado locations. I used a T-square for the task, evenly spacing the two 8-3⁄4″-long dadoes on the left side of the desk. Once marked, use a clamp-on edge guide to rout 1/4″ x 1/4″ stopped dadoes on your marks. Because these are clamped together, you’ll rout each set of dadoes simultaneously in a single 17-1⁄2″ pass.
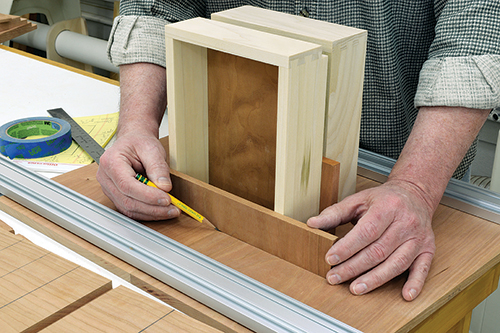
For the short dividers in the middle, clamp the desk top piece (one of your Pieces 2) and the top shelf of the center module (piece 6) together, also back-to-back, and mark three evenly spaced locations for stopped 7-3⁄4″-long x 1/4″-wide x 3/16″ stopped dadoes. (Use another of the 3/8″ center shelves to raise the top shelf up to the same thickness as the desk top.) As before, rout the dadoes using a clamp-on guide.
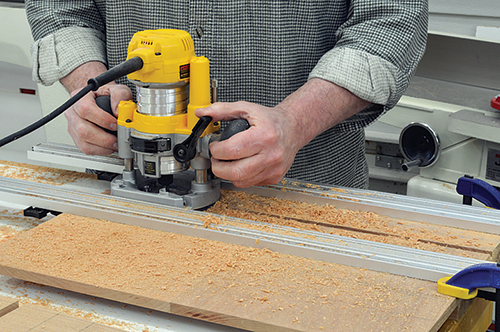
The drawer shelves in the center module need dadoes, too, with one slight difference. These are through-dadoes visible in the finished desk, so clamp the two sides of the module together front-to-front; when cutting the dadoes in a single pass, the router exits the cut on a back edge. If you get any slight tearout, it’ll be hidden on the back.
The middle drawer shelf goes right in the center; once it’s marked, use the drawers themselves to lay out the other two. Some scraps of the same 3/8″ stock used on the drawer shelves will help lay them out. As before, use clamp-on guides and rout across both workpieces in a single long pass.
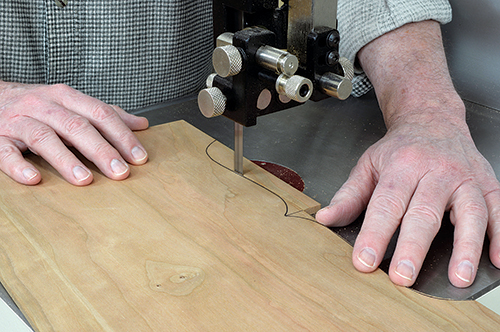
The last task before assembly is preparing the tall and short dividers. The tall ones receive a nice profile on the front edge typical of the period, and you can cut this on the band saw or with a jigsaw, scroll saw or coping saw.
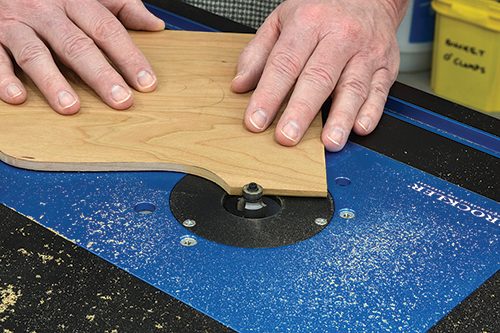
To match the round front of the stopped dadoes, use a 1/8″-radius bit to cut a roundover on both sets of dividers. The entire front of the short ones get the roundover, while just the top and bottom straight portion on the tall ones. While you have your router table set up, swap the small roundover bit for a larger one and mill a bullnose edge on the front and both ends of the desk lid.
Finally, give everything that will be on the inside of the desk a good sanding — it’s easier now than after assembly.
Assembling the Desk
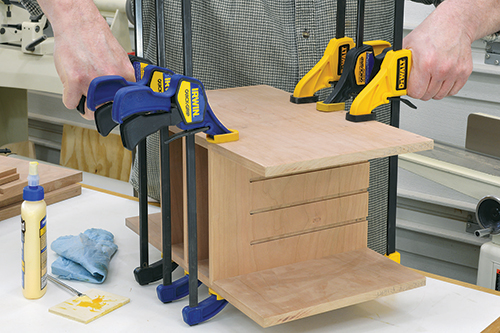
Assemble the center drawer module first, taking care that the drawer shelf with the slots for the short divider is on top, dadoes facing up, as shown in the photo above. Apply glue inside the shelf dadoes and clamp up the assembly.
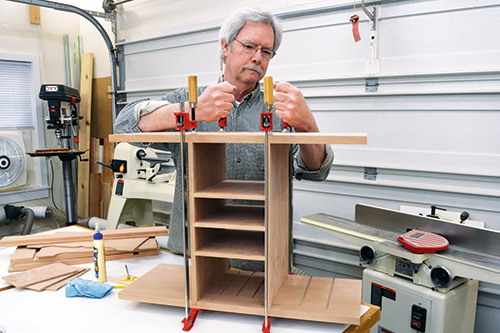
Attach the desk’s top and bottom to the center module, again ensuring that the divider slots are oriented correctly. In the photo, I’m clamping the assembly upside down so I can see those dadoes on the underside of the desk top. Better safe than sorry.
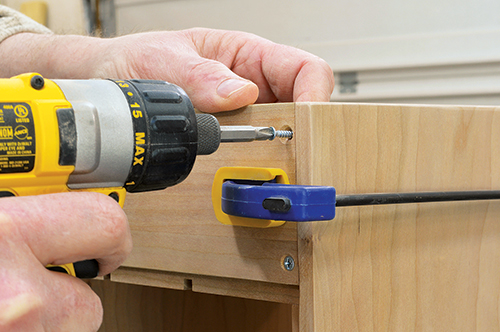
The upper storage compartment is boxed in with front and back pieces. The front is a simple piece of 3/4″ x 3-3⁄4″ x 26″ stock installed onto the upper front of the desk with glue and biscuits. The back piece, however, has 3/8″-wide x 1/2″-deep rabbets cut on the inner surface of each end and along the bottom, and is glued and screwed into place. You can see in the photo how the back piece creates another shallow rabbet underneath it. This teams with the rabbets on the back edges of the sides to form a recess for the desk back.
This is also a good time to attach the door-mounting strip on the bottom front. This is almost entirely a long-grain to long-grain joint, so glue alone is fine.
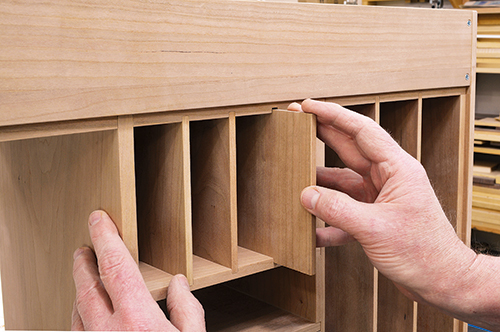
With assembly complete, test-fit all the dividers and adjust as necessary. These should slide easily in and out and be flush with the rear edges of the desk. Don’t glue these into place; the desk back holds them in. This is not only easier, it’s also period-correct — they were almost never glued in.
The shelves on the right side of the desk could be installed in a number of ways. If you prefer, you can cut even more dadoes to create shelf slots in the inner surfaces of the carcass before assembly. Since these shelves pull out, you’d need to make those through dadoes. However, for visual balance I set the shelves back the same distance from the front as the tall dividers on the other side, and I didn’t want empty slots in front of the shelves.
You could cut dadoes into a separate interior wall, but I’ve done something easier by creating a “shelf stack.” This method simulates dadoes, creating a solid and attractive means of mounting the shelves, yet allows them to be removed. The concept of stacked shelves is simple: Attach a series of wooden strips to the sides of the shelf compartment, topping each with a shelf.
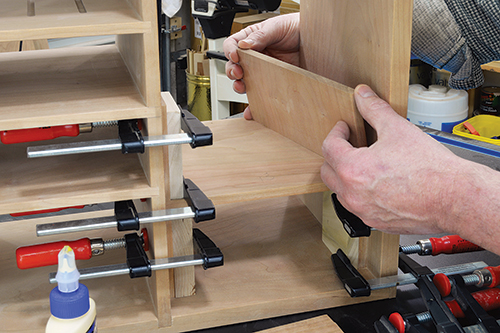
Cut the side strips to width (the desired height of the shelf), and then it’s simply a matter of gluing and stacking. Start by gluing/clamping the two bottom side strips in place, then top with the first shelf. Then glue the next two side strips into place, top with the next shelf, and so on. Be careful not to get glue on the edges of the shelves or you won’t be able to remove them.
I’ve evenly spaced three shelves, but you can do more or fewer, and alter the spacing as you like. By the way, if you really make the shelves exactly evenly spaced, considering that the interior height is 16″ and the shelves are 3/8″ thick, you’ll end up with some tough-to-work-with fractions. Instead, make the first three sets of the side strips 3-3⁄4″ high as noted on the Material List, then just trim the top ones to fit. That top set will be about 1/8″ shorter but completely unnoticeable.
Finish off the desk carcass with a back cut from 1/4″ plywood, attached with 1/2″ screws — I used cherry plywood, but a different species is fine; original desks of this type often used a different wood on the back. If you want absolute period-correctness, use tongue-and-grooved or lap-jointed solid wood slats instead of ply.
Making the Door
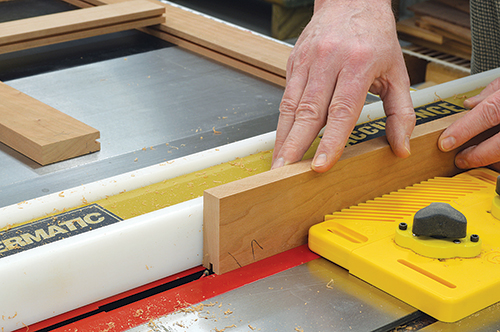
The drop-down door is basic frame-and-panel construction, with a couple of options. Cut components to length, and then mill a 1/4″-deep groove down the inside edges of the frame pieces, and on both edges of the center stile. Since I’m using 1/4″ cherry ply for my panels, I’ve sized these grooves accordingly, but adjust yours for the panels you plan to use.
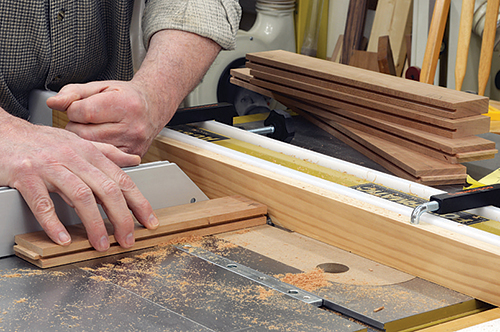
Now, install a 1/4″-wide dado set in your table saw (or a 1/4″ bit in a router table) and cut 1/4″-long tongues on the ends of the top and bottom rails and the center stile.
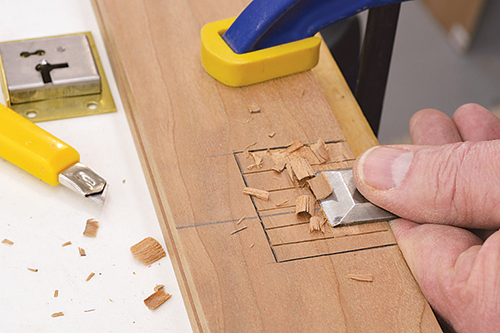
You’ll find it easier to install the desk’s half-mortise lock on the top rail now, before assembly. Clamp the rail to your workbench and lay the lock even with the top-inside edge of the door. Trace around the lock with a knife or sharp pencil. Keep in mind that most locks don’t have the key post in the center, so mount the lock slightly off-center in order to have the keyhole centered on the outside.
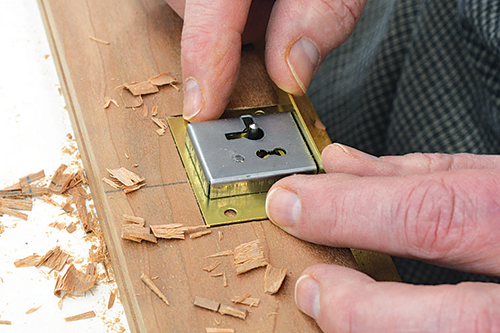
Define the mortise edges, then carefully clean out the waste with a chisel. Check the mortise depth frequently as you work by putting the lock in place upside down until the depth matches the thickness of the lock face. Now, mark the door edge for the shallow mortise that allows the top of the lock case to sit flush with the door edge.
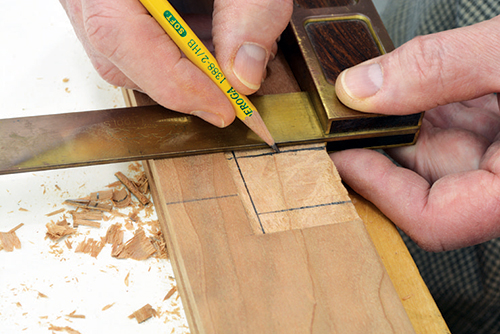
Use a square or straightedge to mark the inner mortise for the lock mechanism. Speed things up for this deeper mortise with a Forstner bit on your drill press, being sure to set the depth stop. Remove most of the waste, then square it up with a chisel.
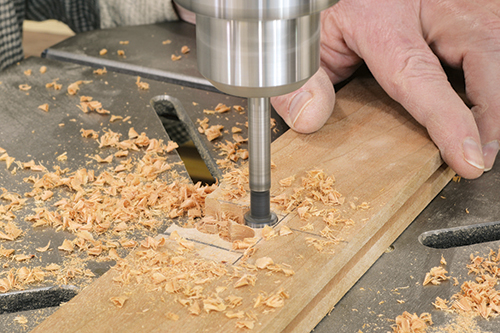
To locate the keyhole, rub pencil on the key post and press the lock firmly in place. The lock won’t lay flat because of the key post, but the graphite on the post marks the correct spot for drilling the keyhole. The hole need only be large enough to allow the key to pass through, but it’s best to size the hole to match the opening in the escutcheon you plan to use.
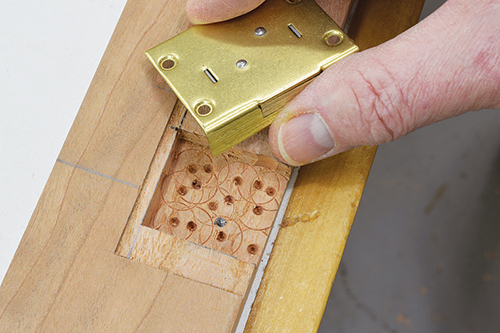
Flip the rail over and hold the escutcheon in place over the keyhole, and pencil in the keyhole outline. Shape the keyhole by removing most of the waste with a drill, then fine-tune it with a chisel, knife or round file.
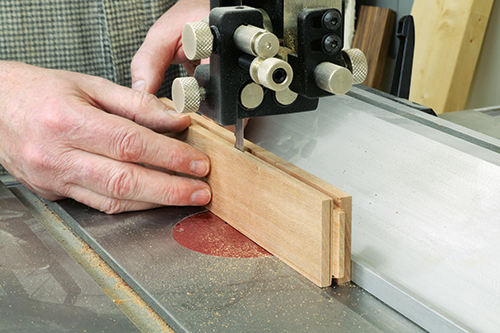
I mentioned you had options on the door. On many original desks the door was the same inside as out, and if that’s your preference then assemble the door now. However, most included a formal writing surface on the inside that was smooth all the way across the panels. You can achieve this by making the center stile thinner so it’s flush with the panels. I removed most of the inner face on the band saw. Go easy on this, as you don’t want to go beyond the level of the tongues on each end. Best, in fact, to leave it a hair high for now and then level things out with a sander after assembly.
Assemble the door as you would any other frame-and-panel piece. The rails first, then slide in the panels, then the outer stiles. By the way, I wiped a light coat of oil on the panel fronts to see what they’ll look like before locking them in place. (Glad I did; I didn’t like the look of the first panels I cut.) I rarely use glue with panels, but in this case that center stile doesn’t have a closed groove — removing the back portion turned it into a rabbet — so I ran a thin bead of glue on that one panel edge when installing it.
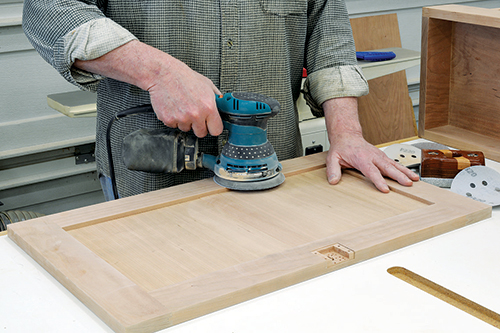
Give the door a good sanding all around, including the center of the writing surface, to do any final leveling.
To create the mortise for the lock’s bolt, first attach the hinges on the bottom, 3-1⁄2″ from each end, then mount the door to the desk. (If you plan to dismantle it later for finishing, no need to use all the screws now.) Rub pencil marks over the top of the bolt and, with the door held closed, engage the lock so the bolt rises up into the underside of the desk’s top. This leaves a guide mark for cutting the bolt mortise. Make a series of shallow drill holes on this mark to create a slot, then clean and square things up with a thin chisel. You can add a strike plate over the bolt mortise if you like, but they weren’t typically used on desks in the 19th century.
Finishing Up
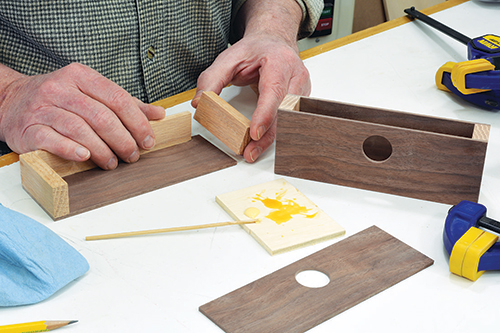
So, why are the drawer openings 10″ deep, but the drawers only 8-3⁄4″ long? Well, that’s a secret — a location for a secret till, that is. Hiding places were common in these desks, and I’ve included not one, but two, of them.
These are simple, butt-jointed boxes; they’re so small that wood movement just isn’t an issue. Center a finger hole near the top of each front piece, then just glue and clamp them up. Use any wood you want for these (they’re perfect scrap bin projects), but the facing pieces should be a dark wood so they’re less visible inside the drawer openings.
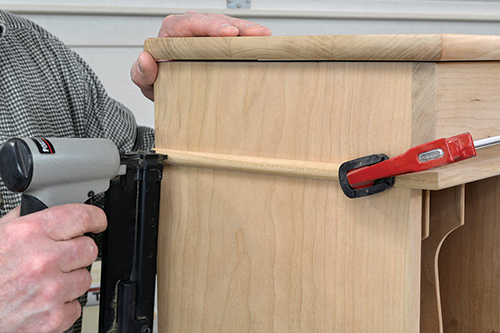
The last touch is an optional strip of 1/2″ half-round cherry molding that visually separates the lidded top of the desk from the lower portion. Miter the corners of the front piece and simply glue and clamp it into place; all the grain matches so wood movement isn’t an issue. That’s not the case on the desk sides, though. Attach the side pieces with a bit of glue at the front — the first 1-1⁄2″ inch or so — then a single pin nail in the center and one at the back.
Give the desk the finish of your choice. A drying oil was common in the 19th century and that’s what I’ve used — oil on cherry is my favorite finish in the world — but use whatever you prefer. If you’ve opted for the full writing surface as in the project desk, don’t apply any finish inside the panel area.
I used thin leather, adhered to a 1/8″-thick piece of hardboard, for the blotter here. Attaching the leather to a subsurface first with contact adhesive makes installing it way easier. You don’t have to mess with a lot of adhesive on the inside of the door at all, as you would gluing loose leather in place. Instead, with a few dollops of regular wood glue scattered around inside the door an inch or so from the stile/rail edges and a few in the center, you just drop the hardboard into place and you’re done. If you should decide to change the leather down the road, removing it is much easier, too.
Now, if you disassembled things for finishing, the last step is to reattach any hardware you removed — hinges for the bottom of the door, lid hinges for the back of the desk lid and the flush pulls on the two drawers.
Click Here to download a PDF of the related drawings and Materials List.
Hard to Find Hardware
2″ Brass Non-Mortise Hinges #28720


