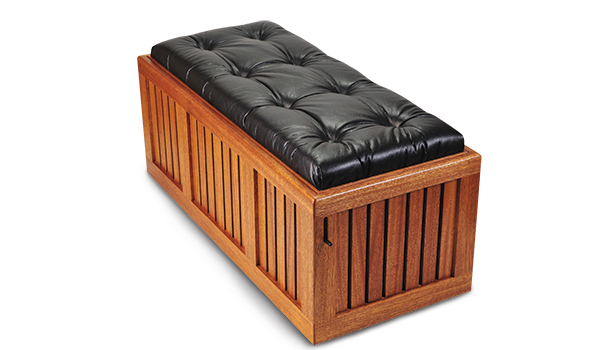
Recently, I wanted to build a long ottoman with an upholstered top to go in front of a low couch, so my wife and I can both put our feet up when we’re reading or watching television. Some ottomans are built like chests, and it made sense to design one with a liftable lid, so the piece could also be used to stow away pillows, books, DVDs, etc. But I had yet another functional desire to fulfill: Sometimes, we eat dinner in front of the TV, so I also wanted my ottoman to provide a firm table surface on which to set plates and glasses. It seemed like a tall order, but with a little trial and error and the help of a full-sized mock-up, I came up with the design shown in this article.
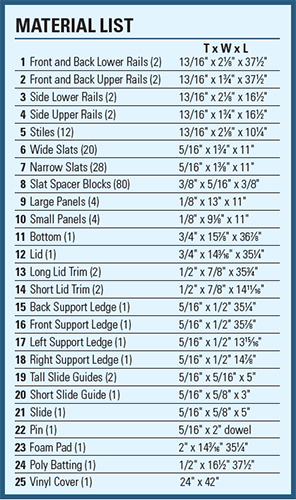
Click Here to download a PDF of the related drawings.
Most of the ottoman’s construction is straightforward: the chest portion is built frame-and-panel style, with solid mahogany rails and stiles. Instead of installing the usual flat or raised panels in the frames, I decided instead to fit a series of evenly spaced slats, behind which are thin plywood panels covered in the same black vinyl fabric used to upholster the ottoman’s lid.
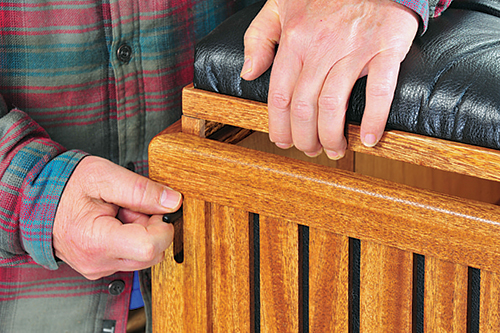
A simple plunger mechanism located in a corner of the carcass allows the lid to be lifted, to allow access for storage, or to flip the lid over and use its reverse side as a coffee table. With the upholstered side up, the ottoman can also function as a bench seat — an added bonus.
Building the Framework
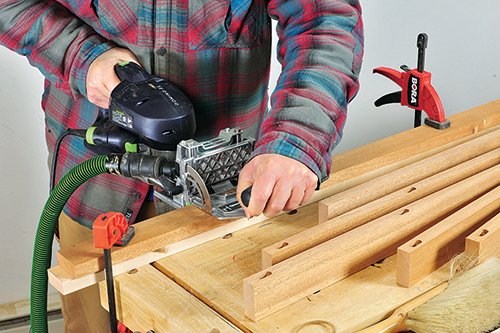
Construction begins with cutting all frame stiles and rails to size, following the Material List. I built the front, back and side frames separately, then assembled these subassemblies together. All the stiles are joined to the rails with loose tenon joinery (I use the Festool Domino system, but you can also use the router mortising method, or even cut traditional mortise-and-tenon joints). I set the Domino’s fence to center the mortises on the thickness of the stock, then I marked out the location of each mortise on the inside edges of the long and short rails. After plunge cutting these, I fitted the Domino with its trim stop accessory, which I set to center the mortises side-to-side on the ends of the stiles.
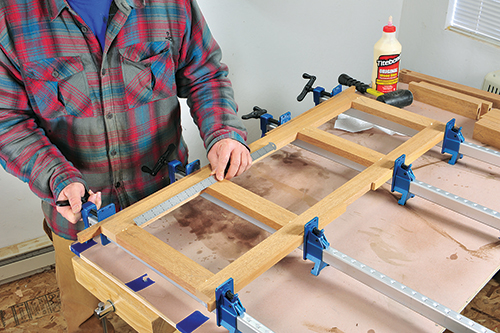
Now it’s time to glue the frames together. For each frame, I slathered the loose tenons and mortises with yellow glue, then pressed the tenons into their lower rail mortises. I then put the stiles in place, tapping them onto the tenons. Next, I put loose tenons into the upper ends of the stiles and pressed the upper rail into place. I applied a few short bar clamps, then double-checked to make sure that the edges of the stiles were flush with the ends of the rails and the assembly was square and flat before setting it aside to dry. On the ottoman’s long sides, also make sure that the open panel spaces are even.
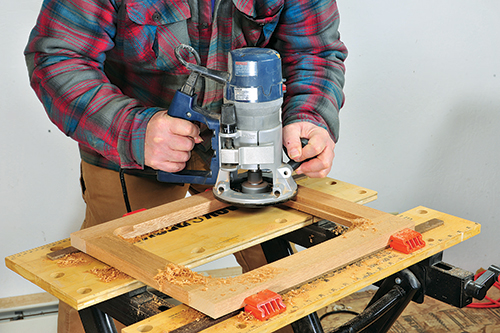
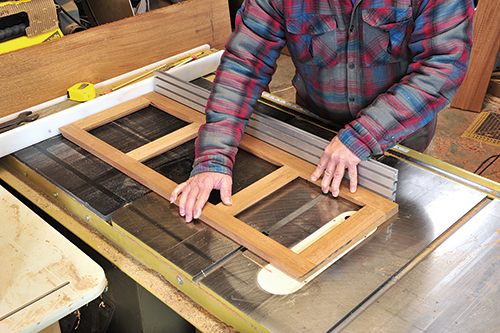
Once all four of the ottoman’s frame sides were dry, I scraped off the excess glue and gave the inner and outer frame surfaces a rough sanding, so that all members were level with each other. Now, using a router fitted with a rabbet bit set for a 3/8″-deep, 3/8″- wide cut, I routed the inside edges of each frame opening. I then squared up the corners with a sharp chisel. At the table saw, I tilted the saw blade to 45˚ and beveled on the inside edge of each frame’s end. To keep the long frames square during cutting, I guided them with a miter gauge.
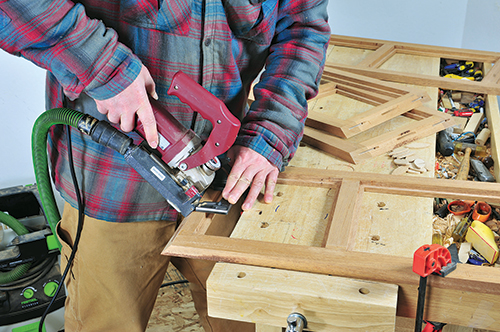
Now I was ready to cut slots in these beveled ends for the #20 plate joinery biscuits that will join the four frames into the ottoman’s carcass. After tilting the biscuit joiner’s fence to 45˚, I marked out the position of the three slots and plunge cut them on each frame end. Moving to the table saw, I mounted a dado set wide enough to cut a 7/16″-deep, 3/4″-wide rabbet along the bottom inside edge of all four frames’ bottom rails.
The rabbet serves to capture the ottoman’s 3/4″ plywood bottom. Next, I fit my plunge router with a 3/8″ spiral fluted bit and routed a slot through the upper corner of one of the short frames. Positioned as shown in the detail Drawing, this slot is for the lid lifting dowel. Finally, I sanded the four frames flat and smooth, sanding everywhere except around the yet-to-be-joined beveled corners.
Creating Slatted Panels
To give my ottoman a unique look, I decided to create panels from thin wood slats backed by 1/8″-thick plywood covered with the same vinyl fabric used to upholster the lid. I cut the 48 slats that are needed from the same mahogany I used to build the frame. After jointing a straight edge on the stock, I crosscut it into 10-3⁄4″ lengths, then ripped the blanks to all the necessary 1-3⁄8″ and 1-3⁄4″ widths. On the table saw, I cut each piece in half, thickness wise, using a narrow-kerf rip blade, then ran the stock through my planer to reduce each slat to its final 5/16″ thickness. I finish-sanded both edges and one “good” face of each.
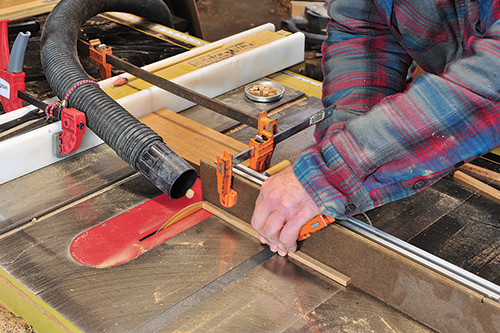
To make the spacer blocks that fit into the frame rabbets between the slats, I ripped few strips of 3/8″ x 5/16″ stock, then used my table saw’s miter gauge to cut a bunch of blocks, each 3/8″ long. To keep these small pieces from being hurled by the force of the saw blade, I clamped the nozzle of my shop vacuum (which I’d emptied of all sawdust) atop the saw table, directly opposite where the blocks are cut off.
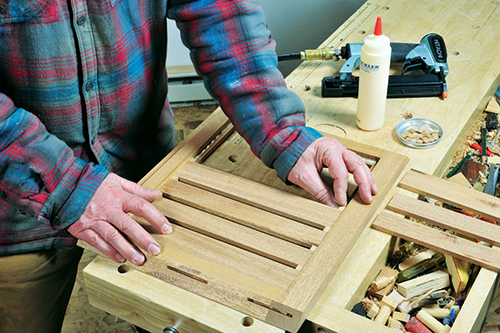
Before fitting the slats, I put the frames atop my bench, rabbeted side up, and sanded the edges of each panel opening smooth. Next I applied a narrow bead of glue around one of the rabbeted openings and set the slats in place, one by one, good side down, following the order shown in the Drawing. After inserting each slat, I set a pair of spacer blocks into the rabbet top and bottom, then put the next slat in and repeated the process. The blocks not only keep the slat spacing even, but also fill the gaps in the rabbeted frame, as you can see in the photo below. Once all the slats were in, I used a pneumatic pin nailer to secure the slats and blocks with 1/2″-long brads. This process is repeated on each of the panel openings in all the frame subassemblies.
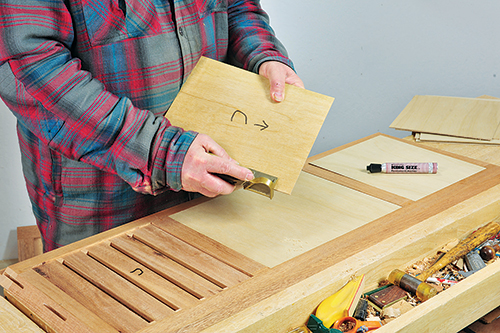
After cutting out eight backing panels from 1/8″ lauan “doorskin” plywood, I tried pressing them into their frame openings, trimming each one as necessary for a snug fit. I lettered each panel, so I could return them to the same openings later.
Frame Assembly and Finishing
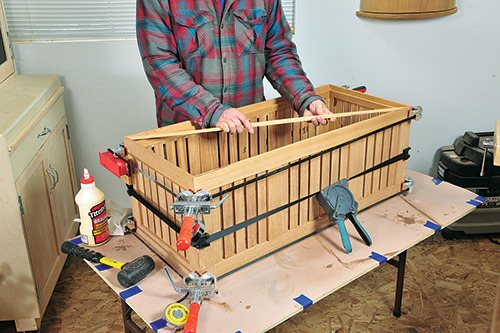
Before gluing up the frame subassemblies that form the ottoman’s carcass, I did a dry fit to make sure that everything fit together properly. Working atop a true, flat surface (covered with construction paper to keep the assembly from sticking), I applied glue to all the slots and plate joinery biscuits. After setting everything in place, I used a pair of band clamps, one set at the top of the frame, the other at the bottom, to pull the corners tightly together. I slipped a third band clamp around the midsection of the carcass, tightened all clamps, and checked the squareness of the assembly before leaving it to dry.
The next day, I scraped away excess glue, then sanded the corners to round their beveled edges slightly. Using a router fitted with a 3/8″-radius roundover bit, I rounded over the top outside edges of the carcass. Next, I cut the four ledge strips that serve to support the ottoman’s lid. At the router table, I rounded over two edges of these strips (adjacent to their 1/2″ width) using an 1/8″ roundover bit. Positioning the strips with their rounded edges facing in and top edges exactly 7/8″ below the top of the frame, I located the two strips with unmitered ends at the front-right corner (where the routed slot through the frame is), then glued and nailed them in place using 5/8″- long brads. I also made and attached the three-piece lid lifter housing to the inside corner of the carcass over the slot in the frame. On the 5/8″ x 5″ lifter piece, I drilled a centered 5/16″ hole, 3″ from the top end, for the lifter’s 2″ dowel handle (which I stained jet black with a permanent marker pen).
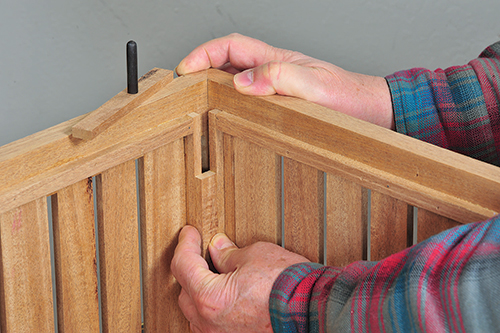
I cut the ottoman’s lid and bottom from 3/4″ mahogany plywood, trimming them to final size and making sure their edges and corners were square. While at the table saw, I also ripped the lid’s edge trim, leaving each piece a little long for now. I used a rabbet bit in the router table to create each trim strip’s final L-shape profile, as seen in the Drawing.
To give the mahogany some color and depth, I decided to finish my ottoman with a tinted oil finish (medium walnut colored Watco® Danish Oil). After sanding all parts to final smoothness with 240-grit sandpaper, I applied two coats of the tinted oil to the carcass (inside and out), the 1/8″ slat panels, both sides of the bottom and lid, the lid trim pieces and lifting mechanism. After a few days, I topcoated all parts with satin spray lacquer, to give the surfaces greater durability and a pleasant sheen.
Upholstering Lid and Slat Panels
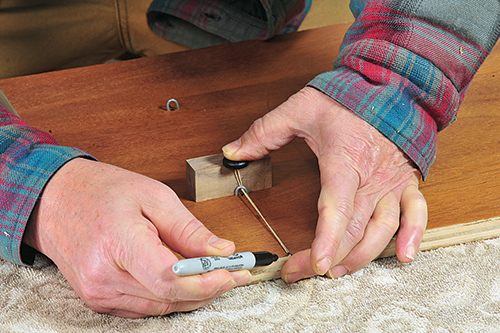
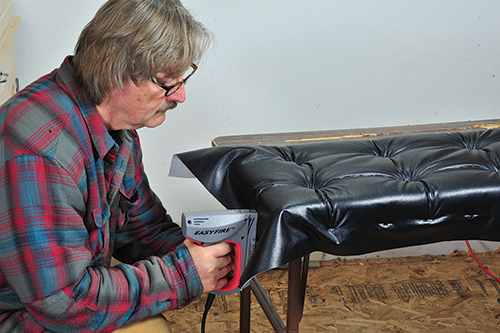
To make my ottoman a comfortable leg rest, I upholstered one side of the lid with a textured black vinyl fabric, which looks great with the walnut-stained mahogany. The fabric is laid over a piece of 2″ thick firm foam, covered with thin poly batting, then stretched and stapled to the plywood lid. Instead of just leaving the padding flat, I tufted the surface using eight buttons covered in black vinyl. The buttons are secured with strings, threaded through U-shaped fencing staples and secured to the edges of the lid. The entire upholstering process is too extensive and complicated to describe in this article, so I made a step-by-step video, which you can view below.
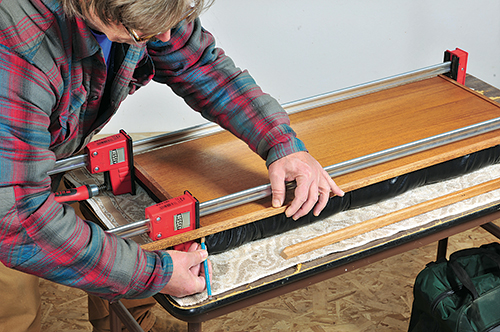
I laid the long trim pieces on these and marked their exact outside length. I repeated this process to mark the short trim pieces, then mitered all pieces to final length. After carefully fitting the trim around the lid, I applied a dab of glue to each mitered end, clamped all strips to the lid and used a pin nailer to secure the trim all the way around. Later, I sanded the miter tips and rounded them slightly, to remove any excess glue, and touched up the finish.
Only a few small tasks remained to complete the project: I applied black vinyl to the faces of the eight panels that back the slats. I sprayed one side of each with 3M “Super 77” spray adhesive, let the glue set for about 30 seconds, then pressed the fabric in place and trimmed any excess from the edges with a razor knife. I set the panels into their frame openings and secured them with 1/2″ pins.
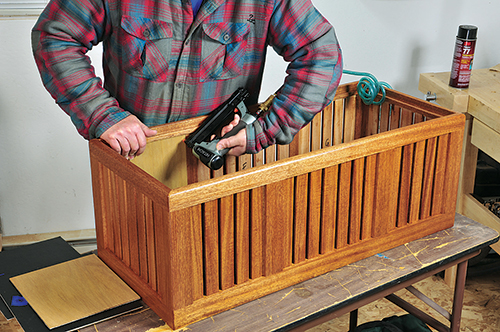
Next, I slipped the lid lifter into its housing and glued its dowel handle in place. Finally, I set the ottoman’s bottom into its rabbet and secured it with 1-1⁄4″-long, 18-gauge brads. Nylon furniture glides, one attached to each corner of the bottom, serve as feet.

All that remains is to flip the ottoman over, set its upholstered top in place and put my feet up and relax.
Click Here to download a PDF of the related drawings.


