This article, “Turning Threaded Inserts,” is from the pages of American Woodturner and is brought to you by the America Association of Woodturners (AAW) in partnership with Woodworker’s Journal.
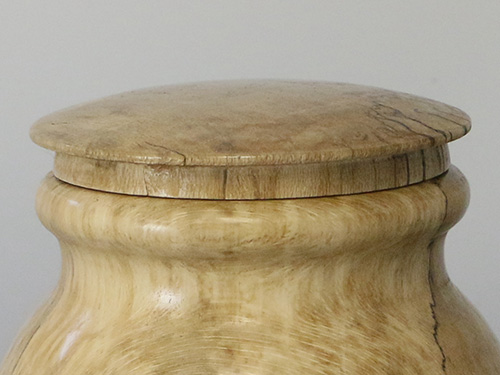
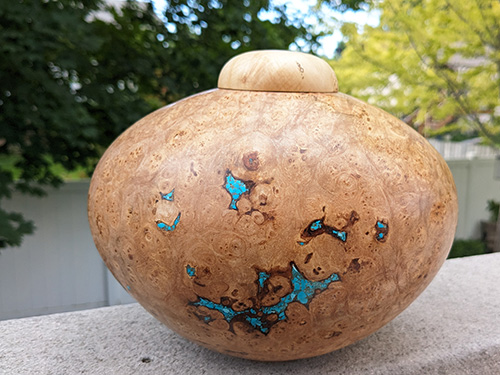
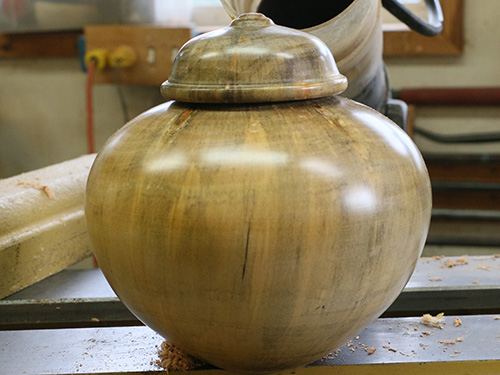
Sometimes when making a hollow vessel, like an urn, a lid with threads is desirable. However, threading a large vessel can be challenging, especially if the wood is light or porous.
Also, if you make a mistake while threading the vessel or lid, it may be ruined. A solution to these problems is to make a separate threaded insert and glue it into the base and lid.
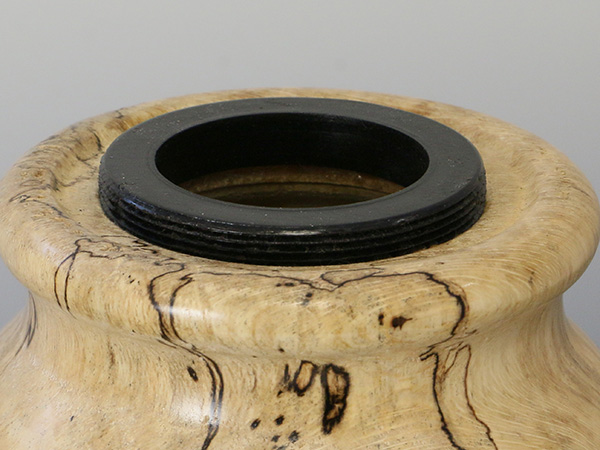
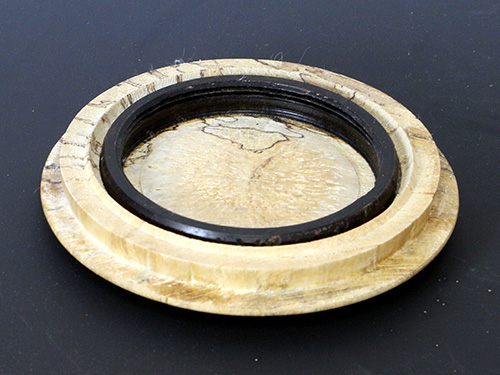
An insert consists of two rings, one with interior threads (a “mortise” ring) and one with exterior threads (a “tenon” ring). The two rings are threaded and sized to fit into recesses in the vessel and the lid. Once installed, the threaded inserts allow the two parts to be screwed together.
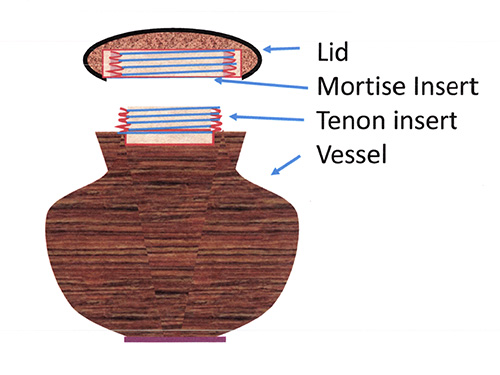
The process involves sizing the rings, threading the mortise insert, parting off the mortise ring, and then turning and threading the tenon insert to fit. The mortise insert will be glued into the lid of the vessel, and the tenon insert will be glued into the vessel opening.
Threading Options
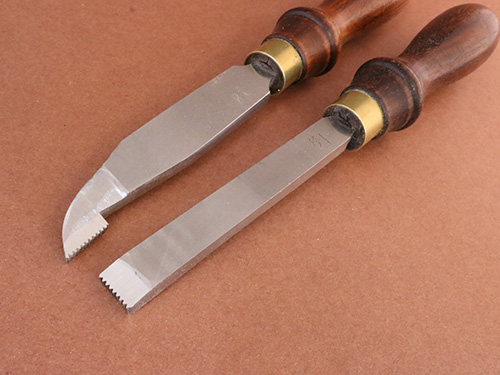
The threading process can be accomplished with either a threading jig, where the threads are cut by a rotating cutter mounted on the lathe spindle, or hand-chasing tools, where the threads are cut by manually engaging specialized tools into the spinning wood.
I used cherry for the threaded inserts shown in this article because it is more visible in the photos. But a general rule about wood choice is, the harder the wood, the better the threads. I use mostly African blackwood for my threaded inserts, whether they are hand-chased or made with a jig.
Conceptually, the steps for making the threads are the same for both methods, but the mechanical threading jigs make the outcomes more predictable. Handchasing tools tend to be associated with more traditional woodturning skills. Both methods have their advantages and disadvantages. The threading jigs will cut threads in soft woods like cherry or maple with better results than will hand-chasing tools. The disadvantage is that they require precise setup and alignment with the lathe.
Advantages of hand-chasing tools are that they require little setup, are less expensive, and are equally effective as the jigs on tight-grained woods like boxwood or African blackwood. However, learning to use thread-chasing tools can be compared to learning to ride a bike: you probably took a few falls before you succeeded. Hand-chasing does require technique and practice, but it is an attainable skill.
The threading jig shown in this article is manufactured by ChefwareKits, but most threading jigs work in a similar manner. A rotating cutter is secured in the headstock spindle of your lathe and turned at 2500 to 3000 rpm by the lathe motor. The workpiece to be threaded is held in a chuck mounted on the threading jig, which mounts in the lathe’s banjo and feeds the workpiece into the cutter from the tailstock end.
Size the Blank
When designing threaded inserts, there are two main considerations. The first is the size of the opening in the vessel that will contain the threaded tenon insert. As noted, the threads on the tenon are on the outside surface. This is to keep material being put into the vessel from getting into the threads.
There will be an opening down through the tenon into the vessel, so the desired outside diameter (OD) of the tenon helps to determine the size of the vessel opening. The mortise ring that fits into the lid and screws over the tenon ring must be larger than the tenon, so the blank size for the threaded insert must be at least the diameter of the lid mortise ring.
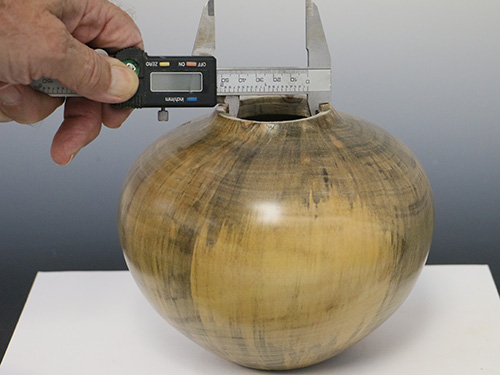
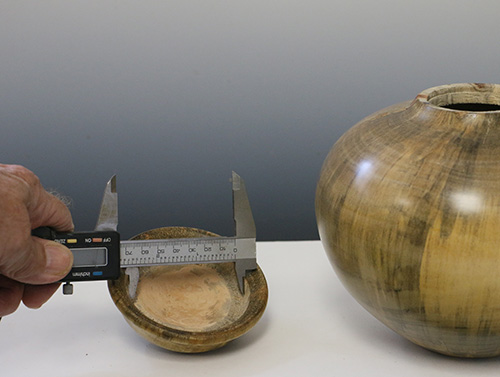
I turn the mortise ring for the lid (internal threads) first because it is easier to adjust the size of the tenon ring to fit the mortise ring than to fit the mortise to the tenon. Use a caliper to gauge the required OD of the mortise ring for the lid and the inside diameter (ID) of the vessel opening for the tenon ring. In this case, the OD of the tenon is 1/4″ (6mm) larger than the opening of the vessel.
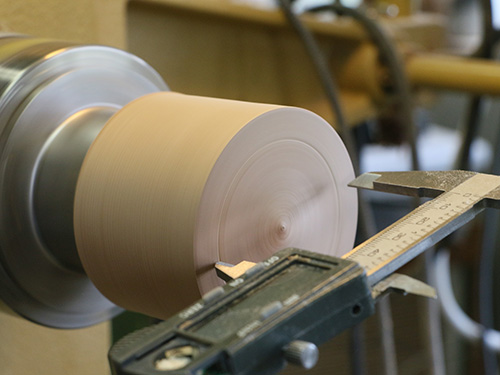
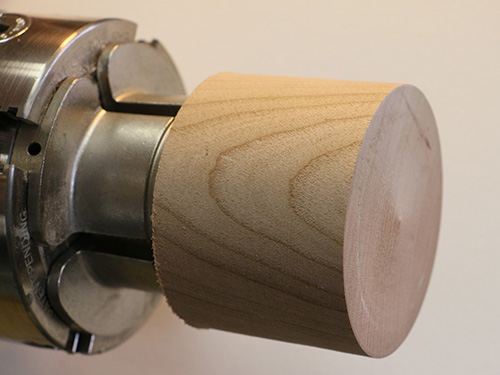
Turn the blank for the threaded inserts to the ID of the recess in the lid and face off the front. The wood is mounted in spindle orientation, with the grain running parallel with the lathe bed. I prefer this orientation because the wood is less likely to move and become oval over time. Using a Vernier caliper, mark what will become the inside diameter of the mortise ring with respect to the desired OD of the tenon ring.
Cut threads – mortise ring
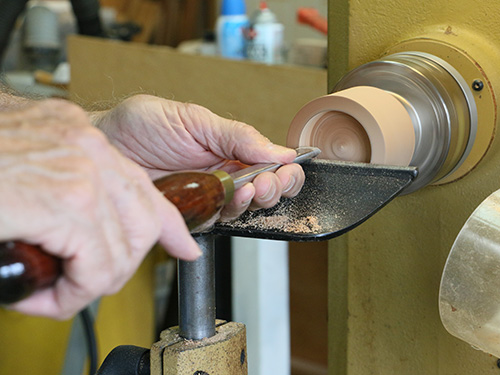
The threads made by most threading jigs are either 10 or 16 threads per inch (tpi). The depth of the 10-tpi threads is approximately .065″, or 1.6mm, and the depth of the 16-tpi threads is approximately .04″, or 1mm. Here, I’m threading 16 tpi, so I turn a recess into the end of the blank about 1/2″ (13mm) deep and about 1/8″ (3mm) smaller than the desired OD of the tenon ring. It is important that the inside wall be parallel to the lathe bed so that the threads will be evenly deep when cut. There is a tendency to taper the inside wall when hollowing. I use a skew, presented flat on the toolrest and aligned parallel with the lathe bed, and feed it straight in along the inside edge of the recess.
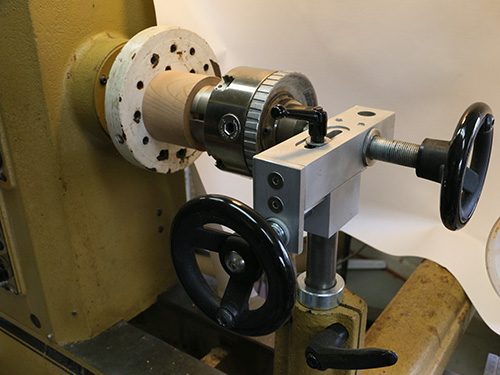
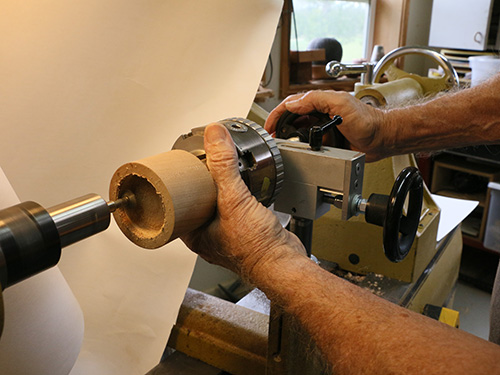
The chuck with the hollowed blank is now moved to the threading jig, and the jig is squared to the lathe following the manufacturer’s instructions. This step may differ with different jigs, so I won’t go into detail about setting up the jig, but it is important that the object to be threaded be parallel with the lathe bed.
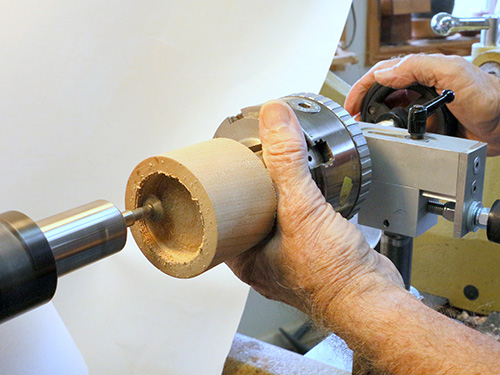
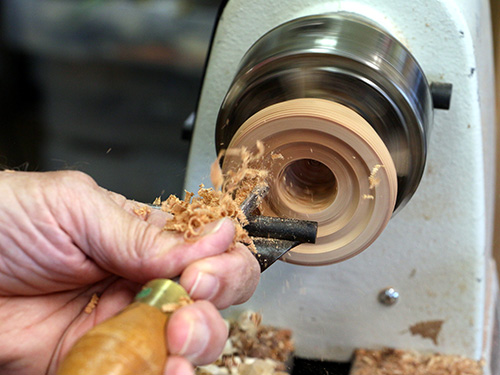
Align the cutter with the inner edge of the recess in the mortise ring. As noted, the 16-tpi thread is only .04″, or 1mm, deep. The instructions with the jig say to turn the depth handle one-half turn for 16-tpi threads to achieve the correct depth. Set the lathe speed of the cutter to 2500 to 3000 rpm and advance the lead screw on the jig to move the workpiece into the cutter. I keep a hand on the chuck to further steady it while advancing the wood into the cutter.
There need only be four or five threads in the mortise ring, and I try to get them done in one pass. Don’t back the piece out while the cutter is spinning, but disengage the cutter from the wood and examine the quality of the threads. On relatively soft woods like cherry, there might be some tearout. One option to mitigate tearout is to saturate the wood with thin cyanoacrylate (CA) glue prior to cutting the threads. Be sure to let the glue harden completely before cutting. After threading, I brush out the sawdust with a soft toothbrush and remove the chuck from the threading jig.
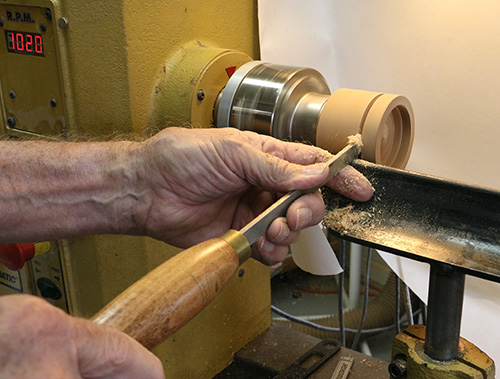
I now remove the jig from the lathe and reinstall the toolrest for the next step, to part off the mortise ring. Use a parting tool to cut off the mortise ring just past the last thread. The mortise ring will now be used to size the tenon for threading.
Cut threads – Tenon Ring
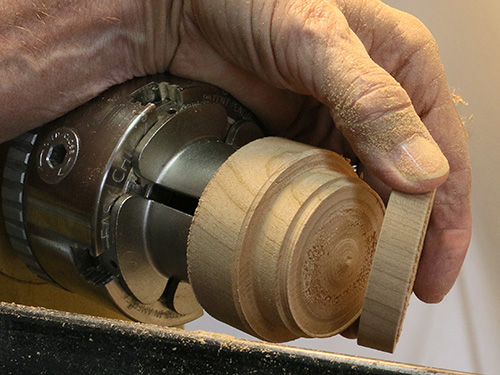
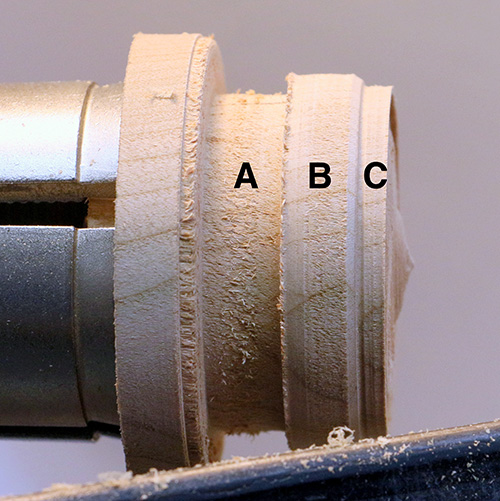
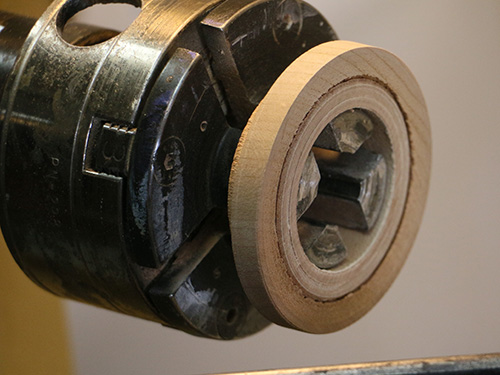
Turn the tenon ring from the remainder of the blank still mounted in the chuck. A rabbet about 1/8″ wide is cut on the end of the blank so that the threaded mortise ring just fits over it. Allan Batty called this the “witness diameter.”
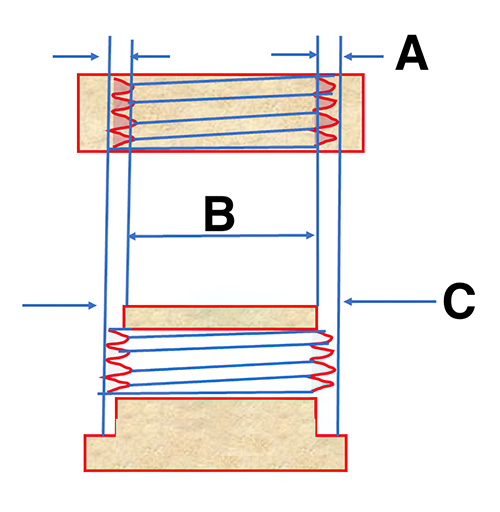
The drawing illustrates how the ID of the threaded mortise ring is equal to the witness diameter. The shoulder just behind the witness diameter is where the tenon threads will be cut, and for 16-tpi threads that diameter will be about 2mm larger than the witness diameter.
Although a Vernier caliper can be set to 2mm larger than the witness diameter, it is such a small dimension that it would be hard to turn to it exactly. So I estimate the diameter to be close but a bit larger than 2mm because the tenon threads can be cut deeper if necessary.
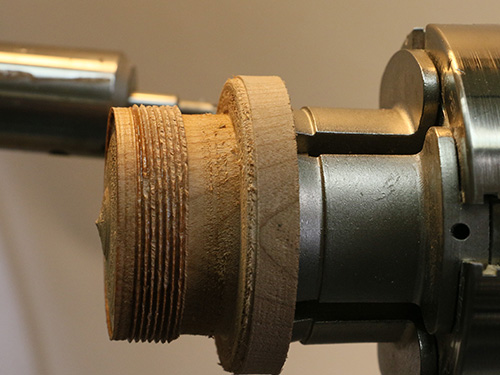
Reinstall the threading jig, and realign the jig with the lathe bed. Adjust the jig until the cutter touches the outside of the witness diameter on the tenon blank. When the lead screw is advanced, the cutter will cut the threads in the raised part just behind the witness edge. After cutting, use a soft toothbrush to remove any sawdust and to clean up the threads.
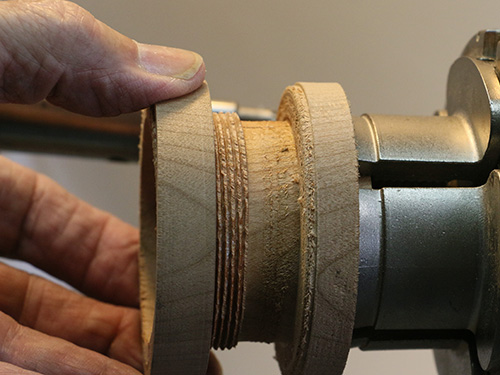
The finished threads look good, and it is time to see if everything fits. Most often, the two parts will screw together, but the fit may be tight. A slight bit of sanding with 600-grit sandpaper on the outside of the tenon threads will generally improve the smoothness of the fit.
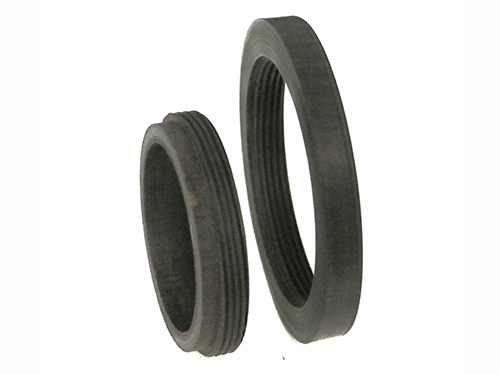
Alternative: Threaded Brass Inserts
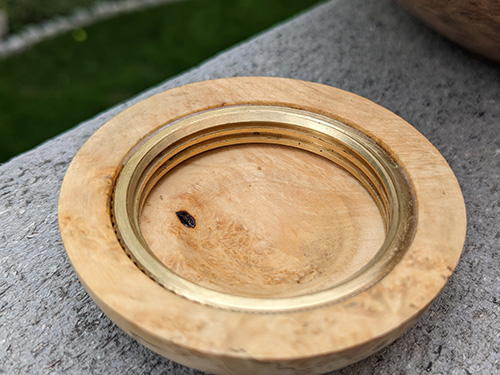
If you don’t want to turn threaded inserts in wood, there is a commercially available option—threaded brass inserts available from several woodturning suppliers.
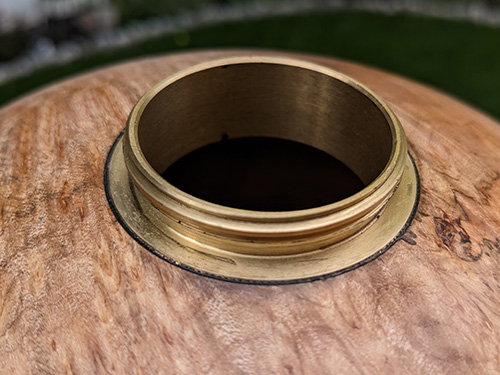
The same construction concepts apply, and you are guaranteed a good fit of the threads.
This vessel, made by Matthew Deighton and Emily Ford, makes use of a 2″- (5cm-) diameter brass insert.
Final Steps
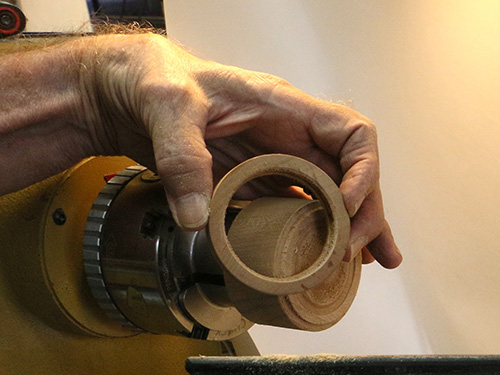
The next step is to hollow the inside of the tenon ring, which will ultimately become the mouth of the vessel. Part off the witness diameter section and extra threads.
Keep just four or five threads for actual use. Then part off the tenon ring from the blank.
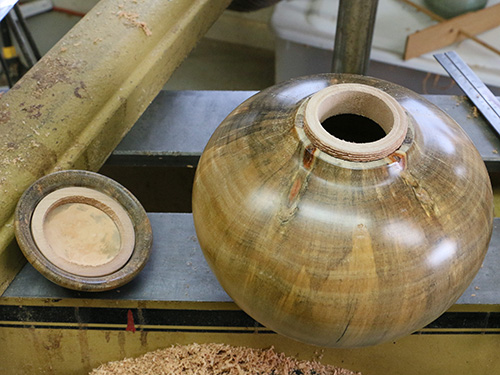
Holding the tenon ring in spigot jaws in expansion mode, I thread the mortise ring over the tenon threads, pare away extra wood so that they will both sit flat, and clean up the surfaces.
Finally, the insert rings are ready to be glued into the vessel and lid. After gluing them in, I apply paste wax to the surface of the threads with a soft toothbrush as a final finishing step.
Walt Wager has been a member of the North Florida Woodturners and the AAW since 2004. He taught woodturning at Camelot’s Woodworking Studio in Tallahassee, Florida, and demonstrates regionally and nationally, in-person and remotely. Contact Walt through his website, waltwager.com.


