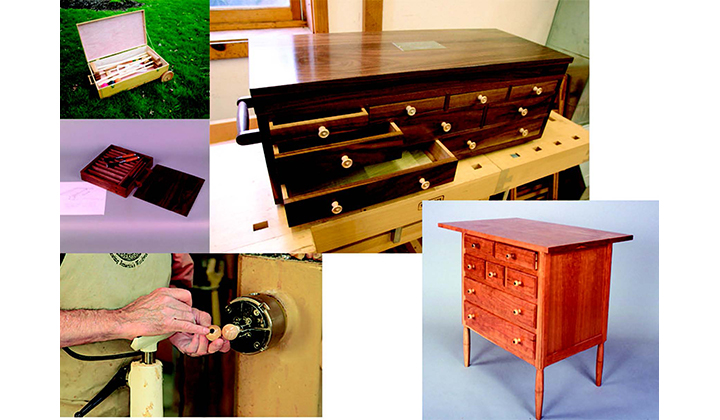
As a furniture maker, I expend a fair amount of effort to fabricate as much of my furniture as possible myself. While screws and nails are a given, I seldom buy hardware beyond hinges. The result is that hand-turned knobs, handles and wheels have become a signature of my casework. I would like to share with you my take on this process and hope it stimulates you to come up with designs of your own. I am sure others can take my ideas to interesting and beautiful new horizons.
Knobs
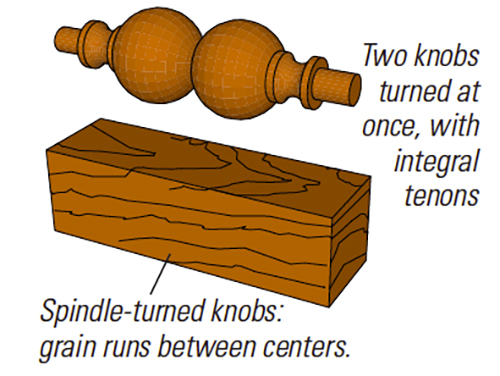
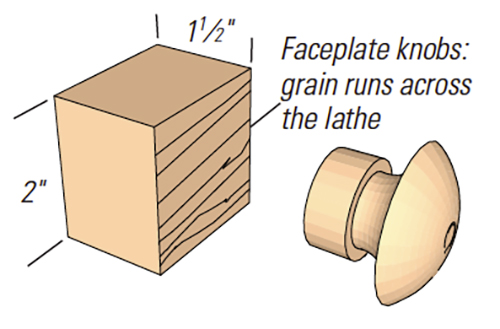
Something that niggles me about almost all knobs is attachment. Most metal pulls are attached with machine screws, while faceplate knobs are traditionally attached with a wood screw. About the only time the screw is tight and the knob doesn’t spin is on the day it is installed or when the humidity has been 90% for three weeks running. The rest of the time, which is most of the time, the knob whirls and wobbles every time you tug on it. My methodology ends this problem by attachment with a dowel. In most casework, I find that either a 3/8″ or a 1/2″ dowel works handsomely. With spindle-turned pulls, the dowel can be turned as part of the piece, while the faceplate-turned variety requires the gluing of a dowel as a loose piece.
Three further benefits are derived from hand-turned knobs. The first comes for free and can’t be storebought. By turning everything from one billet, you get a repeating grain pattern in all of the pulls. The second benefit is perspective. In very high-end 18th- and 19th-century chests of drawers, the knobs were graduated.
Starting with the biggest knobs on the bottom drawer, the pull on each successive drawer upwards is between 1/16″ and 1/32″ smaller. This corrects for perspective when a standing viewer looks down at the drawers, so that all the knobs look to be equal in diameter. It is a nice touch that few will directly perceive — but it’s why certain works end up in museums and others don’t.
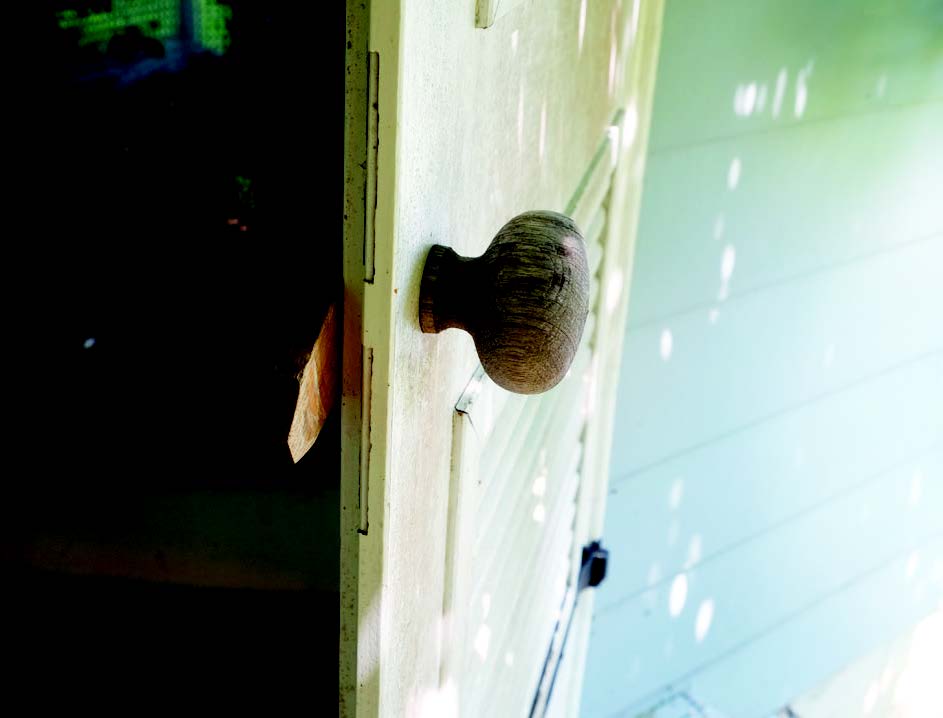
The third benefit is that you can make your own latching mechanism to secure a door. By turning the dowel long enough to go through the door stile, you can attach it to a toggle that slips behind the face frame stile when you turn the knob. This detail brings delight to all who open the door, once you warn them not to yank, but to gently turn the knob — today’s public is accustomed to magnetic catches on cabinetry instead.
Spindle or Faceplate?
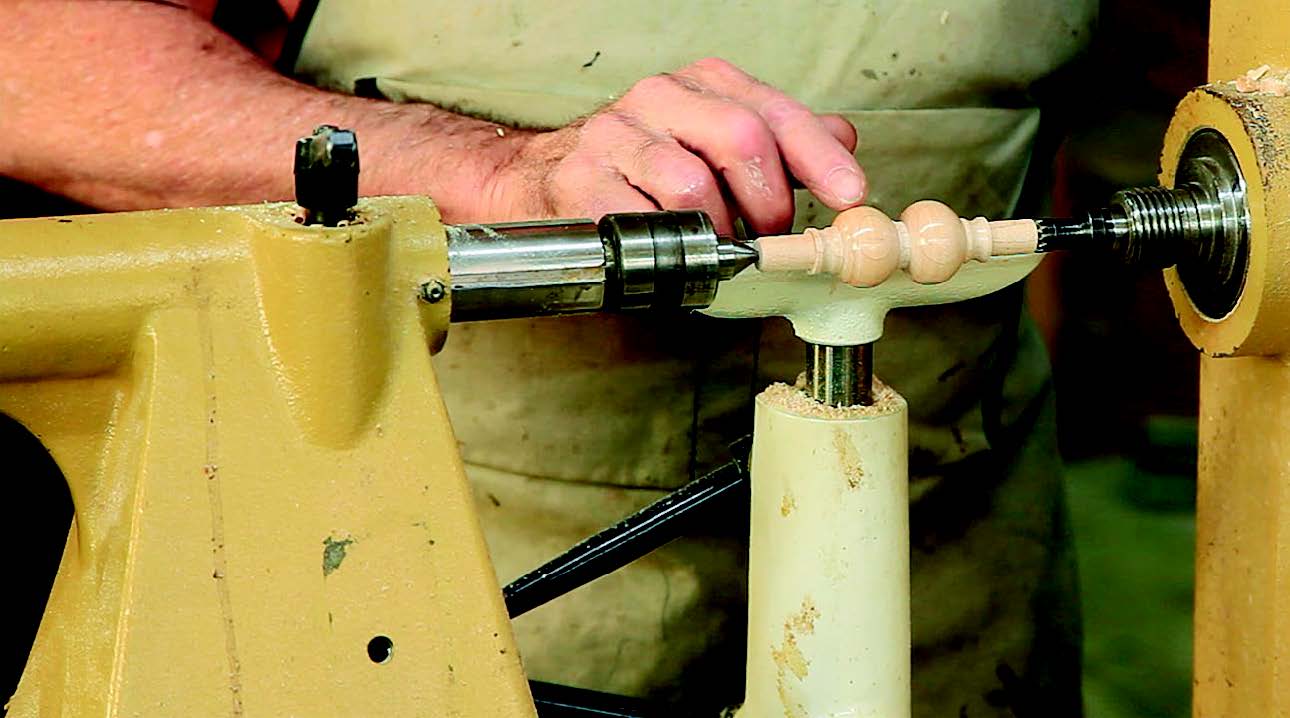
Spindle turning is by far the best grain orientation for pulls up to about 1-1⁄2″. That being said, I have successfully spindle-turned 3″-diameter entry door knobs. While theory says that, at some diameter, faceplate turning becomes the better grain orientation due to strength, I am not at all convinced that this is so. Rather, I think that the decision to faceplate turn is stylistic. You get a much different look by faceplate turning. This highlights the fact that wood for a turned knob should always have good crossgrain strength.
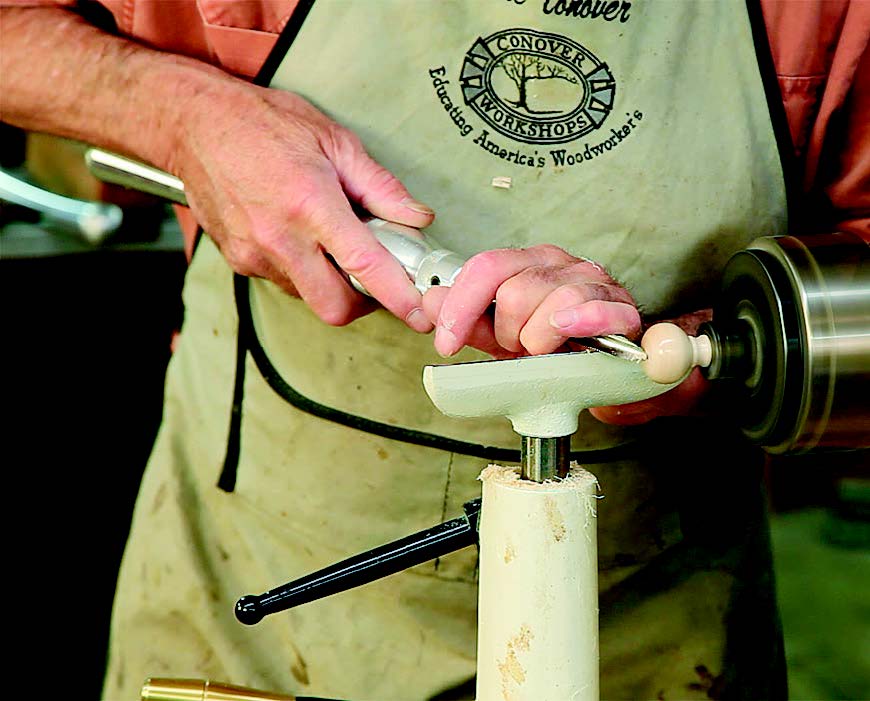
Like the perfect grain and diameter match, an inlaid contrasting dot is also part of my signature. I spindle-turn a contrasting wood to an appropriate diameter, then drill on center with a twist drill that is about .005″ smaller in diameter, apply a drop of super glue, and tap the spindle into the hole. After parting off the excess, I turn the remaining excess flush.
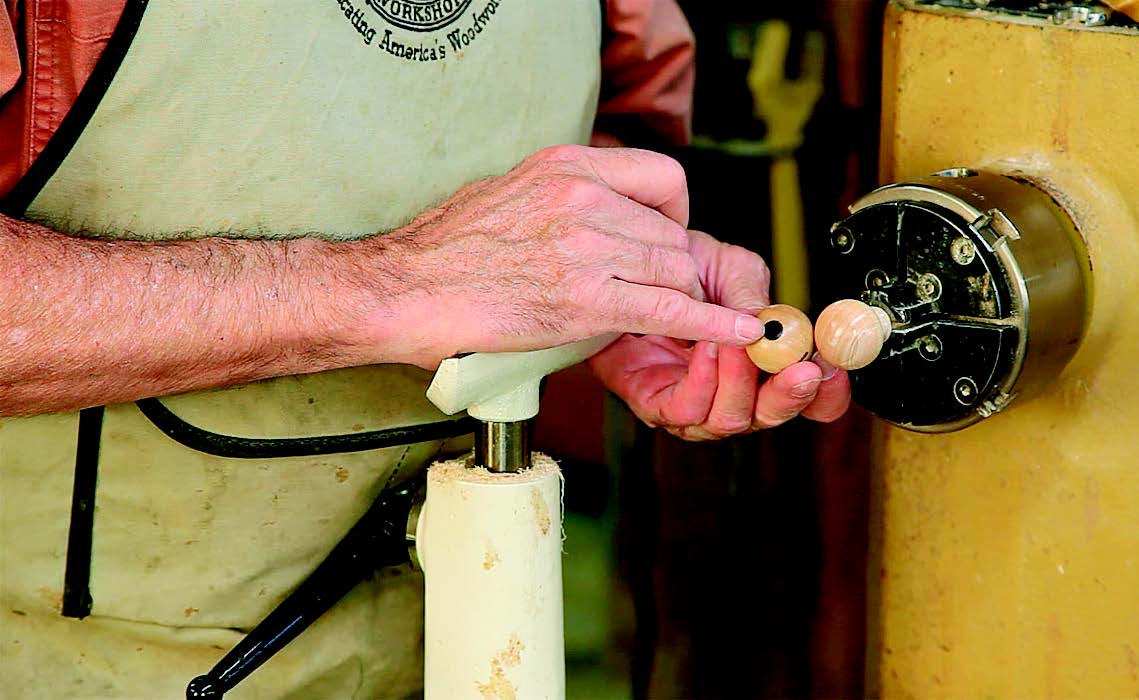
Chucking is somewhat problematic with faceplate-turned knobs. One solution is to lay out with a compass, then band saw rounds. Now drill a blind hole in each blank on the center dimple left by the compass point. Glue in a dowel and grab this in a four-jaw chuck.
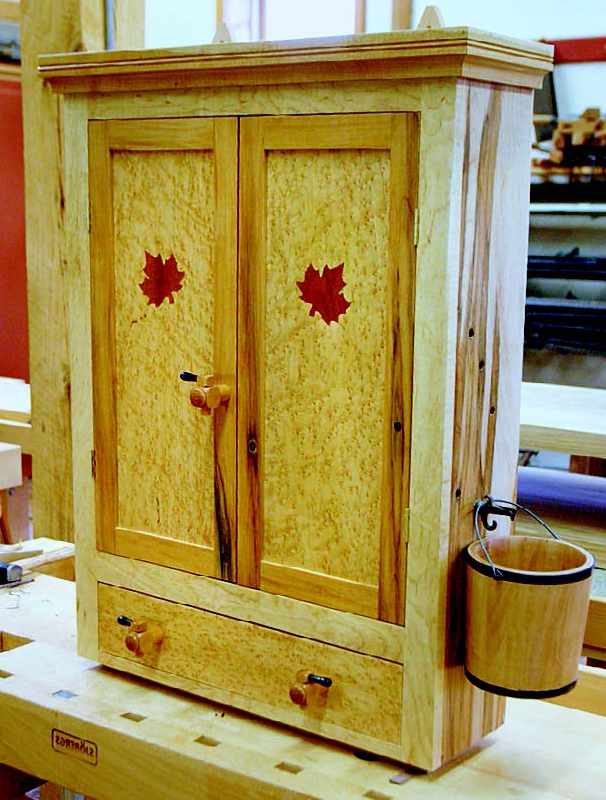
To install a shop-made knob, simply drill a hole of the appropriate diameter at the appropriate place, apply some glue, and push it home. Quickly align the grain to the desired orientation. I like to through-drill the holes and have the tenons come flush with the inside face. This allows easy removal if something catastrophic happens. For bombproof installation, split the tenon about two thirds of its length and drive a wedge from the inside.
I used this technique to attach pulls made from oldtime barrel taps with working handles to a maple sugaring- themed cabinet I created for Geauga County [Ohio]’s 2006 Infinitree Project.
Handles
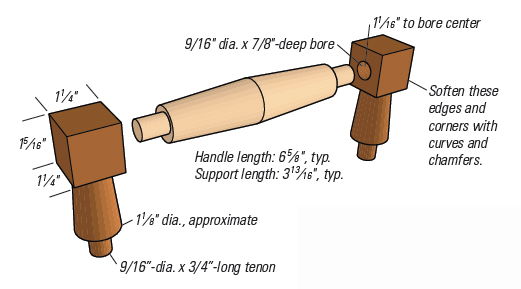
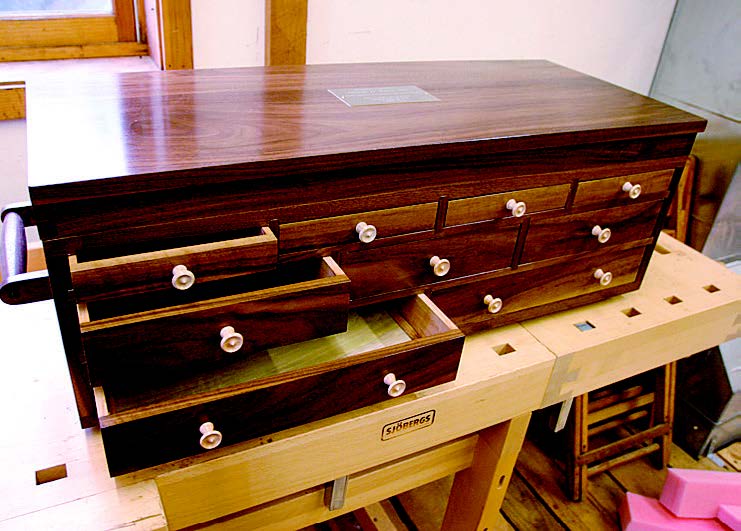
Turned handles are eye-catching and constantly garner comment. What is more, they are easy to make from scraps that would likely be thrown away. You can turn round tenons and drill the drawer or carcass for gluing into place, or you can make a square tenon and mortise the carcass. This is the stronger attachment when a lot of weight is involved, such as on a tool chest. My illustration should give any woodworker/turner sufficient information to make your own version.
Wheels
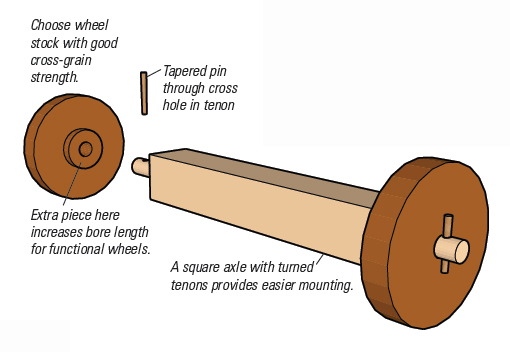
Although most turners only think of toys at the mention of turned wheels, it is possible to make neat turned wheels for a variety of furniture: tea caddies, rolling boxes and mobile stands, to name a few. This is pure faceplate turning. The concept is simple, but there are some tricks to getting nice concentric wheels of uniform diameter. Stock selection and layout is one of these tricks. Wood for wheels needs good crossgrain strength and should be planed to uniform thickness.
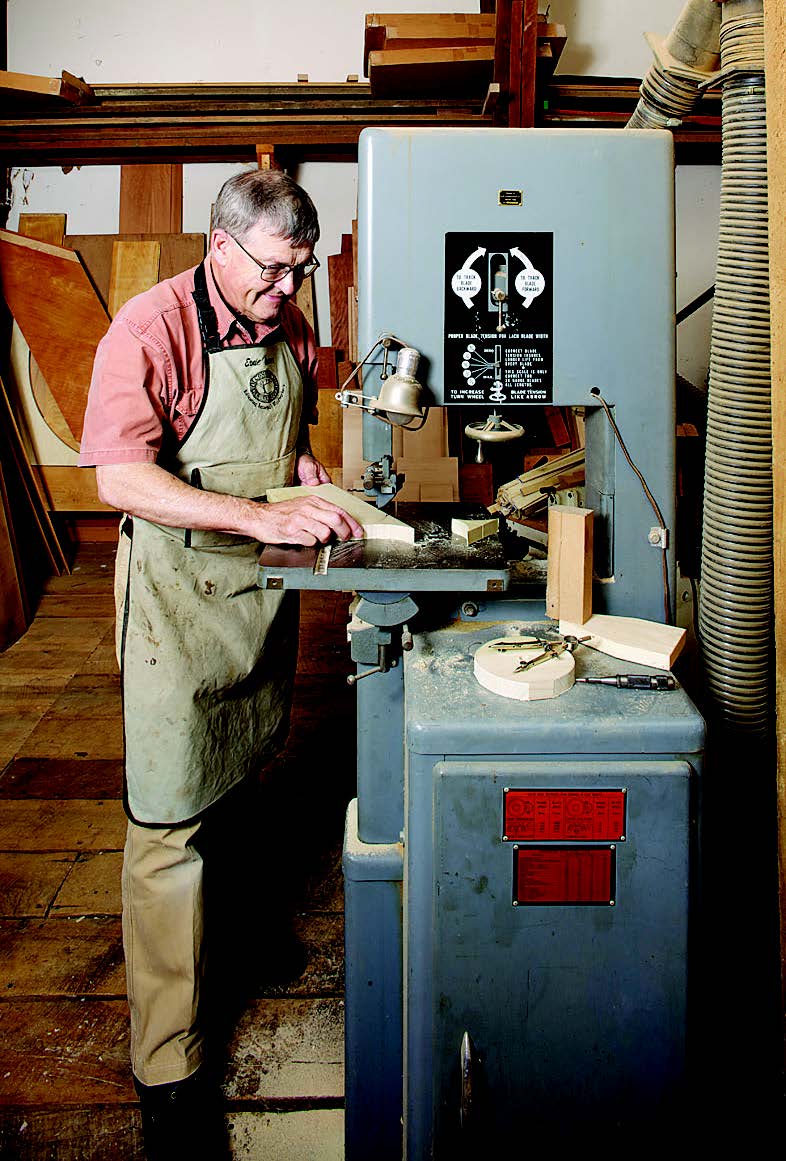
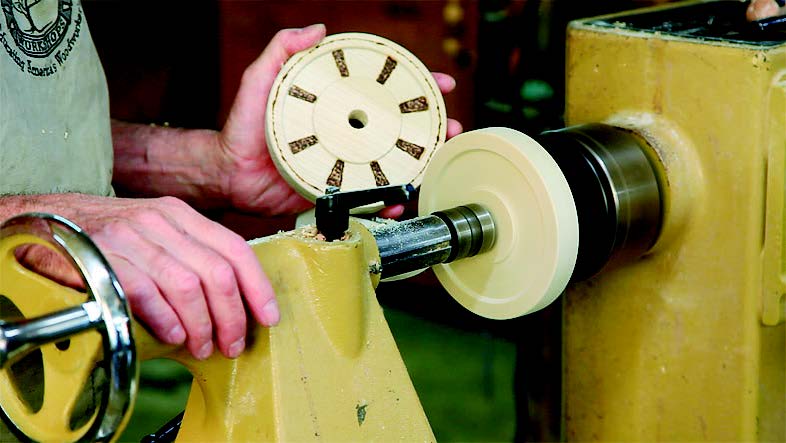
To create a wooden wheel, lay it out with a compass or dividers, center-punch the center point, and drill in a drill press to the axle diameter. Band saw just outside the layout lines.
Chucking is quite easy: simply turn a very short tenon with a square shoulder that is tight with the center bore. Pin the piece against this improvised chuck. For small bore diameters, you can use a 60° live center directly, but for larger diameters you will need to interpose a piece of wood. Once chucked, turn the piece round with a bowl gouge and/or a scraper. Turn just to the compass line and all the wheels will be the same diameter. You can scrape the face of the wheel to look like a wheel and tire. You can even wood-burn spokes.
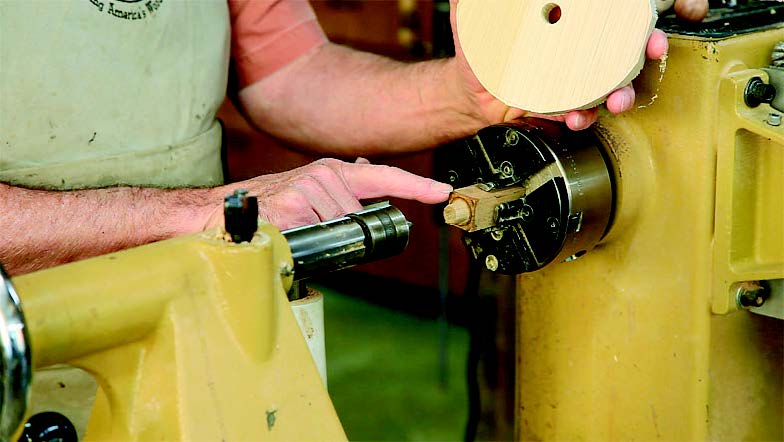
On some wheels, the axle can be as simple as a nail. On functional wheels, the axle is a square of wood with each end turned round. Leave the center square for easy attachment to the box or frame you are adding the wheels to. Cross-drill the axle and tap a tapered pin through to secure the wheel.
I hope you find ways to weave these ideas into your work. Shop-made pulls, handles and wheels really add a unique dynamic to your woodworking projects.
