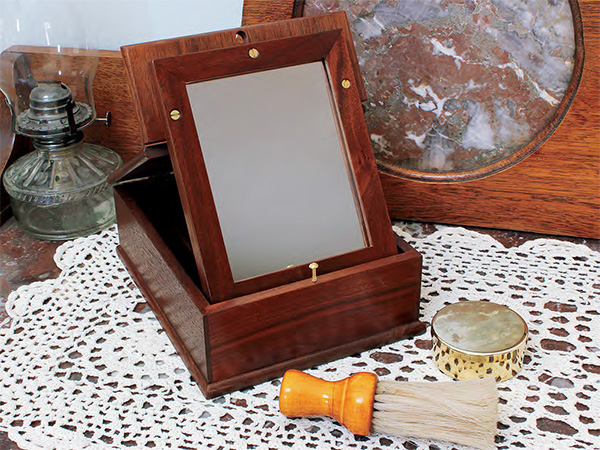
Such a box was divided to organize razors, toothbrush and brushing powder, small scissors, brush or comb, and perhaps needle and thread. While there were several different styles of shaving boxes, the one presented here is fairly typical. When opened, the small mirror attached to the box lid rests against the front of the box to keep it upright. You can adjust the box sizing to suit your own needs and tastes, and feel free to alter the dividers any way you like (perhaps even to accommodate a modern razor).
Getting Started
I’ve chosen black walnut for this project, but feel free to use your favorite hardwood. Mill your stock to the appropriate thicknesses per the Material List, then cut all the individual workpieces to size, with the exception of the 5/8″-thick work-piece for the mirror frame. When cutting the box ends, make an extra one or two for some test cuts in a later step.
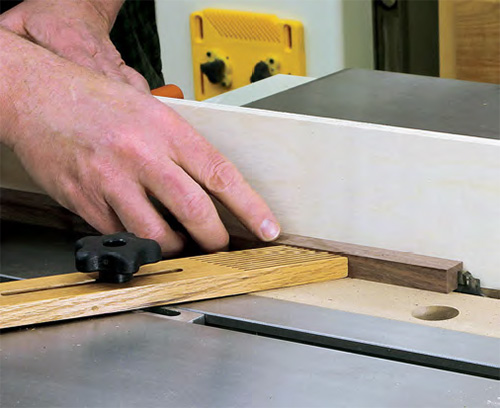
When cutting a strip of 5/8″-thick walnut to its 3/4″ width for the mirror frame, don’t cut the individual pieces to length yet. It’s more efficient — and safer — to first mill the frame’s rabbet with the workpiece as long as possible.
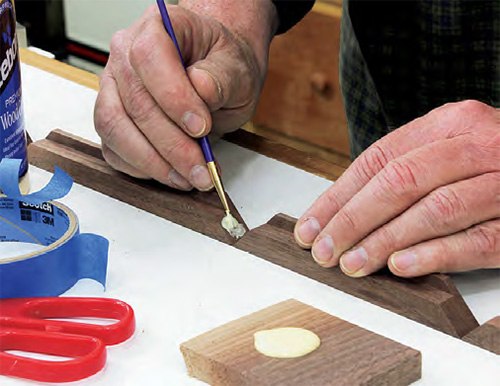
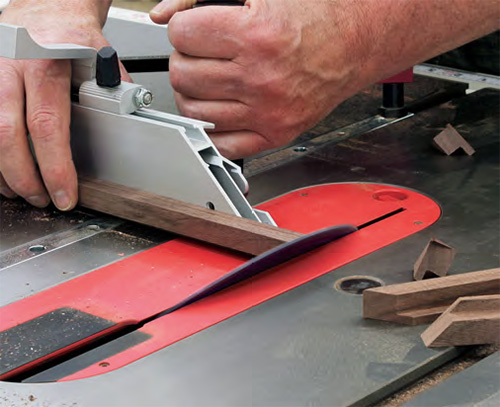
Then mitercut the individual pieces to length. Follow the steps shown in the photos for cutting, then taping and gluing the frame pieces together.
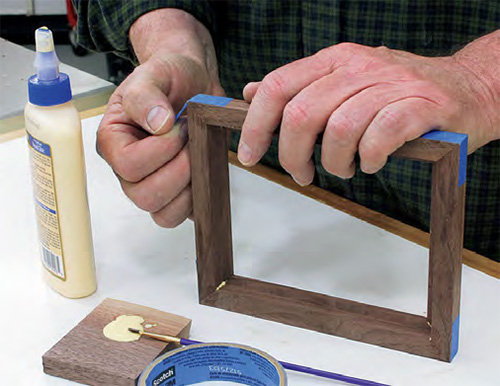
After applying the final tape, check your frame assembly for square and allow it to dry on a flat surface.
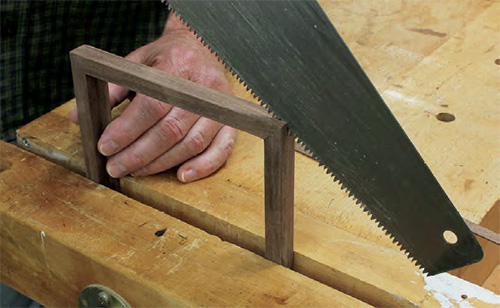
When the frame is dry, let’s strengthen those miter joints with thin splines. Secure the frame in a workbench vise (or clamp it to the edge of a worktable), and cut an angled slot in each corner with a handsaw (1/4″ deep is plenty).

Now, glue a thin (about 1/16″) piece of walnut in each slot. Wipe off the glue squeeze-out, and once the spline has fully dried, trim it off and sand the corners smooth. You’ll barely see these in the finished frame.
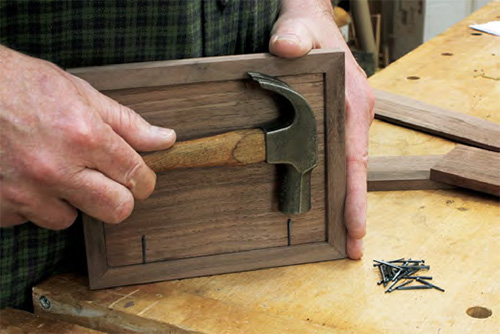
Go ahead and set the 3/4″ headless brads — they’re keepers for the glass and mirror backing — now to prevent scratching the finish later. Tap them in just enough to set the holes.
Building the Box
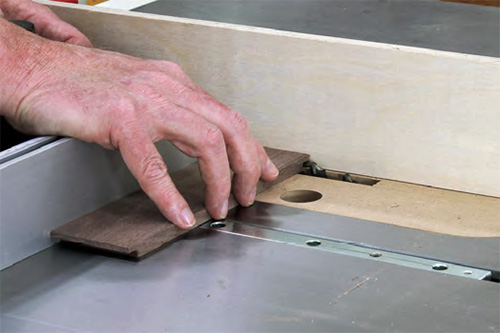
Box construction here consists of rabbet joinery, although dovetails are also appropriate. With a dado blade in your table saw (or rabbeting bit in your router table), set at a height of 1/4″, cut 3/8″-wide by 1/4″-deep rabbets on the ends of the two box sides. Now install a 3/16″ straight bit in your router table, set at a height of 3/16″, to create the dadoes for the box dividers on the inside faces of the end workpieces.
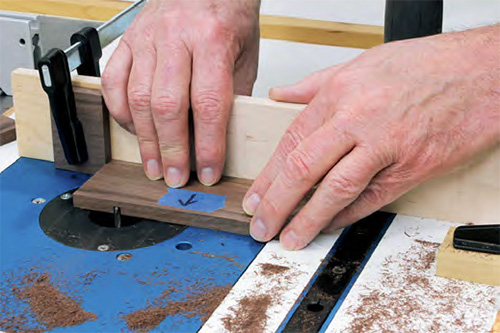
These dadoes are pretty straightforward, but take your time with the setup to ensure the cuts are perfect. I’ve clamped stops on my router table’s sliding fence to control the size and location of the cuts. Since the dividers are 1-3/8″ high, you only want the workpiece to travel 1-3/8″ into the router bit. You can see where I’ve clamped a poplar table stop to control the forward travel of the fence to exactly 1-3/8″ into the router bit.
You can also see that I’ve clamped a walnut end stop onto the fence to position the workpiece exactly 1-1/4″ from the router bit: the dadoes for the dividers are 1-1/4″ from each end of the workpieces. To keep everything straight, I’ve taped an arrow on the outside face of the workpiece denoting the correct orientation for each cut.
Rest the workpiece against the end stop with the inside face downward. Turn on the router and slide the workpiece into the router bit until it reaches the table stop, then pull it back. Set the workpiece aside and make the same cut on the other workpiece. Now, turn off the router and reposition the fence stop (the walnut one here) so it’s 1-1/4″ to the other side of the router bit and clamp it in place. Repeat the cuts as before, making sure to mind the direction of the taped-on arrows.
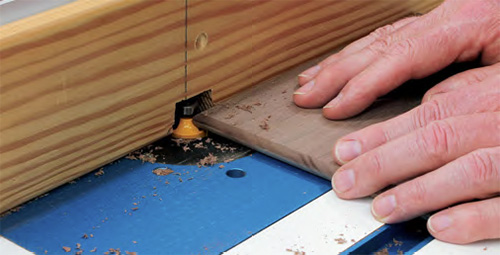
Recall that earlier I recommended you make some extra end pieces? Do yourself a favor and make practice cuts on one of these extras first, to ensure your setup is right.
Assemble the box by first dabbing glue into the rabbets on the side pieces, then clamp the box sides and ends together. Check the assembly for square, and allow it to dry.
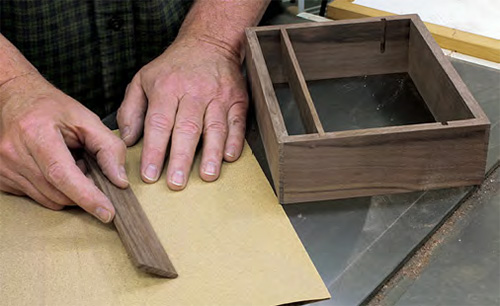
The dadoes we routed in the box ends for the dividers have rounded ends, so round the top edge of the dividers to match. These dividers are thin, so the easiest way is to do the rounding on a sheet of 150-grit sandpaper on a flat surface. Be sure both dividers are flush with the box bottom. You can fine tune this once you’ve completed the roundover on the tops by inserting both dividers into the box, turning it right side up and sliding the whole thing over the sandpaper.
From Top to Bottom
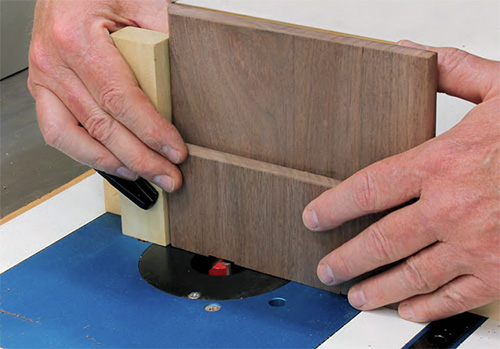
Both the box lid and base have rounded edges; the base takes a half roundover on just the top edge, while the lid edges are fully rounded. Install a 3/16″-radius roundover bit into your router table, and round all four top edges of the box base. For the lid, first round over all four top edges, then flip it over and do the four bottom edges.
The lid is divided into two sections, which you create by making a cut 6″ from one end. The 6″ portion becomes the back of the lid, while the 3″ portion is the front.
Since the hinges essentially rejoin the lid we just cut, it’s most efficient to merely fold the two lid pieces over on themselves and cut both mortises at the same time on the router table with a 3/4″ straight bit set 1/16″ high. Make sure to orient the workpieces for a continuous grain pattern before you proceed. Clamp a stop block onto your router table’s miter gauge or sliding fence exactly 1-1/4″ from the bit edge. Place the lid halves together against the stop block with the cut edges down, and run both over the bit at the same time to cut one complete hinge mortise. Still keeping the two halves together, flip them around side-for-side and repeat to cut the other hinge mortise.

While you have the 3/4″ bit installed in the router table, raise the height to 1/8″. Now, with the stop block still in place on the fence, create deeper mortises in the top/rear edge of the main box for two more hinges. With the same stop block setup, these will also position the mortises 1-1/4″ from the box edges.
Why double the mortise depth? Well, for the two-part lid we wanted the hinge centered between the two lid halves. For the hinges on the underside of the lid at the rear, however, we won’t cut mortises — they mount flush — and the deeper mortises in the box keep the lid from raising the full thickness of the hinge.
Secure the two lid halves into your vise, mortise edges up. Center your hinges over the back-to-back mortises, mark and drill pilot holes, and screw the hinges into place.
Final Assembly
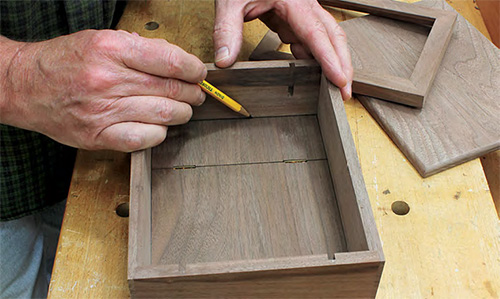
Place the lid upside down and center the main box on the upward-facing underside of the lid. With the box perfectly centered, trace the inside edges of the box onto the underside of the lid to indicate exactly where the open portion of the box will be once the lid is attached. Drill three countersunk screw holes in the top portion of the mirror frame: one through the center/top, and one on each side. The two side holes should be about 1/2″ from the hinged edge of the two-part lid. Be sure that all three holes are drilled in the solid portion of the frame, about 1/4″ from the outer edge, avoiding the rabbeted section where the mirror goes.
Before attaching the mirror frame to the lid, slip your screws into the holes so they are fully seated, then check the screw depth against the edge of the lid: you do not want those screws going through and coming out the top of the lid. If the screws are too long, use the next shorter size.
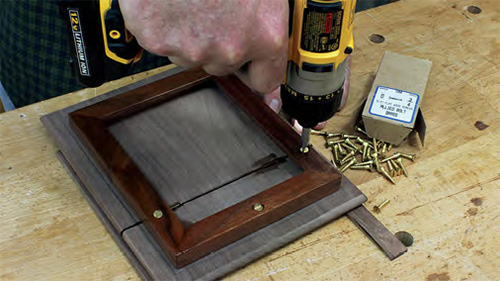
Center the mirror frame in the marks you made on the underside of the lid (you should have about 1/8″ clearance on the sides and a bit more at the ends) and screw the frame into place. This step is just to set the screw holes and check the clearance with the box sides. Once you’ve done that, you can remove the frame and set it aside. After adding a finish to the rest of the box, we’ll mount the glass and mirror backing, and permanently reattach it to the box lid.
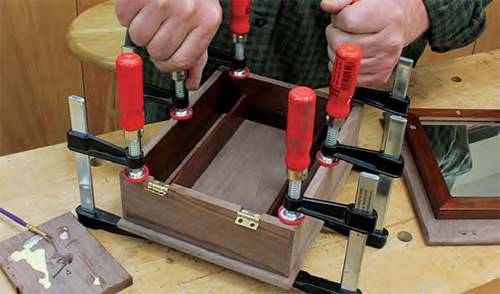
Install hinges in the rear mortises we cut earlier with the knuckles to the rear, then place the inverted box atop the lid/mirror assembly, lining the box up with your outline marks from earlier. Mark the hinge locations on the underside of the lid and drill pilot holes for the hinge screws. As before, insert screws into the hinge leaves and double-check that they will not extend through the lid; 3/8″ screws, once paired with the thickness of the hinge leaves, should be right, but check this before installation.
Before attaching the box base, apply a finish to the inside of the box and dividers. Shellac was typical for items like this. I chose amber shellac to really bring out the color of walnut. Shellac the dividers and box interior separately, taking care not to get shellac on the bottom edge of the box where you’ll apply glue, then slip the dividers into place when the shellac dries.
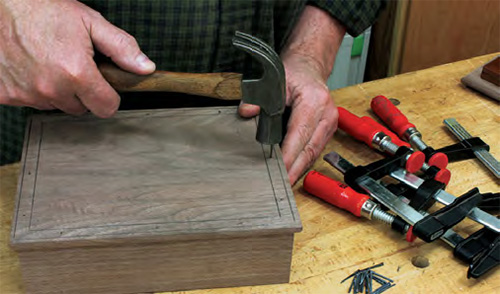
Install the box base with a combination of glue and nails: at only 7″ wide, wood movement isn’t an issue here, so glue won’t present a problem. Apply glue to the bottom edge of the main box and center it on the box base, and clamp up the assembly till dry. Once the glue dries, reinforce the bottom with headless brads (3/4″ or 7/8″) or pin nails. Note in the photo that before gluing on the base, I traced an outline of the box on the underside of the base to act as a nailing guide —place nails only in the dead center of this outline.
Installing the Locking Post
Drill a pilot hole in the front edge of the box for a #6 x 1″ brass screw that will act as the locking post for the box lid. Place the hole exactly in the center of the box edge, centered from side to side. Drive the locking-post screw into this hole, but not too far. We need it there to mark for the locking-post hole in the lid and we’ll drive it to final depth once the lid is complete.
Attach the lid to the box via the rear-mounted hinges, and close the box so the underside of the front edge of the lid rests atop the locking-post screw. (Hold the lid flat while you do this.) Press the front of the lid down firmly onto the locking post screw to make an indentation in the underside of the lid.
Using the indentation as a guide, drill a 5/16″ hole exactly centered on the mark. Be sure to place scrap wood underneath while drilling to prevent the drill bit from causing tearout on the opposite side when it comes through. The lid should fully close now, with the locking-post screw passing neatly through the center of the hole. With this done, go ahead and apply finish to the rest of the project.
Adding the Final Hardware
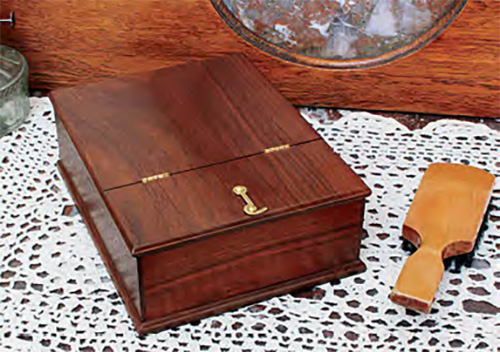
There’s still the matter of keeping the box lid closed when your grooming tasks are finished. For that, it’s time to add the latch hook. Latch hooks really haven’t changed over the last couple hundred years. As long as you use one made of solid brass, rather than brass-plated, any commercially available latch hook is fine and will give your project a touch of high quality. I used a 1-1/4″ hook, but a 1″ hook would work just as well. Latch hooks typically come with a Phillips head screw, which is fine, but if you want to hold to period authenticity, replace it with a slotted screw instead.
With the lid closed, adjust the height of the locking-post screw to allow you to slip the latch hook beneath the head without binding too tightly. Hold the latch hook in place and make a centered mark on the lid through the hook’s top screw eye. Drill a pilot hole on your mark. Insert the latch hook’s mounting screw through the hook eye, slip a washer onto the screw beneath the hook, and fasten the hook to the lid. Adjust the latch screw so the hook twists easily, but without any extra play in the action. I used a #6 x 1/2″ screw to mount the latch hook, and although the lid is only 3/8″ thick the combined thicknesses of the hook and the brass washer underneath it were sufficient to make it just right. As with every other instance of driving screws through the lid of the box, check and double-check before driving the screw.
The final step is to reattach the mirror frame permanently to the underside of the lid with its three screws. Here, I’ll offer a bit of advice. Don’t yield to the temptation of gluing the mirror frame to the underside of the lid. If the mirror ever cracks, you’ll need to be able to easily remove the frame from the box lid in order to replace the glass.


