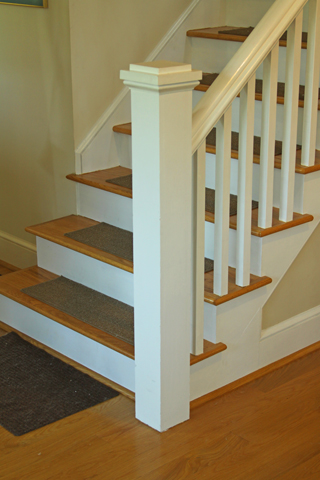
I want to replace an existing handrail and newel post. I have all the papers. It appears that the existing newel post is secured to floor joist. I have no access to the the joist. What is the best way to anchor the new newel post? I probably will saw the old one off even with the floor. – Bob Howell
Rob Johnstone: Without knowing how your newel is constructed, this is a bit hard to answer: There are a couple of ways to anchor newel posts. One is to use construction adhesive combined with screwing it to the floor. Pre-drill holes for the screws into the base of the newel, then secure it in place. Hide the screw holes with some decorative molding.
Another way is to mount threaded inserts in the surface where you will mount the newel. When you make your newel post, leave the center open and feed threaded rod up the length of the newel. Have a hidden surface inside the top of the newel where you can use nuts with washers to tighten the post down. Then complete (or glue on) the top of the newel on-site.
Tim Inman: The original newel is anchored into the joists for a reason. Not only is a newel post decorative, and a convenient terminal for the balustrade, it provides safety and strength to help prevent an accidental “overboard” fall. I don’t know if you’re old enough to remember watching cheap spaghetti westerns on Sunday mornings, but if you are, then you remember the balcony balustrade falling apart like toothpicks when the bad guys got into a fight and pushed each other over/through it. You don’t want that happening in your real-life home.
There are some very effective rehab mounting hardware kits on the market (Rockler carries some of these). Essentially, they allow you to do what Rob is suggesting. Screw the anchor bolts into rock solid framing members (not just the floorboards!). Then, the newel or balusters can be screwed down onto the anchors. When it is all said and done, the “How’d they do that?’” question becomes quite a hidden mystery.
We built an addition to a pre-Civil War staircase and balustrade a while back for an historic Underground Railroad home. We custom turned all the parts, so we had an advantage. For that project, we made the newel posts in two pieces. The lower piece was cut with a 3-inch X 3-inch deep socket mortised in it. We were able to drill and anchor that part to the floor joists securely. Then, the top piece had a matching 3-inch tenon that fit into the socket mortise. We set the pieces together with epoxy glue, so they are now one part, for all practical purposes. If you are custom turning your own parts, consider this two-piece approach. It works like a charm, and is very reliably strong – and pretty easy to do. Setting bolts through the center of the newel and hiding them under the newel cap is another option, as Rob suggests.
Whatever you do, be safe. Having a nice-looking balustrade is one thing. Protecting someone from a fall is the real thing. Strength is a requirement, not a goal. Could a big man (me) stumble and fall against your new balustrade and not go through it like a cheap Sunday Western actor? Would you be confident that your balustrade would stop you from falling over it in the event of a trip or stumble? Could your grandkids climb on the banister and leave you smiling instead of panicky? You get the idea. Be safe.
Chris Marshall: As Rob and Tim are suggesting, I would definitely err on the side of overbuilding this connection. It should be structural. If I were attaching that newel post, I would still try to figure out a way to gain access to a floor joist for attaching the replacement. My wife has accused me of overbuilding many times, but I have yet to see the drawback of doing so–heaven forbid someone taking a fall as a result of my efforts! Repair it right the first time and you’ll never regret it later.


